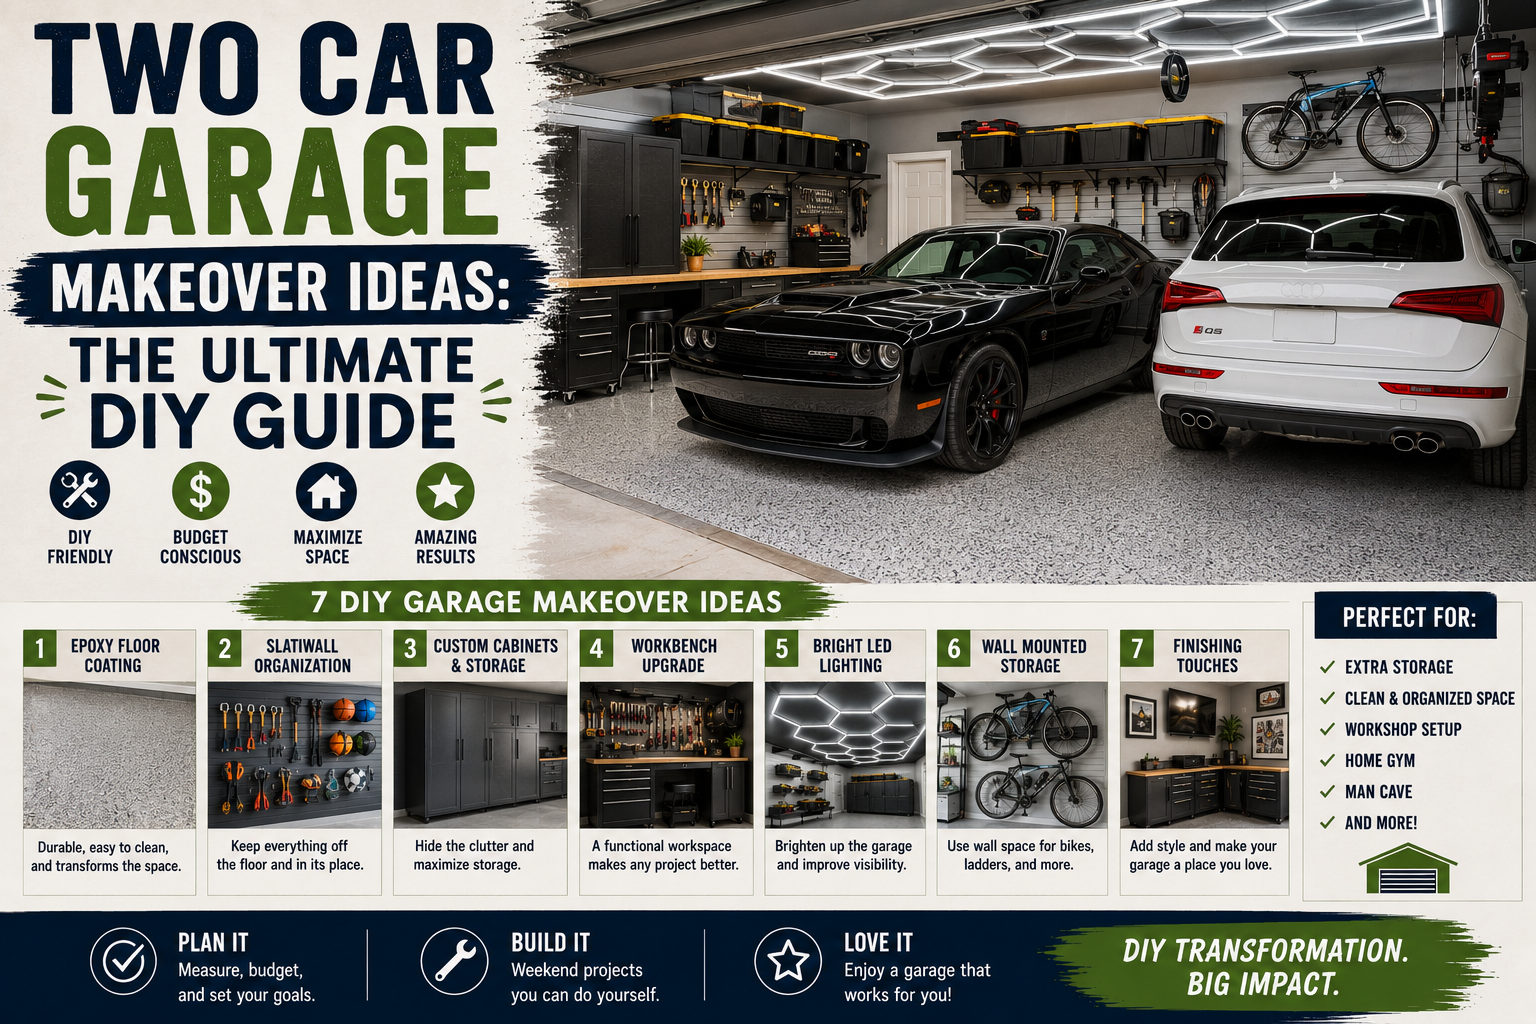
If you’ve been sitting on some two car garage makeover ideas but don’t know where to start, I completely understand that feeling. My two-car garage was honestly embarrassing — cluttered, dark, and a total waste of space. But after months of planning and a serious amount of elbow grease, I transformed it into what I genuinely consider my dream garage setup. And I want to walk you through every single step so you can do the same thing.
Working with a tight footprint of just 18 feet wide by 19 feet deep, every single inch of space had to earn its keep. This wasn’t just a quick weekend refresh — it was a full-on makeover covering flooring, lighting, cabinets, a washing station, insulation, climate control, and even a hidden wall vacuum. If you’re ready to stop wasting your garage and start loving it, this post is exactly what you need. You might also want to check out my guide on garage organization ideas on a budget for even more ways to maximize your space without breaking the bank.
I’m going to break down each phase of this project so you can pick and choose what works for your own space. Whether you want to tackle one upgrade at a time or go all-in like I did, these two car garage makeover ideas will give you a clear roadmap from start to finish.
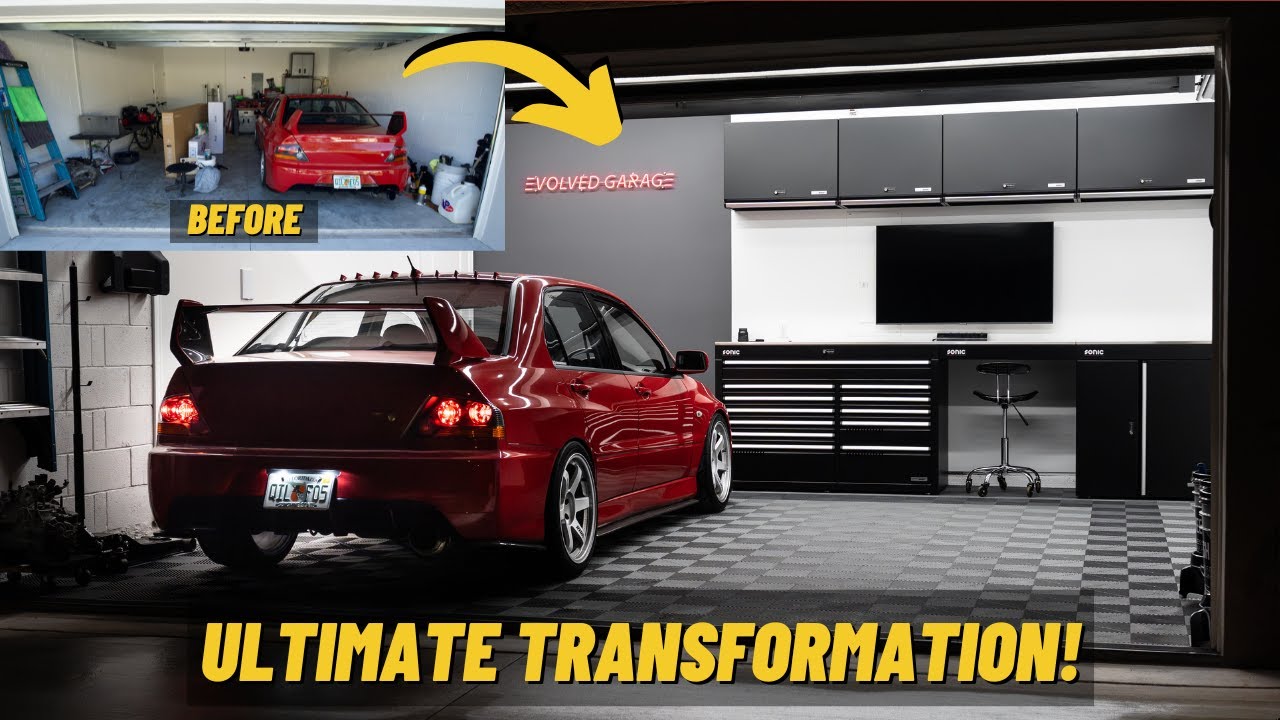
Step 1: Start With a Solid Design Plan
Before I touched a single tool, I sat down and got serious about planning. I worked with a garage design team to map out exactly what I needed from the space. The key question I kept asking myself was: what do I actually need this garage to do for me? Am I parking cars? Working on them? Storing tools? All of the above?
The game-changer for me was using 3D renders to visualize the finished space before spending a single dollar. Seeing a photorealistic preview of the layout meant I could catch design mistakes before they became expensive real-world problems. I cannot overstate how valuable this step is — if you skip the planning phase, you will regret it. Take the time, make the plan, and stick to it.
Step 2: Paint the Garage and Install a Jackshaft Garage Door Opener
Once the plan was locked in, the very first physical task was painting. A fresh coat of paint does more for a garage than almost anything else — it instantly makes the space feel cleaner, brighter, and more intentional. I went with a light, neutral tone to help bounce light around the space and make it feel larger than its actual footprint.
Alongside the paint, I upgraded to a jackshaft garage door opener. Unlike traditional openers that hang from the ceiling, a jackshaft unit mounts on the wall beside the door, freeing up valuable overhead space. If you’re planning any kind of overhead storage or just want a cleaner look, this is one of the smartest early moves you can make. It’s a detail that most people overlook, but it makes a real difference in how the whole garage functions.
Step 3: Install High-Quality Garage Flooring
Next up was the floor, and this is one of those upgrades that completely transforms how a garage looks and feels. I chose Swiss Tracks flooring, and I honestly couldn’t believe how fast it went in — I knocked the entire floor out in just a couple of hours. No adhesives, no mess, no contractor needed.
If you’ve been putting off a garage floor upgrade because you think it’s complicated, I’m here to tell you it doesn’t have to be. If you want an even simpler option for other spaces in the home, I’ve also had great results with peel and stick vinyl floor planks — they’re beginner-friendly and surprisingly durable. But for a garage that’s going to see car traffic and heavy use, an interlocking tile system like Swiss Tracks is the way to go. It protects the concrete underneath and gives the whole space a polished, professional look.
Step 4: Fix the Lighting Once and For All
Bad lighting is one of the biggest problems in almost every garage I’ve ever seen, and mine was no exception. Dim, yellowy overhead bulbs that made it feel like a dungeon — not exactly inspiring when you’re trying to work on a project. Fixing this was one of the highest-impact upgrades of the entire makeover.
I installed proper LED shop lights throughout the space, and the difference was night and day — literally. Bright, white light makes the garage safer, easier to work in, and just a genuinely better place to spend time. If you’re only going to do one upgrade this weekend, make it the lighting. It costs relatively little and pays back in usability every single day. You can also supplement with additional LED lights in specific work zones for even better task lighting where you need it most.
Step 5: Relocate the Water Heater to Free Up Cabinet Space
This one might sound like an odd step in a garage makeover, but hear me out. My water heater was sitting in the garage and eating up prime real estate right where I wanted my dream cabinets to go. As a car enthusiast, every single inch of garage space counts, so I made the call to relocate it inside the house.
This isn’t a project for everyone, and it does require some plumbing and possibly permits depending on where you live — so make sure you check your local codes before going this route. But if your water heater is cramping your garage layout, moving it is absolutely worth the effort. Reclaiming that wall space opened up the entire cabinet installation and made the layout work exactly as I’d planned it in the 3D design.
Step 6: Install Dream Garage Cabinets
This was the moment I’d been waiting for — the arrival of my Sonic MSS+ cabinets. If you’re serious about your garage, proper cabinetry is the upgrade that ties everything together. These aren’t flimsy shelving units or plastic bins — they’re heavy-duty, professional-grade cabinets that make the garage feel like a real workspace rather than a storage dump.
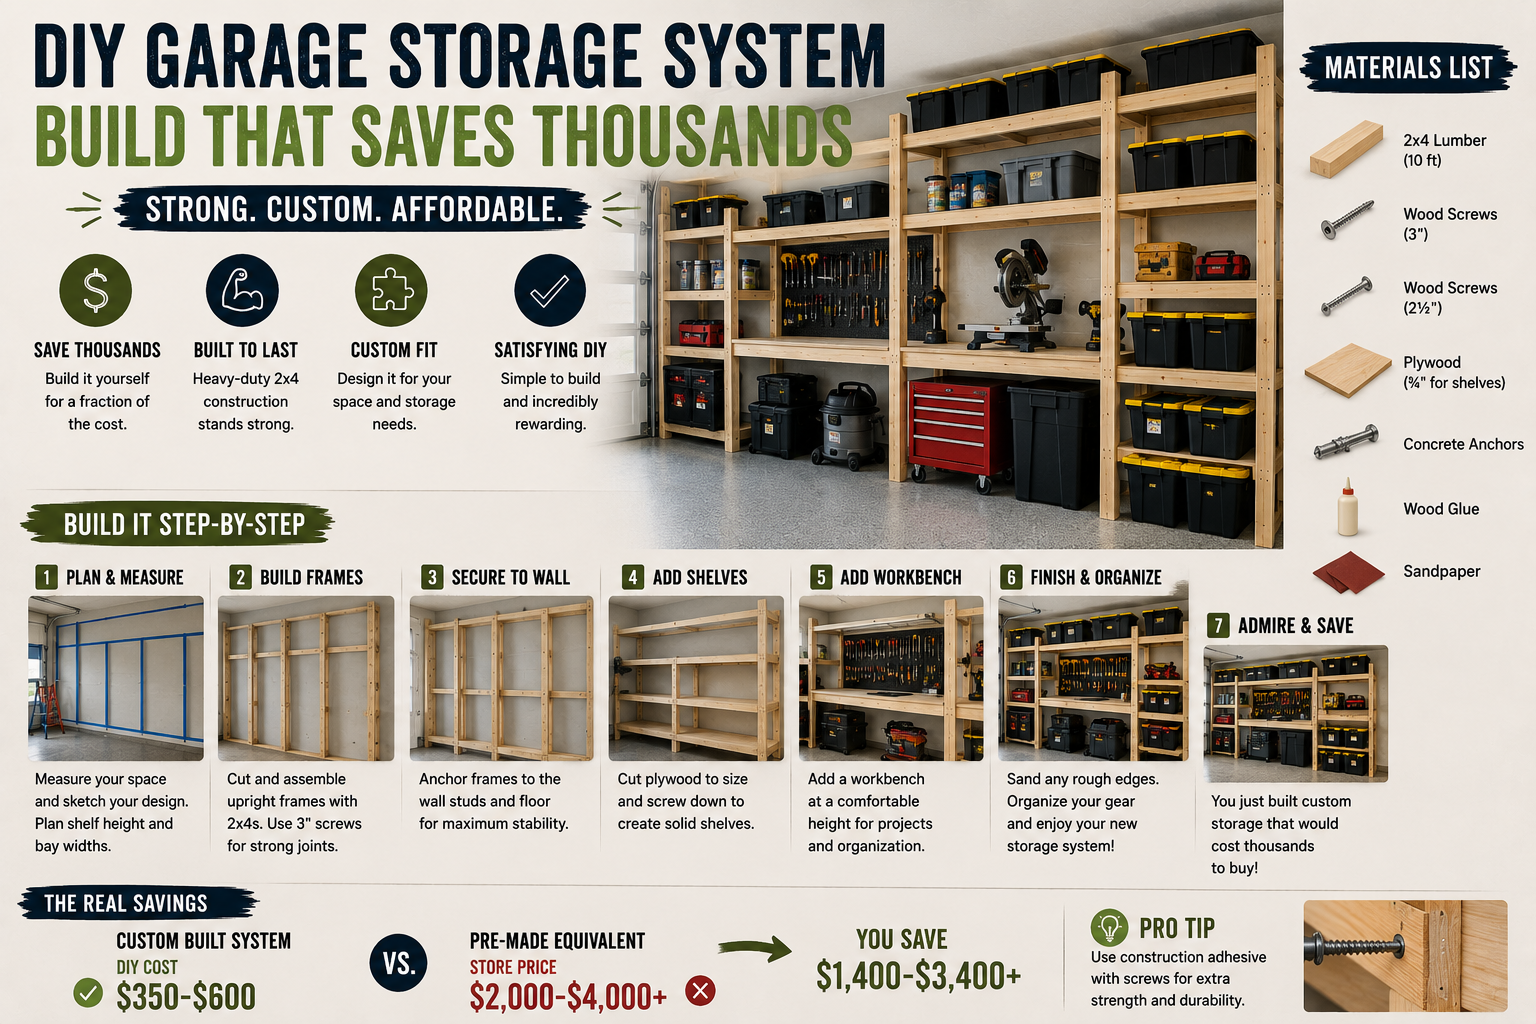
The unboxing and installation process was incredibly satisfying. Watching those cabinets go up wall by wall, knowing exactly how they’d look from my 3D renders, made all the planning feel completely worth it. If you’re looking for more storage inspiration beyond cabinets, my post on the DIY garage storage system build covers a ton of budget-friendly approaches that work alongside or instead of full cabinet setups. The key is getting things off the floor and organized — whatever system helps you do that is the right one.
Step 7: Build a Wall-Mounted Pressure Washer Washing Station
This was the most intimidating part of the whole project for me, and I’ll be honest — I was terrified going into it. Setting up a wall-mounted pressure washer washing station meant handling both plumbing and electrical work that I’d never done before in a garage context. But I backed myself, did my research, and got it done.
Having a dedicated washing station built right into the garage wall is an absolute game-changer for anyone who takes their vehicles seriously. No more dragging hoses across the driveway or hunting for an outlet. Everything is in one place, permanently mounted, and ready to go whenever I need it. If you’re a car enthusiast or just someone who likes a clean driveway, this is one of those two car garage makeover ideas that sounds fancy but is completely achievable with a little patience and confidence.
Step 8: Add Wall Organization and Insulation
With the big structural elements in place, I turned my attention to the walls. Proper wall organization — using shelf brackets and open shelves — makes a massive difference in how functional a garage feels day-to-day. Getting tools, gear, and supplies up off the floor and onto the walls keeps everything visible, accessible, and out of the way of the cars.
At the same time, I added insulation to the garage walls. Living in Florida, temperature control isn’t optional — it’s survival. Insulating the walls was the necessary first step before installing the mini split, and it also helps with noise reduction and overall energy efficiency. I also used spray foam to seal up any gaps around the walls and ceiling to make sure no conditioned air was escaping. This stuff is cheap insurance against losing all your cooling to drafts and gaps.
Step 9: Install a Mini Split for Climate Control
Here’s the thing about working in a Florida garage in the summer — it is brutal. Without climate control, even the best-designed garage becomes unusable for half the year. That’s why installing a mini split was a non-negotiable part of this makeover for me.
A mini split is ideal for a garage because it doesn’t require ductwork, it’s highly efficient, and it can both heat and cool the space depending on the season. Between the insulation I added to the walls and the mini split keeping the temperature dialed in, my garage is now genuinely comfortable year-round. If a full mini split is outside your budget right now, a portable air conditioning unit is a solid temporary solution that can take the edge off while you save up for the permanent install. Either way, don’t ignore climate control if you actually want to use your garage.
Step 10: Install a Hidden Wall Vacuum
I saved the most satisfying surprise for last — and honestly, I still can’t believe I pulled this off. I installed a hidden vacuum system right inside the wall of the garage. This is the kind of detail that separates a good garage makeover from a truly next-level one.
A built-in wall vacuum means no more dragging a shop vac around, tripping over cords, or hunting for where you left the hose. Everything is concealed in the wall, out of sight until you need it, and then it’s right there. It’s one of those features that sounds extravagant until you actually use it every single day and wonder how you ever lived without it. If you love clever hidden storage ideas like this, you might enjoy my post on secret passage hidden room DIY — that same “hidden in plain sight” design philosophy applies beautifully to garages too.
Tips and Best Practices for Your Two Car Garage Makeover
After going through this entire transformation, here’s what I’d tell anyone planning their own two car garage makeover:
Always start with a 3D plan. Visualizing the finished space before you spend money is the single biggest time and money saver in any renovation project. Tackle infrastructure first — paint, flooring, lighting, and insulation before cabinets and organization. Think vertically. In a two-car garage, wall space is your best friend. Use shelf brackets, open shelves, and cabinet systems to get everything off the floor. Don’t ignore climate control — especially if you live somewhere with extreme temperatures. A garage you can’t comfortably be in is a garage you won’t use. And finally, add personal touches — the details that reflect how you actually use the space are what make it feel like yours.
A workbench is another must-have if you do any kind of mechanical work or DIY projects in your garage. Pair it with a extension cord management system and some bungee cords for keeping hoses and cords organized, and you’ve got a workspace that actually functions like a pro shop.
Frequently Asked Questions
How long does a two car garage makeover take?
It depends on the scope of your project, but a full makeover like mine — covering flooring, lighting, cabinets, insulation, climate control, and a washing station — took several weekends spread over a few weeks. If you’re tackling one upgrade at a time, individual projects like flooring or lighting can be done in a single day.
What’s the most impactful upgrade I can make to a two car garage?
In my experience, lighting gives you the biggest bang for your buck. Installing bright LED shop lights transforms how the space looks and functions immediately, and it’s one of the most affordable upgrades you can make. After that, flooring and cabinet storage are the next biggest game-changers.
Do I need to hire a contractor for a garage makeover?
For most of what I covered here — flooring, painting, lighting, wall organization, insulation — you absolutely do not need a contractor. The plumbing and electrical work for the washing station and mini split may require professional help depending on your skill level and local codes, but the majority of this project is very DIY-friendly.
How do I keep a Florida garage cool enough to use?
The combination I used — proper wall insulation, spray foam to seal gaps, and a mini split for active cooling — is the most effective approach. If you’re not ready for a mini split investment, start with insulation and a portable air conditioning unit as a bridge solution while you plan the permanent setup.
The Final Result: My Ultimate Two Car Garage
Standing back and looking at what used to be a neglected, dark, cluttered garage and seeing it transformed into a bright, organized, climate-controlled dream space is one of the most satisfying feelings I’ve experienced as a DIYer. Every one of these two car garage makeover ideas came together exactly as I’d planned — from the 3D renders all the way to the finished space.
If this post gave you the inspiration and the roadmap you needed to tackle your own garage, I’d love to see what you create. Drop a comment below with your questions, share your before and after photos, and don’t forget to check out my full guide on garage storage workstation shelving ideas for even more ways to make every inch count. You’ve got this — now go build something amazing.