If you’ve been staring at a dull corner of your yard wondering what to do with it, I have the perfect project for you. Installing a garden pond — especially one with a waterfall — is one of those DIY upgrades that completely transforms a space. I’m talking about going from bland and forgettable to a backyard centerpiece that you’ll actually want to spend time near. The sound of moving water alone makes it worth every shovelful of dirt.
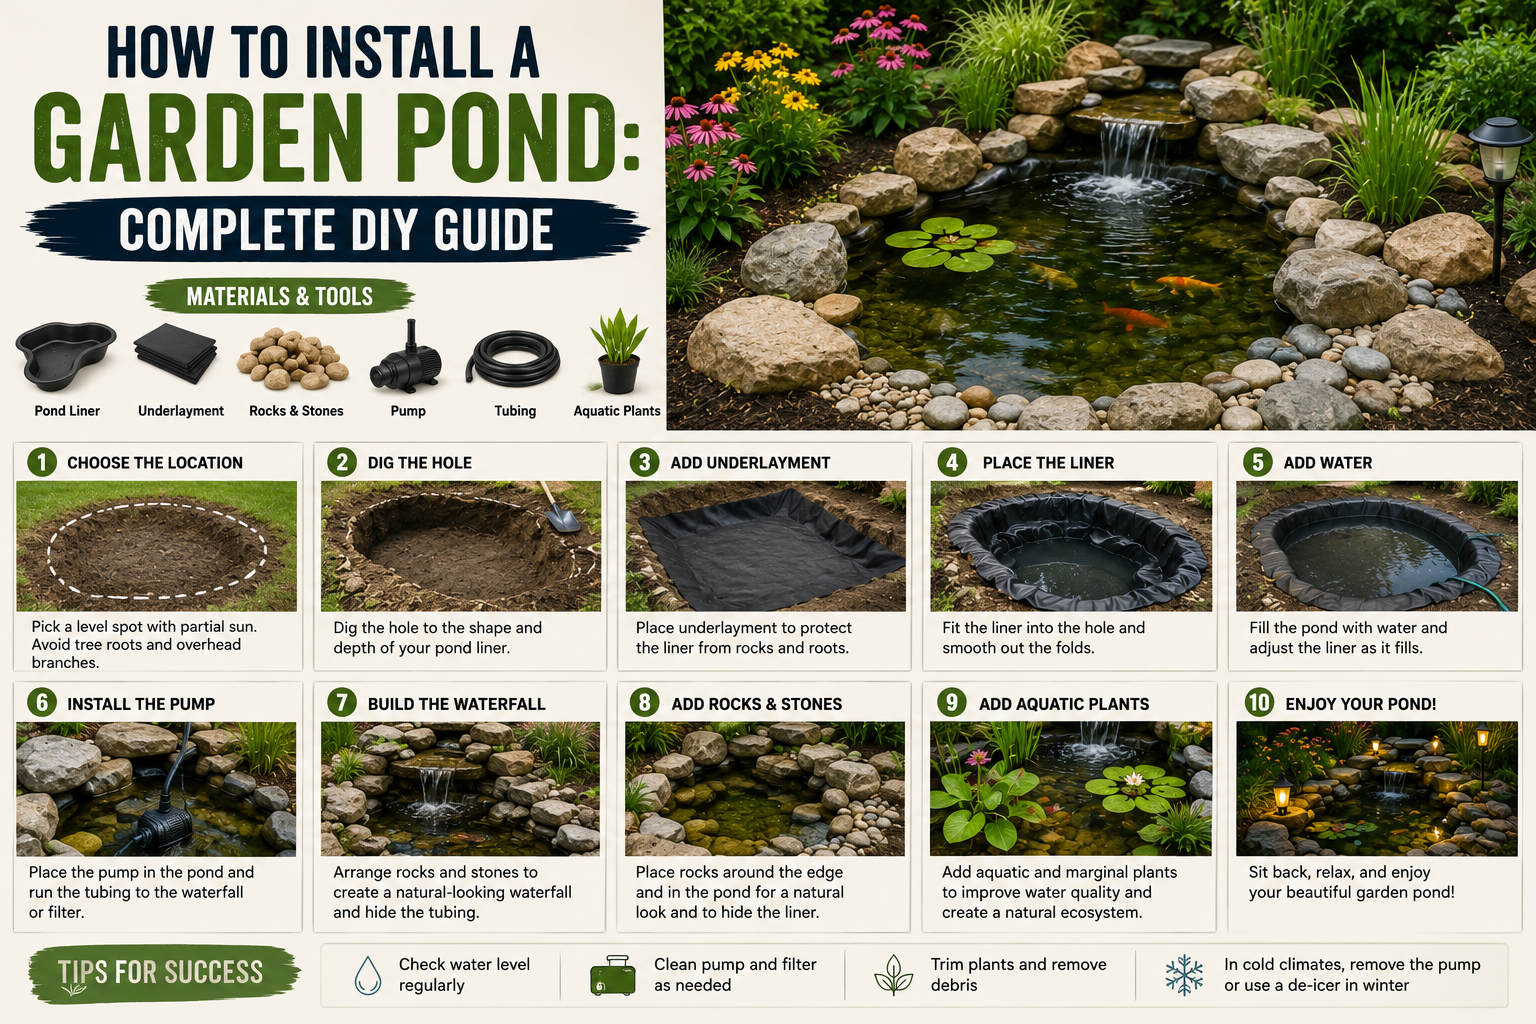
I’ve researched and tested this approach thoroughly, and I want to walk you through every single step of how to install a garden pond, from picking the right location all the way to dropping in water lilies at the end. This is a two-tier pond with a waterfall design using a combination of a rigid shell for the pond basin and a flexible liner for the waterfall — a combo that gives you the best of both worlds. Whether you’re a seasoned DIYer or tackling your first outdoor project, this guide will give you the confidence to get it done. And if you love outdoor DIY, be sure to check out my guide on DIY backyard patio and fireplace builds for more ways to create a stunning outdoor living space.
Let’s get into it — here’s everything you need to know, step by step.
Step 1: Choose the Right Location for Your Pond
Before you dig a single inch, you need to nail down your location — and this decision matters more than most people realize. I always tell people that a poorly placed pond is one of the most frustrating things you can deal with because you’re not going to want to move it later. There are several key factors to consider before you commit to a spot.
First, choose level, well-drained ground. Sloped or waterlogged areas create serious headaches. Second, the closer you are to an electrical outlet, the better — you’ll need power for your pump, so plan the most direct line possible between the house and the pond to minimize wiring runs. Third — and this is critical — call 811 before you dig. This is the national “Call Before You Dig” hotline that will tell you if there are any underground sewer lines or electrical wires in your chosen area. Never skip this step.
You also want an outdoor faucet nearby so you can top off the pond with a garden hose when the water level drops. As for sunlight, more direct sun means more variety in water plants you can choose from. If you’re planning to add fish, you’ll want to balance sun with some shade — lily pads help with that. Once you’ve checked all these boxes, you’re ready to move forward.
Step 2: Design Your Pond Layout
For this project, the design is a two-tiered pond with a waterfall. The basic concept is this: the pond basin gets dug out first, then the waterfall structure gets built up using saved dirt and decorative rocks. The water circulates using a pump and filter system, and the whole thing gets finished off with landscaping around the perimeter.
I’m using a rigid shell for the pond base — roughly 5 feet by 4 feet — because it gives you a reliable, pre-formed shape that’s easy to work with. For the waterfall, I’m going with a flexible liner so I can customize the shape rather than being locked into something predetermined. Using both together is a smart approach that gives you structure where you need it and flexibility where you want it.
To mark out the pond location, simply set the rigid shell on the ground and trace around it with marking paint. Once that’s done, move the shell out of the way — it’s time to dig.
Step 3: Excavate the Pond Hole
Now comes the part everyone either loves or dreads — digging. Use a good shovel and plan ahead for what you’re going to do with all that extra dirt. For a two-tier waterfall build, save some of the excavated dirt — you’ll use it to build up the waterfall mound. The rest you’ll need to haul away or spread elsewhere in the yard.
Dig the hole a couple of inches wider than the shape of your pond on all sides. For depth, you want to go three inches deeper than the liner — this extra depth is for a sand base layer that you’ll add later. In my case, the rigid shell is 18 inches deep, so I’m digging down to 21 inches total. As you dig, remove any large rocks, roots, or debris. A mattock or pick axe is great for breaking up compacted soil and working around stubborn roots. Try to keep the bottom of the hole as level as possible as you go — the sand will help you fine-tune it, but getting close from the start saves time.
Step 4: Level the Hole and Add a Sand Base
Once you’ve hit your target depth, use a 2×4 and a level to check how flat the bottom of your hole is. You’ll likely find one side is slightly higher than the other — that’s completely normal. The fix is straightforward: add or remove a little soil until you’re close to level across the whole area.
Next, pour in about three inches of sand as your base layer. Sand is ideal here because it’s smooth, easy to work with, and fills in all the little gaps and imperfections that your dug-out dirt floor has. Use the back side of a rake to spread and level the sand. Run your 4-foot level across it in multiple directions until you’re spot on. The goal when you set the shell in is to have the lip of the pond shell sitting 2 to 3 inches above the surrounding ground level — this protects against dirty runoff water getting into the pond and keeps the water clear.
Step 5: Set and Level the Rigid Shell
With your sand base perfectly level, carefully lower the rigid shell into the hole. Check it again with your 2×4 and level — you want that lip sitting consistently 2 to 3 inches above grade all the way around. Once it’s where you want it, start backfilling around the outside edges with bags of sand.
Sand is your best friend here because it flows into all the nooks and crannies around the shell, locking it in place without disturbing the level you worked so hard to achieve. Keep checking with your level as you go — don’t assume it’s staying put on its own. This part requires patience, but getting the shell perfectly level now prevents headaches later. Once you’re satisfied, the shell is set and you can move on to building the waterfall.
Step 6: Build Up the Waterfall Structure
Unlike the pond basin which gets dug down, the waterfall gets built up using the dirt you saved during excavation. Pile and shape it to create a mound roughly 15 inches high as the base and foundation of the waterfall. This doesn’t have to be perfect at this stage — you’re just establishing the general form.
Once the dirt mound is shaped, add a thin layer of sand over the top. The key thing to understand about the slope here: from left to right you want it level, but from back to front you want a slight downward tilt toward the pond so water flows the right direction once the pump is running. Use your level frequently as you work to get this right. Getting the grade correct at this stage is what makes the waterfall actually function properly.
Step 7: Install the Flexible Liner for the Waterfall
Now it’s time to lay the flexible liner over the waterfall structure. The liner is what directs all the water flow down into the pond, so placement matters. Drape it over the mound and shape it to follow the contours you’ve built. The most important thing: make sure the bottom edge of the liner drapes down into the pond. If it doesn’t extend into the water, you’ll constantly lose water behind the pond — a frustrating and wasteful problem.
Use a utility knife to trim away the excess liner, but be conservative with your cuts. If you trim too much, you limit your ability to shape and adjust the waterfall. Leave more than you think you need and fine-tune from there. The liner will eventually be hidden entirely under rocks, so don’t worry about how it looks at this stage — function is everything right now.
Step 8: Install the Pump and Filtration System
The pump and filter are the heart of your pond — they keep the water clean, moving, and healthy. The pump goes down into the pond itself, and the filter gets installed partially buried outside the pond. I position both on the same side of the pond to keep the hose run short and clean.
One important detail: route the pump cord underneath the liner rather than over it, and plan its path so it doesn’t run directly under your waterfall. You need it to reach your outdoor outlet with a clean, hidden run. For the filter, dig a hole that buries roughly half of it — you want it low profile but still accessible from the top for cleaning and maintenance. Trench a small channel for the hose connecting the pump to the filter so it stays below grade and out of sight. Connect the pump outlet to the filter inlet using flexible pond hose secured with a hose clamp. The filter outlet then connects to the top of the waterfall where the water will emerge.
Step 9: Lay the Decorative Rocks and Flagstone
This is where the project really starts looking like something special. The goal with the rock placement is to make everything look organic and natural while also hiding the liner and controlling exactly where the water flows. I use a combination of large flagstone as the primary structure and smaller stones to fill gaps and provide support.
Use spray foam — specifically pond-safe foam — to seal between rocks and hold them in place. It’s waterproof, bonds well to stone, and essentially replaces mortar for this type of application. No two rocks are alike, so expect this to be a trial-and-error process. Place a rock, step back, adjust, repeat. The most important thing to keep in mind throughout is controlling water flow — every rock placement should direct water toward the pond, not away from it.
To hide the pump hose at the top of the waterfall, split one flagstone into two pieces and create a little shelf — essentially a hiding spot for the hose with a stone lid over the top. It’s a simple trick that looks completely intentional once everything is in place. Around the rigid shell edges, use thin flagstone as a border. Fill gaps with beach pebble, egg rock, and pea gravel for a layered, natural look.
Step 10: Clean Out the Shell and Add Gravel to the Base
After all the rock work, there’s inevitably going to be dirt and debris that falls into the rigid shell. Take a few minutes to wipe it out before filling the pond — this makes a real difference in water clarity right from the start. A quick clean now saves you from dealing with murky water for the first week.
Once it’s clean, use some of your flagstone to create a small shelf on the bottom of the pond. This serves two purposes: it helps hide the pump and adds visual interest, making the bottom look more realistic and textured. Add pea gravel along the ledges inside the shell as well. One important tip here: rinse your gravel before adding it to the pond. Gravel straight out of the bag is dusty and dirty, and if you pour it in dry, your water will be a cloudy mess. Hose it off first — it only takes a minute and makes a big difference.
Step 11: Fill the Pond and Test the Pump
With everything in place, it’s time to fill the pond. Just grab your garden hose and let it run — it takes a little while depending on the size of your pond, so use that time productively to work on the surrounding landscaping. While the pond is filling, do a final check on your rock placement and make any last adjustments to the foam seals.
Once the water level is up, plug in the pump and watch the magic happen. When that water starts flowing over the waterfall and back into the pond, the whole project clicks into place. Listen for the waterfall sound — it should be a smooth, consistent flow. If water is escaping anywhere it shouldn’t, identify where and add more pond foam to seal it. A few minor adjustments at this stage are completely normal.
Step 12: Add Landscaping Around the Perimeter
Any time you add a water feature to your yard, completing the surrounding landscaping is what takes it from a project to a finished feature. Without it, even a beautifully built pond can look incomplete. Planting greenery, flowers, and ground cover around the perimeter of your pond unifies the whole design and makes it look like it’s always been there. This is also a great time to add stepping stones leading up to the pond so you have a clean path to access it for maintenance.
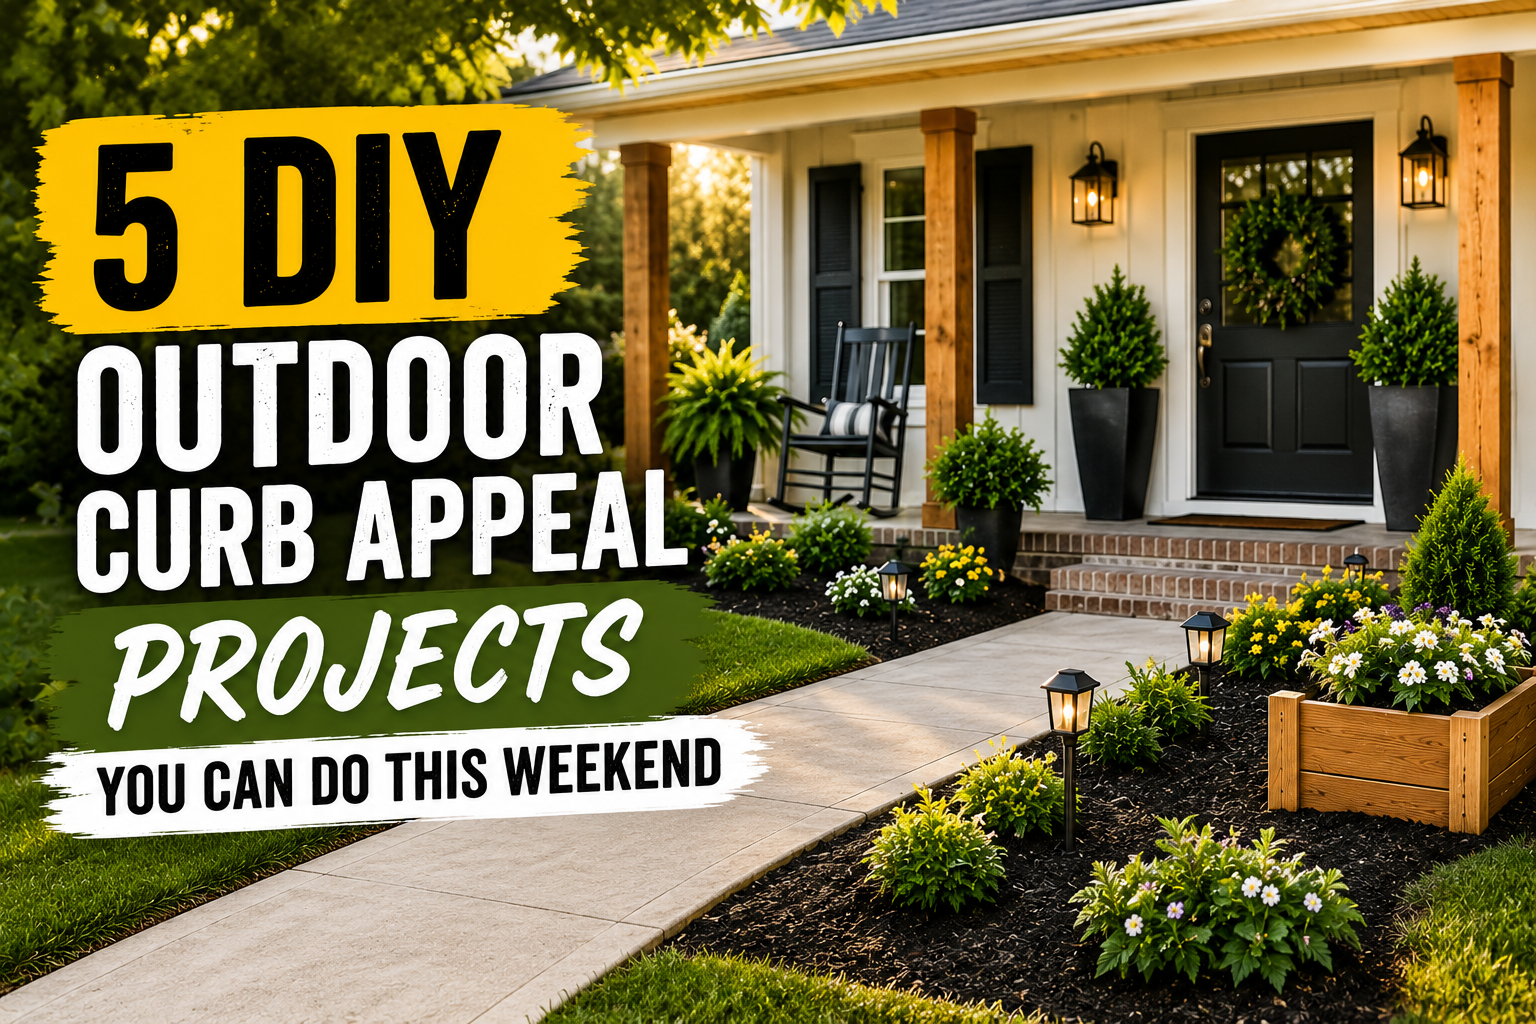
Use landscaping fabric under any gravel or mulch areas around the pond to keep weeds down — trust me, you’ll thank yourself later. A edging tool helps create clean borders between the pond surround and your lawn. And if you want to take the landscaping further, check out my full guide on 5 DIY outdoor curb appeal projects you can do this weekend for more inspiration.
Step 13: Add Water Lilies and Finishing Touches
For the finishing touch, water lilies are a beautiful and practical addition to any garden pond. They add color, texture, and visual interest — but they also serve a functional purpose. Lily pads help reduce algae growth by blocking sunlight from reaching the water, which is especially useful if your pond gets a lot of direct sun. They also provide shade and shelter if you decide to add fish later on.
To install water lilies, simply lower the entire pot directly onto the bottom of the pond. You don’t need to remove the plant from its container — the pot goes right in. The plant will grow and spread naturally from there. Stand back, take it all in, and enjoy the sound of that waterfall. It’s one of those DIY projects that delivers a huge reward for the effort you put in.
Tips and Best Practices for Installing a Garden Pond
Here are the key takeaways I want you to walk away with after reading this guide:
Always call 811 before digging. This is non-negotiable — underground utilities are dangerous and the call is free. Dig wider than the liner to give yourself room to work and backfill properly. Use sand, not dirt, for your base and backfill — it levels more easily and supports the shell without shifting. Keep your level handy at all times — a pond that isn’t level will overflow on one side and look off. Rinse your gravel before adding it to avoid cloudy water from day one. Use pond-safe foam to seal between rocks — it waterproofs, holds, and hides the liner beautifully. Plan your electrical run before you dig so you’re not running a visible cord across your yard. And finally, don’t rush the landscaping phase — what surrounds the pond is just as important as the pond itself. If you enjoy budget-friendly outdoor projects like this one, my post on DIY paver patio installation is worth a read too.
Frequently Asked Questions
How deep should a garden pond be?
For a standard decorative garden pond using a rigid shell, 18 inches of depth is typical and works well for water plants. If you’re planning to add fish, you’ll want at least 24 inches in the deepest area so fish have room to get below the freeze line in colder climates. When you excavate, always dig three inches deeper than your liner depth to accommodate a sand base layer.
Do I need a permit to install a garden pond?
In most US states and municipalities, small decorative ponds under a certain depth and surface area don’t require a permit. However, this varies by location, so I always recommend checking with your local building department before you start. Also remember to call 811 before any digging regardless of permit requirements.
How do I keep my pond water clear?
Water clarity comes down to a few things: a properly sized pump and filter for your pond volume, rinsing gravel before adding it, keeping organic debris out of the water, and using water plants like lily pads to reduce sunlight penetration and limit algae growth. Running your pump continuously (not just occasionally) also helps keep the water moving and filtered.
Can I install a garden pond myself as a beginner?
Absolutely. This is one of the more rewarding intermediate DIY projects out there, and it’s very achievable for a motivated beginner. The main requirements are patience (especially during the leveling stages), a willingness to do some physical digging, and careful attention to the pump and liner installation. Following the steps in this guide, you can have a beautiful, functioning pond installed in a weekend.
Conclusion
Installing a garden pond is one of those DIY projects that genuinely changes how you feel about your outdoor space. From that first moment the pump kicks on and water starts flowing over the waterfall, the effort you put in pays off immediately. I hope this step-by-step guide gives you everything you need to tackle this project with confidence.
If you’ve been on the fence about taking on a bigger outdoor project, let this be the one that pushes you to go for it. The tools and materials are accessible, the process is logical once you understand it, and the result is a backyard feature you’ll enjoy for years. Drop a comment below and let me know how your pond build goes — I’d love to see what you create!