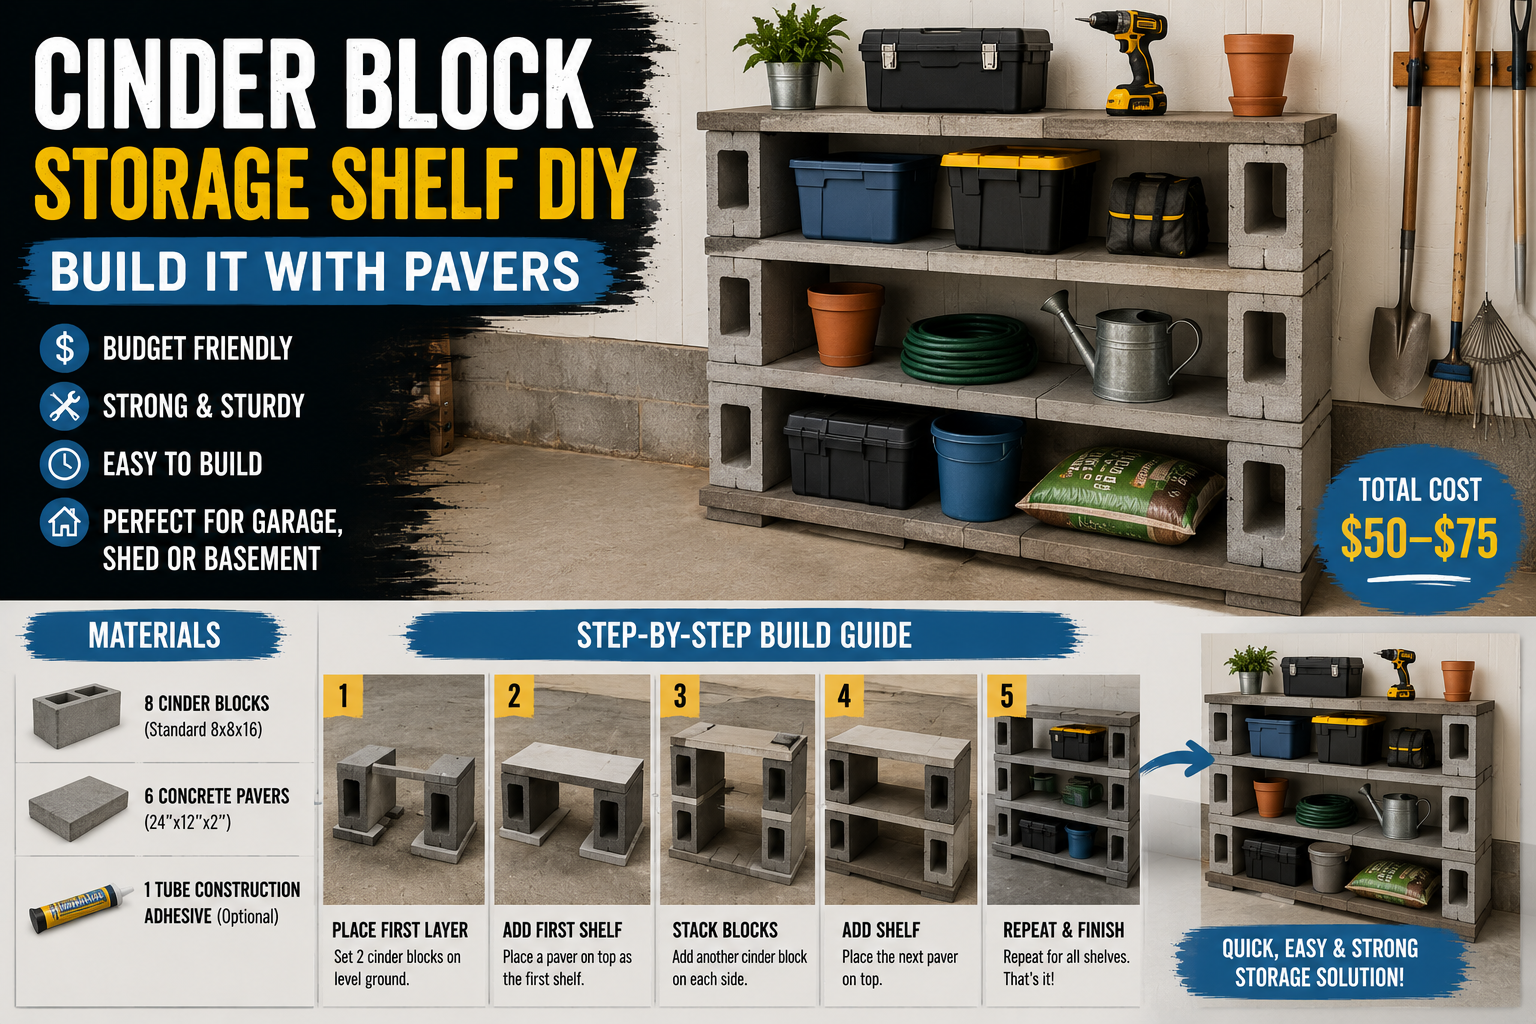
I’ve had a stack of brick pavers sitting around for over seven years, just waiting for the right project. I finally found it. My plan was to build a cinder block storage shelf DIY under my lean-to, using those free pavers as the base and scrap wood as the shelving surface. Simple enough, right? Well, as with most of my projects, nothing went quite as smoothly as I expected — but I learned a ton along the way, and honestly, I’m really happy with how it turned out.
The whole thing started because I needed a proper place to store my riding lawnmower and get some organized storage going under the lean-to. I had the cinder blocks, I had the pavers, and I had the ambition. What I didn’t have was a level surface, a fully functional lawnmower, or apparently enough sand. But hey, that’s what makes DIY fun, right? If you’re thinking about tackling a similar project, stick around — I’m covering every step of what I did, what went wrong, and what I’d do differently.
If you’re into budget-friendly storage solutions like this, you might also want to check out my post on garage organization ideas on a budget — there’s a lot of overlap with what I did here.
Step 1: Figuring Out the Layout and What I Needed to Store
Before I could do anything with the pavers or cinder blocks, I needed to figure out the layout. My main priority was storing my riding lawnmower, which had just been sitting outside with a cover over it. I wanted it tucked neatly under the lean-to, and everything else — including the cinder block shelf — needed to work around that.
I’m a visual person, so instead of sketching anything out, I just physically moved the lawnmower around to different spots until the layout clicked. Once I knew where the mower would live, I could see that the cinder blocks would go right in the middle section, and I’d figure out the far end later. It’s not the most precise planning method, but it works for me.
Step 2: Dealing With the Flat Tire (and a Dead Battery)
Here’s where things got interesting. When I went to move the riding lawnmower into position, I noticed one of the tires was completely flat. Like, very flat. And then when I tried to start it up, the battery was dead as a doornail — totally unresponsive. I hadn’t used the mower in a while (I’ll admit I’d been paying someone else to mow for a few months), so I shouldn’t have been surprised.
I had to fill the tire, charge the battery, and eventually change the flat tire entirely since it wouldn’t hold air. Luckily, I had a spare tire on hand from a previous fix. Dewey — my helper’s dad — came to the rescue with a battery jumper and a jack, which saved me a lot of time and frustration. The whole tire and battery situation ate up a good chunk of my morning, but it had to be done before I could move the mower into its final spot. I also took the opportunity to change the tires on my wheelbarrow while I was at it, since I knew I’d need it for this project.
Step 3: Discovering the Uneven Ground Problem
Once the lawnmower was sorted, I turned my attention back to the paver area. And that’s when I realized I had a bigger problem than I thought — the ground was seriously uneven. We’re talking about an inch or more of variation across the area, which doesn’t sound like much until you’re trying to lay flat pavers on it.
Normally, the solution would be to dig everything out and haul in heavy bags of gravel for a proper base. That’s a lot of work, a lot of weight, and a lot of money. But I had found something during my research that I was really excited to try, and it promised to make this whole process a lot easier. More on that in a minute — first I had to deal with the digging.
Step 4: Marking Out the Area and Relocating a Black Widow
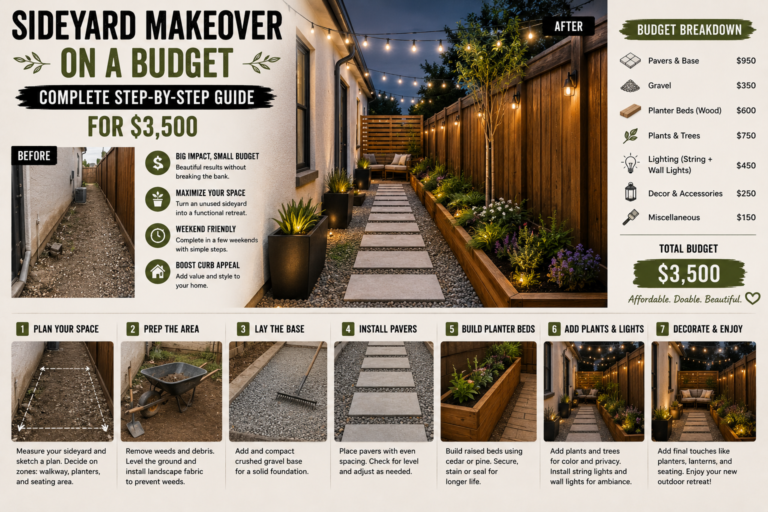
I started marking out where I needed to dig to level the surface for the pavers. I decided to put the paver pad on the right side of the lean-to, which meant measuring and marking a roughly 8×6-foot area. Just as I was getting started, I found a black widow spider hanging out in the area. I’m not going to lie — I was not thrilled. These things are venomous, so I carefully relocated it somewhere safe before continuing. Not the most glamorous part of the project, but definitely necessary.
With the uninvited guest rehomed, I got to work digging out the high spots and leveling the ground as best I could. The digging itself wasn’t too bad, but compacting the ground afterward took way more effort than I expected. I had to do it several times before the surface was even close to level. It was hot, sweaty work — very much a Florida summer situation.
Step 5: Laying Landscaping Fabric (Doubled Up)
Once the ground was as level as I could get it, the next step was laying down landscaping fabric. I’ve never had great luck with landscape fabrics in the past — weeds always seem to find a way through — so I decided to double it up this time. Two layers felt like a much more reliable weed barrier, especially since I wanted this area to stay clean and low-maintenance long-term.
The fabric also plays an important role in keeping the sand from washing out, which I’d find out more about as the project progressed. The instructions actually say to fold the fabric around the edges and tuck it under the pavers, but I didn’t know that ahead of time and didn’t leave myself enough extra fabric. Instead, I used garden staples to hold everything in place around the edges — not the intended method, but it worked.
Step 6: The Foam Paver Base That Changed Everything
Okay, this is the part I was genuinely excited about. When I was researching how to do this project, I originally planned to just use six small pavers, set the cinder blocks on top, and call it a day. No sand, no gravel, minimal effort. But then I stumbled onto something called a foam paver base, and it completely changed the scope of the project.
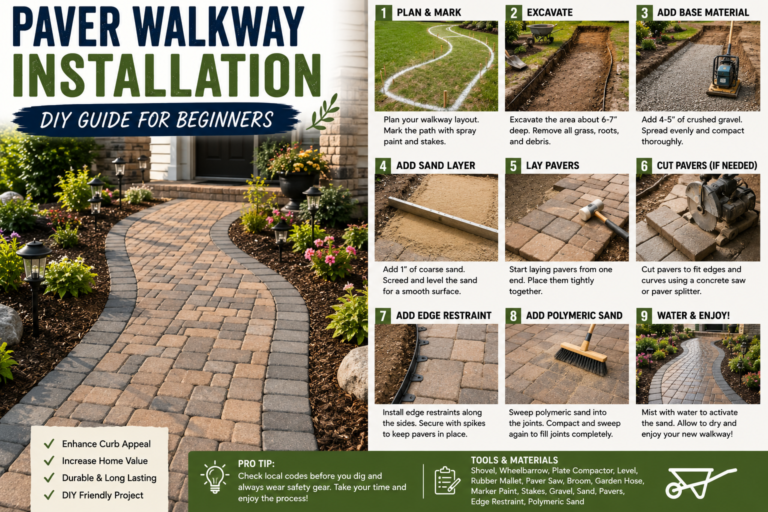
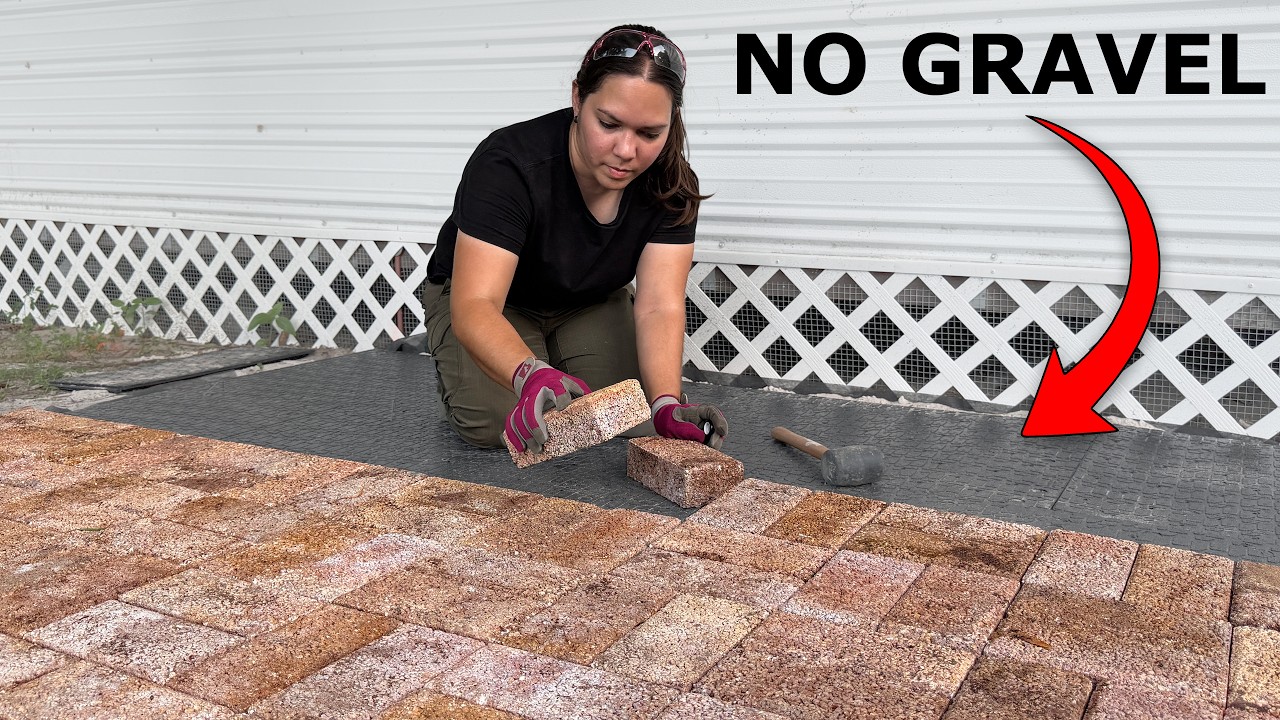
Normally, you’d need a layer of crushed gravel as a base before leveling with sand — heavy bags, lots of labor, not fun. The foam paver base replaces all of that. It’s made of foam, it has a tongue-and-groove system that fits together easily, and you cut it with a utility knife. What was going to be a tiny six-paver spot turned into a full 8×6 pad because I got so excited about using this product. I found a video of someone who used the same foam base and reviewed its durability three years later, which gave me confidence it would hold up. Highly recommend looking into this if you’re planning any paver project — it’s a genuine game-changer for people who don’t want to haul gravel.
Step 7: Leveling the Sand With a Simple DIY Screed
With the foam base in place, the next step was adding a layer of sand to create a perfectly level surface for the pavers. I initially tried to do this in sections, which was not the right approach. The correct method is to place two 1/2-inch pipes as guides across the area, then drag a 2×4 across the top of the pipes. The board rides on the pipes and pushes the excess sand away, leaving a perfectly even 1/2-inch layer behind — essentially a DIY screed.
I didn’t have a proper trowel handy (I couldn’t find mine), so I improvised with what I had. It worked well enough. One thing I’ll warn you about: I massively underestimated how much sand I’d need and had to make a second store run. Buy more sand than you think you need — trust me on this one. Also, the sand I used was the polymeric type, which is specifically designed to harden when wet and lock the pavers in place permanently.
Step 8: Planning the Paver Pattern
I spent about 30 minutes just moving pavers around, trying to figure out the pattern and layout before committing. I wanted something that looked good but also felt structurally sound. I landed on a design where the border bricks all face the same direction, and the interior bricks alternate in a pattern where every two bricks are turned. I’m not sure what the official name of the pattern is, but I liked the look of it, and it felt sturdier than a basic straight layout.
I also discovered — again, by reading the instructions as I went rather than ahead of time — that I needed Edging Material around the perimeter to keep the bricks from shifting outward over time. I didn’t buy that initially because I didn’t know about it. So I had to stop mid-project, go back to the store, and get the edging before I laid everything out. Stopping to get it was absolutely the right call — I would have had to redo the whole thing otherwise.
Step 9: Installing the Paver Edging and Securing the Border
The edging material clips around the outside of the paver area and holds everything together, preventing the bricks from spreading or shifting over time. It’s secured with nail stakes driven into the ground, and the box I bought came with them included — but I ran out before I finished all four sides. Lesson learned: buy extra stakes, or at minimum count out exactly how many you’ll need before you start.
Once both sides were secured, I tightened everything up and made sure the edging was sitting flush against the pavers. It’s one of those steps that’s easy to skip but really matters for the long-term stability of the whole surface. If I hadn’t gone back to the store to get the edging, I have no doubt the bricks would have started spreading within the first season.
Step 10: Cleaning the Pavers Before Laying
The brick pavers I used were the ones I’d had sitting around for seven-plus years, so they were pretty dirty. Before laying them, I needed to hose them off. This turned into its own little adventure — I damaged the threading on the garden hose fitting, which meant a trip to the store for a new fitting and repair parts. That whole situation, including the store run, ate up about two and a half hours of my day. And then it rained for another hour and a half after that.
Moral of the story: check your equipment before you start a project. Inspect your hoses, your fittings, your tools — all of it. A small oversight like a worn hose fitting can cost you half a day. Once I finally got the hose sorted, I washed all the pavers down and let them dry before continuing.
Step 11: Keeping the Pavers Dry Before Polymeric Sand
Because Florida is basically a rainforest from June through September, keeping the pavers dry enough to use polymeric sand was a real challenge. The polymeric sand is activated by water — once you wet it, it starts to harden like concrete and permanently bonds the joints. That means if the pavers are already wet when you apply it, you’ll get an uneven or incomplete bond.
My solution was to run a fan overnight, pointed at the paver area, to keep everything as dry as possible between rain showers. It sounds a little ridiculous, but it worked. I was paranoid about moisture the entire time, which is honestly the right mindset when you’re working with polymeric sand in a humid climate. Patience paid off here.
Step 12: Applying Polymeric Sand to Lock Everything In Place
Once the pavers were dry enough, it was finally time for the polymeric sand. The best way I’ve heard it described is like dry concrete — you pour it, sweep it into all the cracks, tamper it down to help it settle, and then mist it with water to activate the hardening process. I used a tamper to compact the sand between applications, and I went through two full bags to make sure all the gaps were filled.
After sweeping the sand in and tamping it down, I went through and individually filled any tiny remaining gaps before doing the final water activation. The result was a solid, locked-in paver surface that felt incredibly stable underfoot. I was almost afraid to walk on it after I finished because I didn’t want to get it dirty — which is a good sign that it came out well.
Step 13: Handling the Uneven Edge With a Dirt Slope
Remember that uneven ground issue from the beginning? Even after all the leveling work, there was still one area where the pavers ended up sticking out slightly above the surrounding ground because of how much grade change there was. Rather than trying to fight it or redo the whole section, I built up the dirt around the edges to create a gradual slope leading up to the paver surface.
It’s not a perfect solution, but it works visually and functionally. The slope directs water away from the paver pad rather than letting it pool at the edges, which is actually better for long-term drainage. Sometimes the workaround ends up being smarter than the original plan.
Step 14: The Plan for the Cinder Block Storage Shelf
With the paver pad complete, the stage is now set for the main event: the actual cinder block storage shelf DIY. The plan is to stack cinder blocks on the pavers to create vertical support columns, then lay scrap wood across them as shelving surfaces. It’s a simple, inexpensive, and incredibly sturdy way to build storage — no fasteners needed, completely adjustable, and you can reconfigure it any time just by moving the blocks.
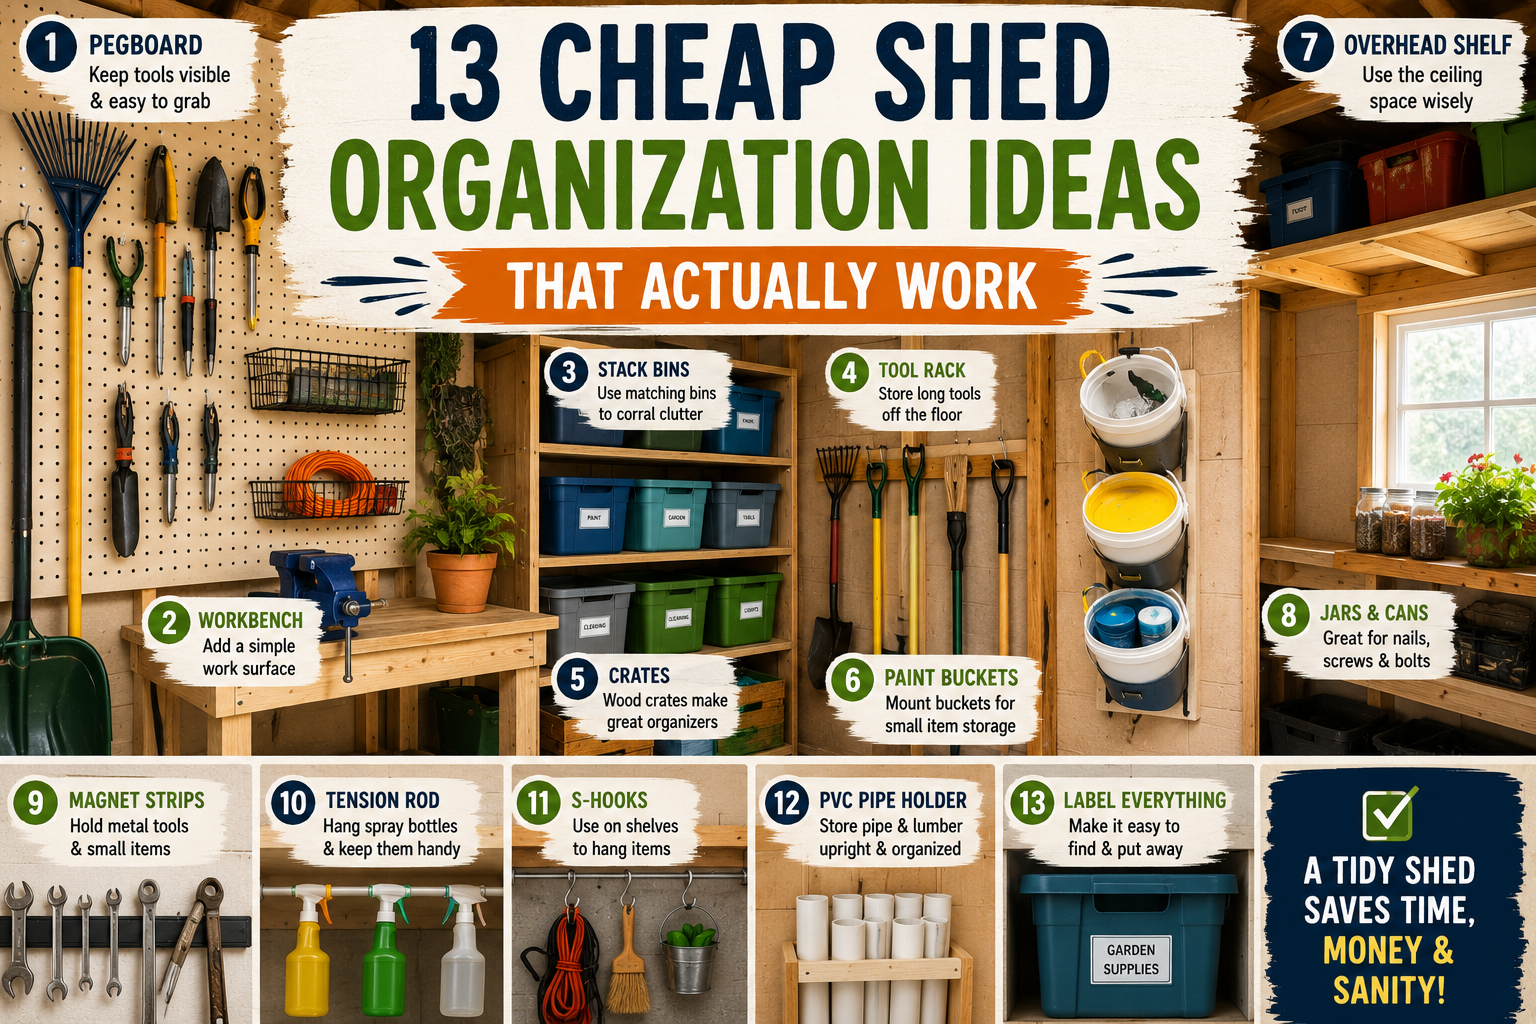
The paver base gives the cinder blocks a stable, level foundation so the whole structure sits solid and doesn’t shift or sink into the ground over time. I’m planning to use this for organizing all the tools and supplies that have been piling up under the lean-to, and I’ll cover the full cinder block and wood shelf build in a follow-up. If you want more inspiration for how to organize an outdoor or garage space like this, my post on cheap shed organization ideas has a lot of ideas that apply here too.
Tips and Best Practices for Your Cinder Block Storage Shelf DIY
Here’s what I’d tell anyone who wants to tackle a similar project based on everything I learned through this process:
Read the full instructions before you start. I kept discovering things mid-project — the edging requirement, the fabric tucking technique, the pipe screed method — that I would have known if I’d read everything first. Save yourself extra store runs by doing your homework upfront.
Use a foam paver base instead of gravel. Especially for smaller DIY pads like this, the foam base saves enormous amounts of labor and weight. It’s easy to cut, easy to fit together, and it’s proven to be durable based on real-world long-term use.
Double up your landscaping fabric. One layer almost always lets weeds through eventually. Two layers gives you a much better chance of keeping the area clean for years.
Don’t skip the paver edging. The Edging Material is what keeps the whole paver field from slowly spreading apart. It’s cheap, quick to install, and absolutely necessary for long-term stability.
Make sure pavers are completely dry before applying polymeric sand. In humid climates especially, this means using a fan and waiting longer than you think you need to. Wet pavers will mess up the bond and leave you with gaps that reopen over time.
Buy more supplies than you think you need. Sand, edge stakes, fabric — I ran short on all three at different points. Better to have leftovers than to stop mid-project for another store run. Also check out my full post on garage storage workstation shelving ideas for more ways to maximize your outdoor storage space once the base is in place.
Frequently Asked Questions
Do I need to use concrete under cinder blocks for a storage shelf?
Not necessarily. For a simple freestanding cinder block storage shelf in a covered area like a lean-to or garage, a properly leveled paver base is more than adequate. The weight of the cinder blocks themselves provides stability. Concrete becomes more important if you’re building something permanent, taller, or load-bearing in an exposed outdoor environment.
What’s the best wood to use for a cinder block shelf?
Scrap wood works great for a basic setup, and it’s essentially free. If you want something more finished, 2×10 or 2×12 boards are popular choices because they’re wide enough to span between cinder block columns without sagging. For an outdoor or semi-outdoor space, make sure the wood is either pressure-treated or sealed to resist moisture.
How many cinder blocks do I need for a storage shelf?
That depends on how many shelves you want and how tall you want them. A common approach is to stack two cinder blocks per column (oriented with the holes facing up or sideways) and run a wood plank across two columns. For a simple three-shelf unit, you’d typically need around 12 blocks for the columns, plus your wood planks. Adjust based on your specific dimensions and shelf count.
Is a foam paver base as durable as a gravel base?
Based on my research, yes — for residential patio and storage area applications, a quality foam paver base holds up very well over time. I found a video from someone who used the same system and reviewed it three years later with no significant issues. For heavy vehicular traffic you’d want proper gravel and compacted base material, but for a storage shelf pad or garden patio, foam base is a legitimate and much easier alternative.
Final Thoughts
This project genuinely surprised me. I didn’t expect to enjoy laying pavers, and I definitely didn’t expect to turn a six-paver spot into a full 8×6 paver pad just because I got excited about a foam base product. But that’s kind of the beauty of DIY — you start researching one thing and end up learning something completely new that changes how you approach the whole project.
The paver base is done, the lawnmower has a proper home, and the cinder block storage shelf DIY build is next on my list. If you’re planning something similar, I hope walking through my process — including all the detours, store runs, rain delays, and flat tires — gave you a realistic picture of what to expect and how to handle it. It’s rarely perfect, but it’s always worth it.
If you want to keep following along with my projects, subscribe to the blog and leave a comment below telling me what you’re planning to build. I’d love to hear about it — and if you have tips from your own paver or cinder block projects, drop them in the comments too. I’m always learning.