If you’ve been dreaming about building a container home, you already know the first wall you hit isn’t made of steel — it’s made of paperwork. Before I ever broke ground, I spent weeks trying to figure out container house building permit costs, zoning rules, and what local codes actually require. The information was scattered, inconsistent, and frankly frustrating. But that frustration turned into one of the most valuable parts of my entire build education.
What I’m sharing in this post is everything I pieced together from a real container home project — a three-container build on 10 acres in Joshua Tree, California. This wasn’t a weekend shed project. It was a full residential build with structural engineering requirements, fire suppression systems, septic design, seismic anchoring, and a level of complexity that most container home YouTube videos gloss right over. I want to give you the real picture, start to finish.
Whether you’re in the early planning stages or already staring at a plot of land, this breakdown will help you understand not just the permit side of things, but every major phase of a container home build — so you go in with eyes wide open. And if you’re just getting started on your DIY journey, you might also want to check out my guide on Backyard Tiny Home Build DIY: Complete Step-by-Step Guide for a broader look at small-scale residential projects.
Understanding Container House Building Permit Costs Before You Buy Land
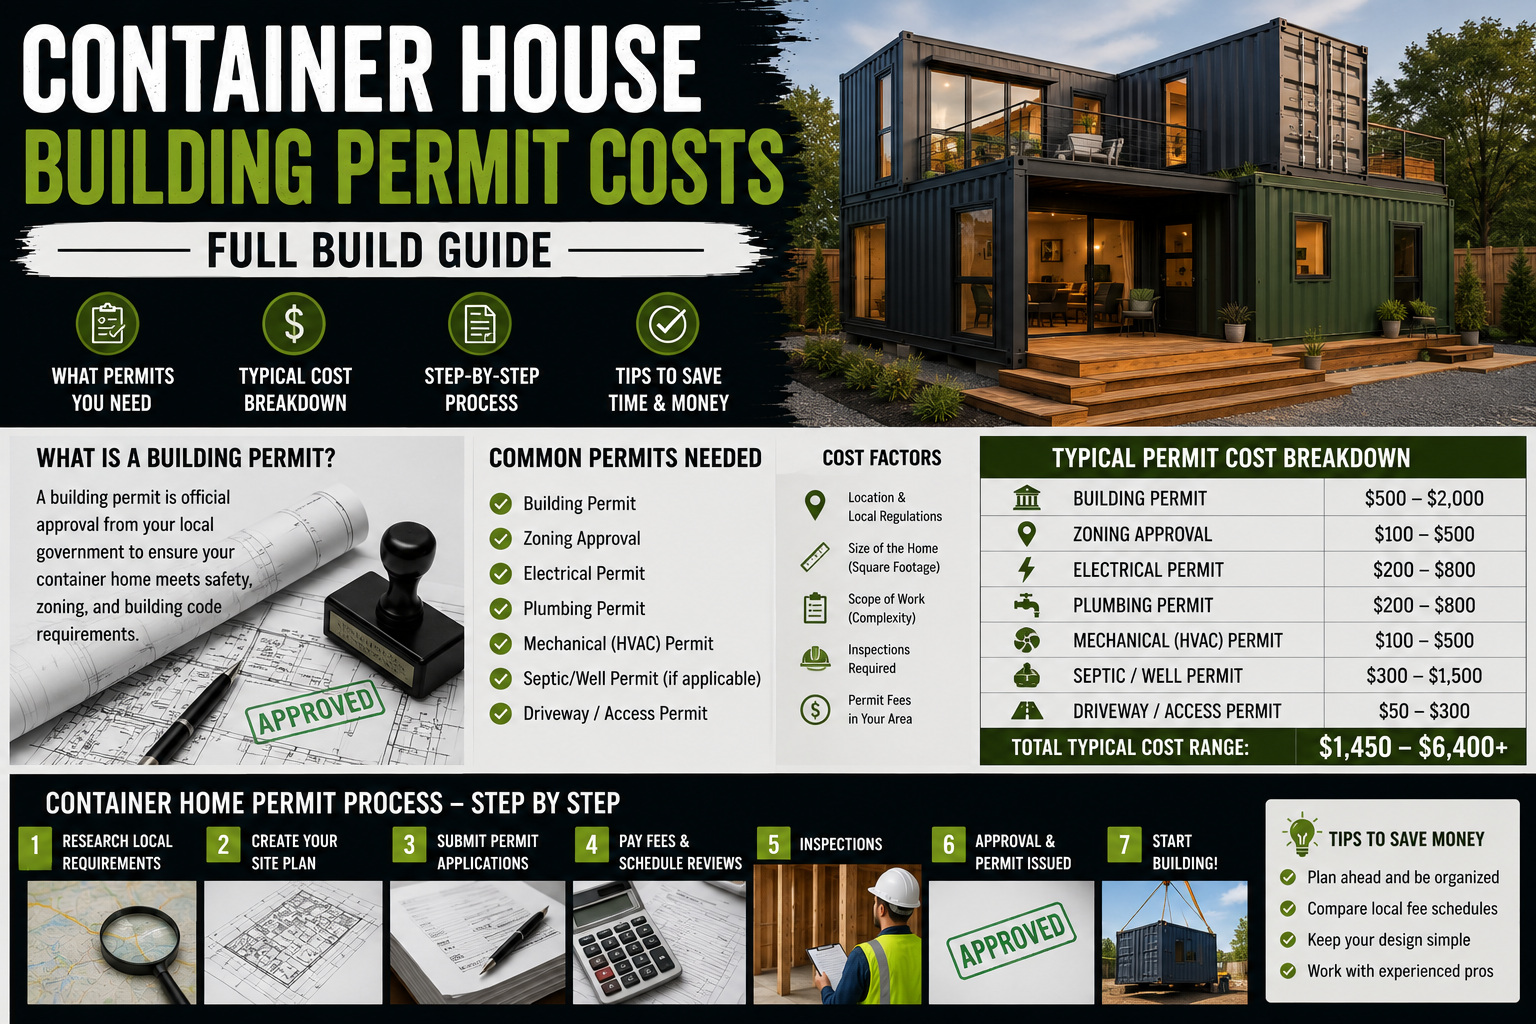
Here’s the thing most people don’t realize: container house building permit costs aren’t a flat number. They vary wildly depending on your county, your state, your zoning designation, and whether your local building department has even seen a container home application before. In California, especially in desert counties like San Bernardino where Joshua Tree sits, you’re often working with planning departments that are still figuring out how to classify these structures.
In general, you can expect permit fees to be calculated as a percentage of your total project valuation — typically somewhere between 1% and 3% of construction costs. On a build that runs $150,000 to $300,000, that puts permit fees alone anywhere from $1,500 to $9,000 before you factor in plan check fees, engineering review fees, and inspections. Some counties also charge separately for electrical, plumbing, and mechanical permits on top of the base building permit. My strong advice: call your county planning department directly before you buy the land, and ask specifically about container structures. Some jurisdictions treat them like manufactured housing. Others treat them like stick-built. The difference matters enormously for your timeline and your costs.
Choosing the Right Containers: Why One-Trip Units Matter
Once the land is secured — in this case, a nearly square 10-acre parcel with a natural hill right in the center — the first major no-going-back decision is ordering the containers. In California, building codes effectively require what are called one-trip containers: units that have only made a single journey from the manufacturer, so their cargo history is known and they haven’t been exposed to potentially hazardous materials.
These cost more than used containers. A standard 20-foot used container might run $2,000 to $3,500, while a one-trip unit can cost $4,500 to $6,500 or more depending on market conditions. For a 40-foot one-trip container, budget $5,500 to $8,000. On a three-container build, that’s a meaningful line item — but it’s not optional if you’re building to code in California. The structural integrity is also simply better, which matters when you start cutting openings and stacking units.
The Hidden Stage: Insulation and Subfloor Work Before Any Walls Open
Before a single wall gets cut, there’s a phase of the build that almost nobody talks about — and it’s one of the most important. Every cavity where a pipe doesn’t run gets packed tightly with rigid insulation. Then floorboards go over it, and that thermal layer disappears forever. This is your one chance to get the floor insulation right, because once those boards go down, it’s done.
For the floor system, insulated subfloor panels are used — a product borrowed from basement retrofit applications that combines oriented strand board with a bonded layer of rigid foam. In the third container, rigid insulation boards are laid directly on the existing plywood floor, then a final layer of plywood goes over the top of everything. It’s a slightly different approach, but the goal is the same: an uninterrupted thermal surface that keeps the floor from becoming a cold bridge in winter or a heat sink in summer. Getting this step right early saves you from comfort problems and energy inefficiency for the life of the building.
Pre-Fabricating Window Frames to Preserve Structural Integrity
Here’s something I found genuinely clever about this build process: the window frames are fabricated before the container walls are ever cut. Steel tubes are measured, marked, cut to exact lengths, and welded into simple rectangular frames off-site or ahead of time. That way, the moment you open up the container wall, you’re not leaving a raw, weakened hole — you’re immediately dropping a reinforcing frame into place.
The first cut doesn’t go perfectly. The gap between the frame and the wall ends up wider than intended, and welding closes it — but the lesson sticks. Slow down on the cuts, get the alignment right, and everything downstream gets easier. The second opening is noticeably cleaner. Mistakes in a container build don’t vanish; they get incorporated into how you approach the next step. That’s not a failure. That’s just the honest reality of building something you’ve never built before.
Reinforcing Every Opening: The Structural Engineering Reality
This is the part that surprises most people when they start researching container homes. Cutting an opening in a shipping container wall isn’t like cutting a hole in drywall. That steel skin is structural — it’s what keeps the box rigid. The moment you remove part of it, you’ve interrupted the load path, and you need a plan for redirecting that load around the opening.
Every window and door opening in this build gets framed out with steel tubing. For larger openings — like the ones for the sliding doors — the tubing is heavier gauge, and temporary supports go in during the cutting process to hold the structure together while the permanent reinforcement is being installed. The door frame corners get special attention, because that’s where stress concentrates as the structure settles under its own weight. Nothing is left to chance here. If you’re planning a container build and working with a structural engineer (which you should be, especially for permitted work), expect them to specify exactly what reinforcement is needed at every opening. Factor that steel into your budget.
The Design Evolution: From Square Tubes to Angle Steel Frames
Early in the build, the frames are made from simple square steel tubes. They work, but they demand tight tolerances and careful alignment — there’s not much forgiveness when something is slightly off. As the project progresses, the approach shifts to angle steel, and that small change makes a meaningful difference. The added flange gives pieces a natural registration surface, so things line up more easily, edges sit more naturally, and sealing gaps becomes straightforward.
This is a good reminder that a container build isn’t a fixed blueprint you execute from start to finish. It’s an evolving process. Each version of a detail carries something forward, drops something that didn’t work, and adjusts based on real-world performance. The design is figuring itself out as it goes — and that’s not a bug, it’s actually how good DIY problem-solving works. Build one, learn, refine, repeat.
Choosing Bi-Fold Doors for Indoor-Outdoor Flow
One of the most striking design decisions in this build is a pair of Jeld-Wen bi-fold doors set parallel to each other along one face of the container. When they’re fully folded back, the boundary between inside and outside essentially disappears. The interior and the Joshua Tree landscape read as one continuous space — which is exactly the point. This kind of indoor-outdoor connection is something you pay a significant premium for in high-end residential design, and here it’s achieved through thoughtful container modification.
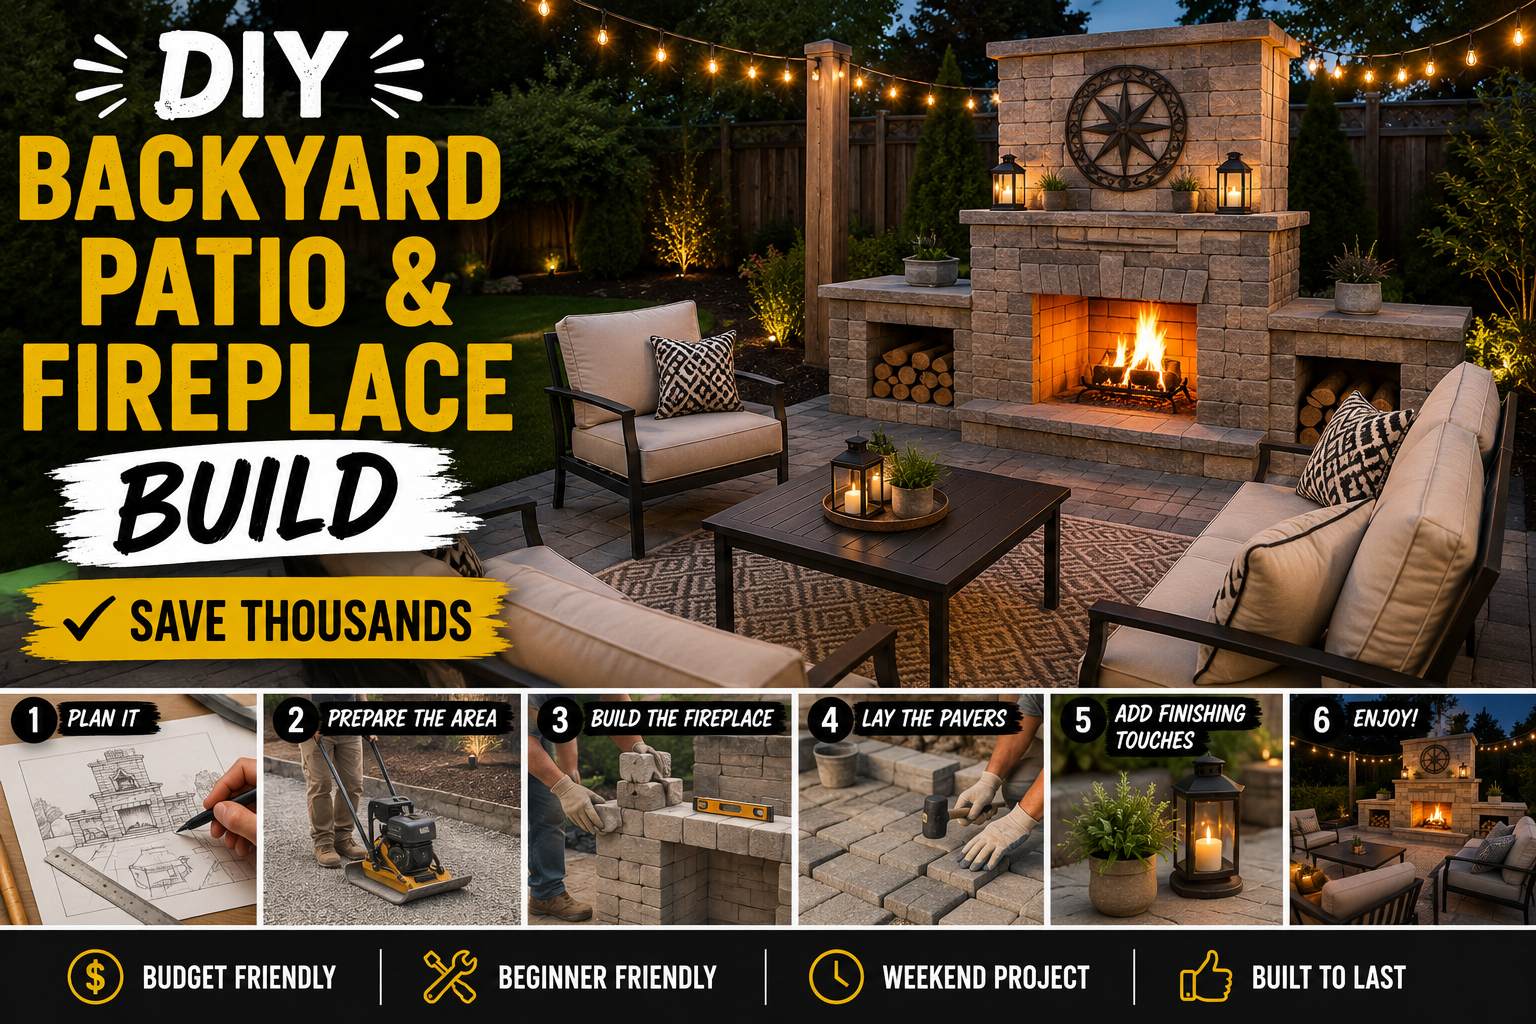
But that visual payoff comes with a structural cost. Every large glass opening means more steel removed, which means more reinforcement required. The team knows this going in, and makes the deliberate choice that light, transparency, and openness take priority over maintaining the original shell. It’s a values decision as much as a technical one — and it’s worth making consciously rather than discovering the consequences after the fact. If you love this kind of indoor-outdoor connection, also check out my post on DIY Backyard Patio & Fireplace Build: Save Thousands for ways to extend that living space further.
Using Spray Foam to Seal Gaps Between Steel and Framing
At the junction where door and window frames meet the corrugated steel of the container, you get these irregular voids — small gaps that don’t conform to any standard shape. Left open, they become pathways for air, moisture, and heat transfer. The solution here is fire-resistant spray foam, carefully injected into those irregular spaces to expand, harden, and seal everything in place.
The spray foam isn’t the finish layer — it’s a hidden structural element that locks itself into every gap between steel and frame. Fire-resistant formulation is specifically chosen here because welding continues after the foam goes in, and standard foam wouldn’t hold up to that heat. Once it cures, it’s invisible but fully present, doing quiet thermal and air-sealing work for the life of the building. For the broader insulation strategy, rigid insulation boards are used across most of the build for a simpler, more controllable installation that doesn’t require specialized equipment.
Interior Timber Framing: Building a Second Structure Inside the Steel Shell
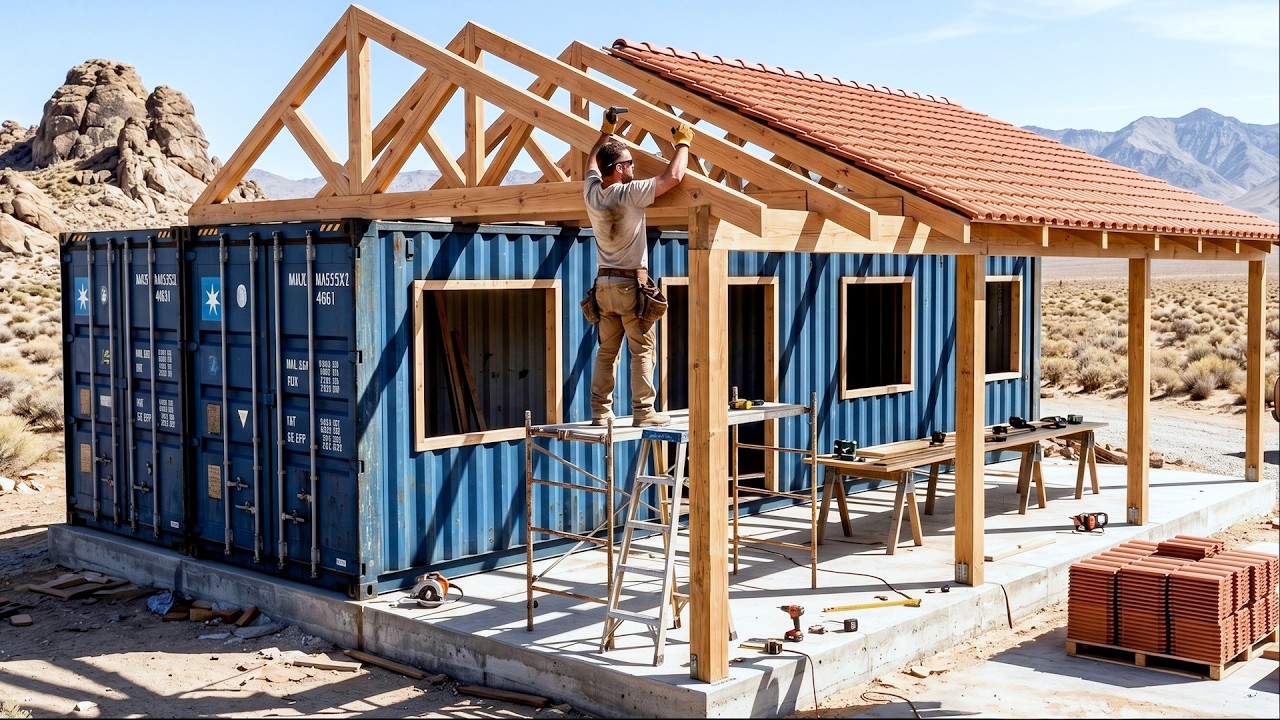
Once the openings are cut and reinforced, a second structural system starts going up inside the container: timber framing along the interior walls. This isn’t decorative — it’s doing real work. The container originally relied on its continuous steel skin for rigidity, but cutting those openings interrupted that skin. The timber frame helps compensate, spreading loads differently and restoring balance to the structure in a new way.
Attaching wood to steel is slow, stubborn work. Brackets get nailed to the lumber first, then fastened into the container’s steel frame with self-tapping screws — none of which go in easily. Extra blocking is added in locations that seem unimportant right now but will matter later when plywood, drywall, and finish layers need something solid to fasten to. Ceiling joists are measured and positioned but left unattached temporarily, because insulation, sprinkler lines, and other systems still need to pass through that space before anything gets permanently closed up. The sequence matters enormously in a build like this.
Installing the Fire Suppression Sprinkler System
In Joshua Tree, every new residential structure is required to include a fire suppression sprinkler system. This isn’t optional — it’s a permit requirement that has to be satisfied before anything gets closed up in the walls and ceilings. The sprinklers go in first, running through the structure while framing cavities are still accessible, before insulation or drywall covers everything.
This is exactly the kind of requirement that affects your container house building permit costs and timeline in ways that aren’t obvious upfront. Sprinkler systems for residential buildings typically run $1.50 to $4.00 per square foot installed, depending on your region and the complexity of the layout. On a 1,000-square-foot container home, that’s $1,500 to $4,000 added to your budget — before any other MEP (mechanical, electrical, plumbing) work. Factor it in early, because retrofitting after drywall is exponentially more expensive and disruptive.
Structural Engineer Requirements: Half-Inch Sheathing on All Interior Walls
The structural engineer on this project specifies half-inch plywood sheathing on all interior walls — and that specification is non-negotiable. It’s not a suggestion or a best practice. It’s a code-required structural element that has to be installed exactly as specified, period. The team cuts the plywood and nails it into place before drywall goes up.
This is a good example of why having a structural engineer involved early is worth every dollar. Their stamp is what gets your permitted container home approved, and their specifications tell you exactly what you need to build. Yes, their fees add to your upfront costs — typically $2,000 to $8,000 for a residential container project depending on scope and location — but without their involvement, you’re guessing at structural decisions that have real consequences, and most building departments won’t accept your plans without engineering review anyway.
Professional Drywall Crew: Speed and Precision That Matters
After all the rough-in work is complete, an experienced drywall crew comes in and transforms the framed interior in just two days. Installation, screwing, mud and tape, corner trim, and a full skim coat — all of it in 48 hours. What might take a DIYer weeks gets done with the kind of speed and precision that only comes from repetition.
I’ll be honest: this is one area where hiring out makes a lot of sense, especially on a permitted build where inspections are happening. A clean, professional drywall job makes every subsequent finish step easier and better-looking. The skim coat in particular — that final smooth layer over all the surfaces — is something that takes years to master, and the result of a professional doing it versus a first-timer is immediately obvious. Budget for this one. It’s worth it.
Septic System Design: A 1,500-Gallon Tank With a Creative Reuse System
Because this is a rural build without municipal sewer access, a septic system is required — and the one installed here is more interesting than your standard leach field setup. A 1,500-gallon concrete septic tank is craned into a carefully excavated hole. Inside, it separates waste into three layers: a floating scum layer of grease and soaps on top, settled sludge at the bottom, and effluent liquid in the middle.
Instead of sending that effluent to a conventional drain field, the system pumps it into planter beds, where it both waters and fertilizes the plants. A submersible pump triggered by a floating buoy inside the tank handles the transfer automatically — as the liquid level rises, the float lifts, hits a set point, and the pump switches on. It’s elegant, self-regulating, and genuinely smart design. It also slows how quickly the tank fills, extending the service interval. From a permit standpoint, alternative septic systems like this require additional engineering and approval, so budget extra time and fees if you’re considering something similar.
Securing Electrical Service: Checking Utility Availability Before You Commit
When the land is first purchased, even the real estate agent isn’t sure whether electricity or water service is available. Rather than assuming, the builder checks directly — using satellite imagery to identify a line of electrical poles running alongside the property, then contacting the utility company to confirm serviceability. The answer is yes, but with a catch: a new transformer needs to be installed on a nearby pole before a connection can be made.
This is the kind of detail that can completely blindside you if you don’t check before closing on land. Utility connection costs vary enormously. Running a new service line can cost anywhere from $10,000 to $50,000+ depending on distance and terrain. Knowing the answer upfront lets you negotiate on price, plan your budget accurately, or decide whether an off-grid solar-plus-battery setup makes more financial sense for your situation.
Seismic Anchoring: Connecting Containers to the Concrete Foundation
Building in a seismic zone — which most of California qualifies as — adds a layer of engineering requirements that directly affect your container house building permit costs. The solution here involves drilling precise holes through the steel container corners using a drill press, then running threaded rod through those holes and down into the concrete foundation below. Heavy steel plates are welded onto the container’s corner blocks, and anchoring epoxy is injected to lock the rod, steel, and concrete into a single unified system.
This isn’t optional in seismic country. The goal is to prevent the containers from shifting during an earthquake in a way that would shear the plumbing and electrical connections running between units. It’s a smart, engineered solution — but it adds labor, materials, and engineering review time to the project. If you’re building in a high-seismic zone, get your structural engineer involved early specifically around foundation and anchoring design. It’s much cheaper to plan it right than to retrofit it later.
Electrical Layout: Meter Panel, Battery Backup, and Underground Conduit
The house sits about 70 feet from the nearest utility pole, with the meter and main breaker panel positioned on the side of the structure closest to that pole. From there, all interior wiring branches out through the building, while the separate containers are tied together electrically through underground conduit running between units. A battery backup system is also installed to store solar energy and keep critical systems running during outages.
Underground conduit between containers is something to think carefully about during the foundation and site prep phase — it’s much easier to run conduit before the ground is fully graded and landscaped than to dig it up afterward. This kind of integrated planning is what separates a smooth build from one that requires expensive rework. For more on managing home power systems, my post on Home Backup Power System Installation: Save $10K DIY goes deep on the battery and solar side of things.
Galley Kitchen Design in a Narrow Container Space
Shipping containers are narrow — typically just under 8 feet on the interior, and once insulation and framing go in, you’re working with just over 7 feet from drywall to drywall. That’s tight, but it’s workable. A galley-style kitchen fits naturally into this footprint: all the cooking elements line up along one wall, while the opposite side becomes a pantry wall mixing open shelves and cabinets.
Everything in the kitchen comes from Home Depot, which turns out to offer more contemporary, space-appropriate options than expected. Once all the cabinets arrive, they’re laid out loosely to verify alignment with the design plan before anything gets fixed permanently — a simple step, but one that catches problems before they become expensive. The countertop is quartz, templated on-site using quarter-inch plywood so the fabricators can cut it precisely to the actual space rather than relying on drawings alone.
Hexagonal Tile Backsplash With an Intentional Asymmetric Layout
The kitchen backsplash uses hexagonal tile backsplash tiles, a design detail that’s been on the wishlist for a while. Rather than setting them in a strict, predictable grid, the layout shifts slightly off-pattern in a deliberate way. The hexagon shape already brings its own geometry to the wall, but breaking the pattern subtly adds movement and intention — the surface feels designed rather than default.
This is a good example of how a relatively inexpensive material choice can make a big visual impact when the installation is thoughtful. Hexagonal tiles aren’t significantly more expensive than standard subway tile, but they read as more sophisticated, especially in a small, modern space where every design decision is visible. If you like the idea of affordable upgrades that punch above their weight, my guide to Budget Kitchen Renovation Under $5000 is full of similar moves.
Custom Oak Pantry Shelving to Work Around a Tight Footprint
The pantry wall presents a specific challenge: at only about 12 inches deep, standard cabinet depths don’t work. The solution is to adapt upper cabinets — normally meant for wall-mounting above a counter — for use as pantry storage at a shallower depth. Custom shelving is then built from 3/4-inch solid oak to complement the cabinets and fill out the pantry wall with warmth and character.
Mid-installation, several electrical outlets land exactly where shelving was planned to go. Rather than fighting the layout, the team adjusts on the spot, working around each outlet to preserve both function and the clean visual flow of the design. When the oak goes in, it transforms the space — the warmth of the wood breaks up the white surfaces and softens the overall look without sacrificing the minimalist feel. It’s a balance that takes a small kitchen from clinical to livable.
Walk-Through Bathroom Design to Avoid Wasted Hallway Space
The bathroom in the main container is positioned between the kitchen and the bedroom and designed as a walk-through space. This is a deliberate move to avoid dedicating square footage to hallways — in a 7-foot-wide container, every inch counts. The layout keeps each transition smooth and connected, so the flow through the home feels natural rather than cramped.
Waterproofing is handled with a membrane applied over green board throughout the wet areas. Once cured, the walls are ready for thin-set mortar and mini hexagonal tile, laid carefully so the pattern comes together cleanly. The floor starts with cement board over the plywood subfloor for stability and moisture resistance before any tile work begins — a foundational step that most bathroom DIY tutorials rush past, but one that determines whether your tile floor holds up for 5 years or 25.
Glass Shower Enclosure Installation Over Finished Tile
Installing the glass shower enclosure requires drilling metal tracks directly through the finished tile walls — a step that has to be done slowly and precisely to avoid cracking the tile or throwing off the alignment. Once the tracks are secured, the glass panels are lifted in and set into the framing system. It’s a two-person job at minimum, and the kind of task where patience pays off visibly in the finished result.
The hardware choices matter here too — both functionally and aesthetically. Quality door hardware for a glass enclosure affects how the doors feel every time they’re used, and in a small bathroom where everything is visible and tactile, cheap hardware undermines an otherwise beautiful space. Spend appropriately on the pieces that get touched every day.
Tile-to-Wood Flooring Transition: Engineering a Seamless Blend
The flooring transition between the bathroom tile and the bedroom wood floor is one of the most technically interesting details in the entire build. Rather than a hard, obvious break between materials, the goal is a visual and physical blend — tile gradually meeting wood across the threshold so the two spaces feel connected while each maintains its own character. This requires precise coordination between two different flooring systems with slightly different thicknesses.
A half-inch plywood build-up is added over the subfloor in the wood flooring area to bring it flush with the tile surface. Extra sheets of hexagonal tile are then used as physical templates, laid over the wood boards so the wood can be cut to follow the exact outline of the tile pattern. The transition joint is filled with Fusion Pro grout in bright white — pre-mixed, stain-resistant, and slightly flexible to allow for seasonal movement. The result is a transition that looks intentional and refined rather than like two materials awkwardly meeting in the middle.
Smart Shower Control Panel Concealed Behind an Oak Bookshelf
The smart shower control panel is housed in the wall cavity on the bedroom side of the bathroom wall. Rather than leaving it exposed as an obvious utility element, a solid oak bookshelf is built and mounted over it, partially concealing the panel while adding functional storage to the bedroom. It’s a clean solution to an awkward problem — turning a mechanical necessity into a design feature.
This kind of creative integration is what separates a thoughtfully designed small home from one that just feels cramped. When you’re working with limited square footage, every element needs to do more than one job. Storage that also conceals mechanical systems, furniture that also defines space, materials that also provide insulation — these layered functions are the vocabulary of good small-space design.
Guest Bedroom Flooring: Wide-Plank Engineered Wood With a Whitewashed Finish
After the complex tile-to-wood transition in the main bedroom, the guest bedroom flooring is comparatively simple: wide-plank engineered flooring with a click-and-lock installation and a whitewashed French oak finish. No elaborate transitions, no custom templating — just a clean, modern floor that goes down efficiently and looks great.
The whitewashed finish is a smart choice for a desert environment. It reads light and airy, reflects natural light, and doesn’t show the fine dust that inevitably finds its way into a Joshua Tree home. Wide planks make the already-small space feel larger. And engineered flooring — unlike solid hardwood — handles the temperature and humidity swings of a desert climate without cupping or gapping. Practical beauty, not just aesthetic beauty.
Airbnb-Ready Storage: Designing for Guest Luggage From the Start
The design includes dedicated luggage storage for Airbnb guests — a specific functional need that gets built into the floor plan from the beginning rather than solved with furniture after the fact. This kind of use-case thinking during the design phase is what makes a short-term rental property actually work well for guests rather than just looking good in photos.
If you’re planning a container home with rental income in mind, think through the guest experience at every stage of design: where do bags go, where do coats hang, is there enough counter space in the bathroom, can two people move through the space without bumping into each other? These questions are much cheaper to answer on paper during design than in drywall and cabinetry after the fact.
Exterior Paint: Choosing PPG Timeless in Elegant Charcoal
For the exterior, PPG Paints Timeless Exterior in a color called Elegant Charcoal is selected from Home Depot, in a flat matte finish. A professional sprayer named Henry handles the application — someone with the equipment and experience to get even coverage on corrugated steel, which is an unforgiving surface for brush or roller work.
The color choice is bold and intentional. Charcoal reads as architectural and modern against the desert landscape, and the flat matte finish absorbs light rather than reflecting it, giving the containers a quieter, more considered presence. For a structure that already has an industrial character, the right paint color is what transforms it from “modified shipping containers” to “designed home.” It’s one of the highest-impact, lowest-cost decisions in the entire build.
Tips and Best Practices for Container Home Builds
Call your county planning department before you buy land. Container house building permit costs and feasibility vary enormously by jurisdiction. Some counties have clear processes; others have never seen a container home application. Know what you’re getting into before you commit to a parcel.
Budget for engineering early. Structural engineering review is required for permitted container builds in most jurisdictions, especially in seismic zones. Get your engineer involved at the design stage, not after you’ve already started cutting steel. Their input will shape everything from opening placement to foundation design.
In California, plan for one-trip containers. Used containers may not meet code for residential construction. One-trip units cost more, but they’re the right tool for a permitted, livable building. Factor that premium into your budget from day one.
Sequence your rough-in systems carefully. Sprinklers, electrical, insulation, and framing all have to happen in the right order. Closing up walls before systems are inspected can cost you enormously in rework. Work with your inspector to understand the inspection sequence before you start.
Don’t underestimate the value of professional subcontractors for specific phases. Drywall, sprinkler installation, and glass shower enclosures are areas where professional speed and precision pay for themselves — especially on a permitted build where inspection quality matters.
Design for your use case from day one. Whether it’s Airbnb guests, full-time living, or a weekend retreat, the decisions that feel small during design — luggage storage, bathroom flow, power backup — have an outsized impact on how the finished home actually functions.
Frequently Asked Questions
How much do container house building permits actually cost?
Container house building permit costs typically run 1% to 3% of your total project valuation, plus separate fees for electrical, plumbing, mechanical, and plan check review. On a $200,000 build, expect $2,000 to $6,000 in permit fees alone, not counting engineering costs. Always call your local building department for current fee schedules — they vary significantly by county and state.
Do I need a structural engineer for a container home?
In almost every jurisdiction that permits container homes as residential structures, yes. A structural engineer’s stamp is required on the plans, and their specifications — like the half-inch sheathing requirement in this build — are non-negotiable conditions of approval. Budget $2,000 to $8,000 for engineering depending on project scope and complexity.
Are shipping containers good for building homes in seismic zones?
They can be, but they require specific seismic anchoring to the foundation — typically threaded rod through the corner blocks, secured with anchoring epoxy into the concrete below. This prevents the containers from shifting during an earthquake and shearing the mechanical connections between units. Your structural engineer will specify exactly what’s needed for your seismic zone classification.
Can I use any shipping container to build a home, or does it have to be a specific type?
In California and many other states, residential container builds require one-trip containers — units that have only made a single voyage and whose cargo history is known and clean. Used containers with unknown histories may contain chemical residues and typically won’t pass inspection for residential use. Always check your local code requirements before purchasing containers.
My Final Thoughts
Building a container home is genuinely one of the most complex residential DIY projects you can take on — and one of the most rewarding. The combination of fabrication, structural engineering, creative design, and systems integration is unlike anything else in the DIY world. Understanding container house building permit costs upfront, working with a structural engineer from day one, sequencing your systems correctly, and making deliberate design decisions throughout the process are what separate a successful build from a stalled one.
If this project inspired you and you want to explore more alternative building approaches, I’d love for you to read my guide on Tiny House Build Under $10,000: Full DIY Guide for $6K — it covers a very different scale and budget but shares the same spirit of building smart and building intentionally. Drop your questions in the comments below — I read every one and I’m happy to help you think through your own build.