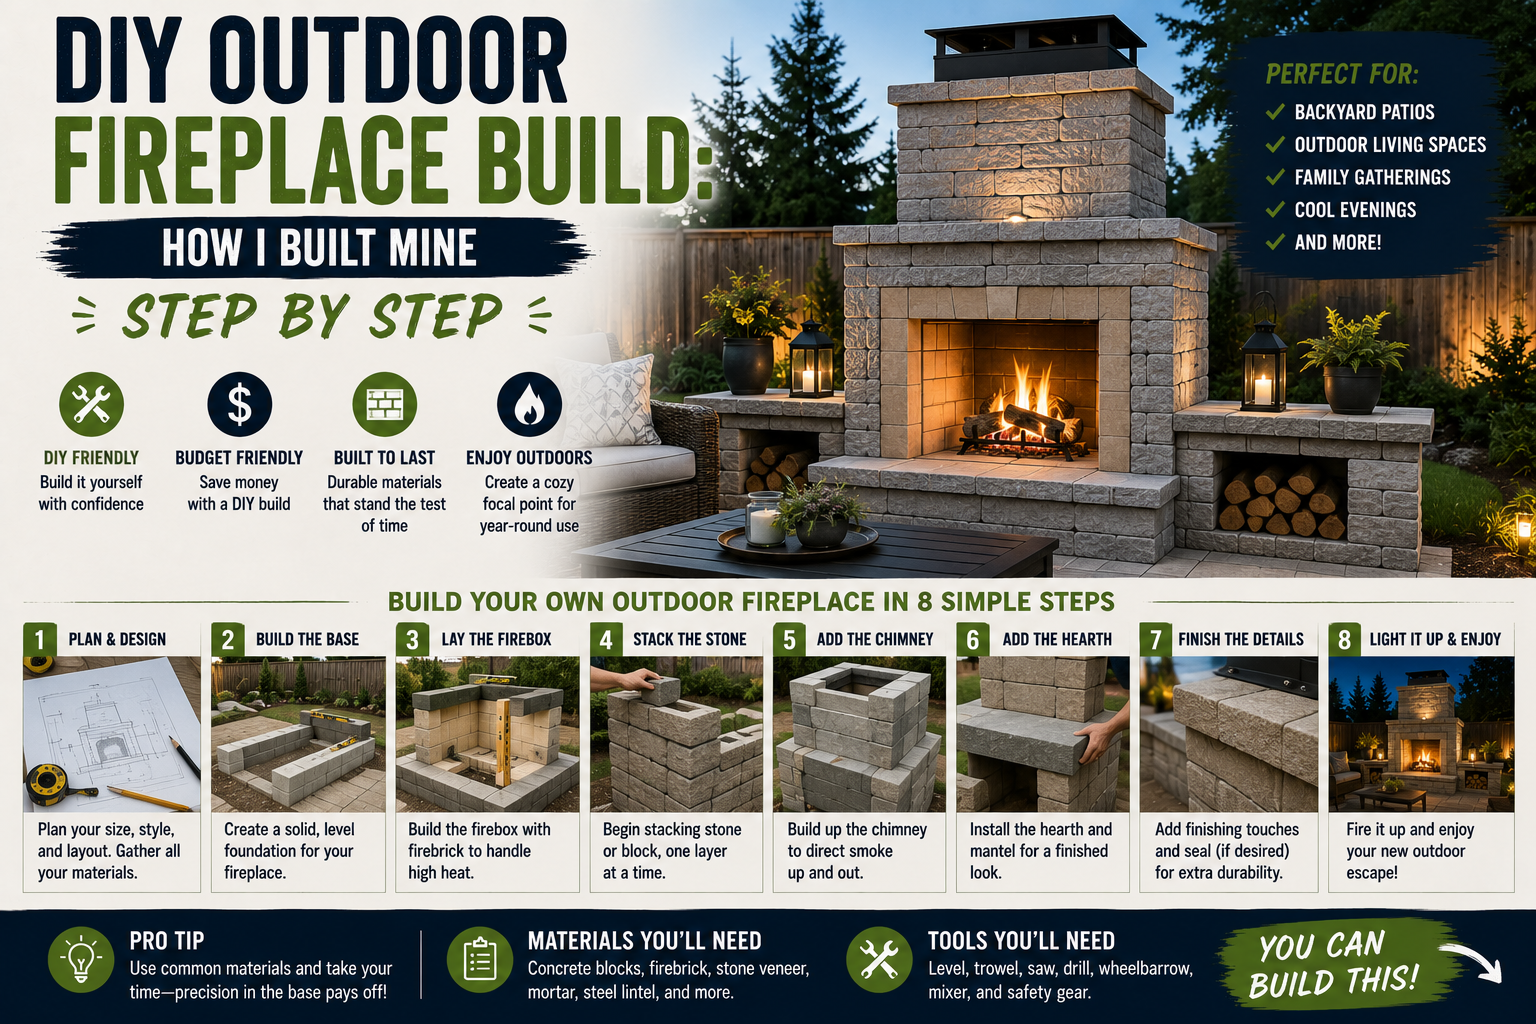
I’m Michael, and this is one of those projects I honestly wasn’t sure I could pull off — a full DIY outdoor fireplace build from the ground up. No prior experience with masonry, no contractor, just me, my wife, a stack of plans, and a whole lot of weekends. The finished fireplace stands 14 feet tall, features a 43-inch firebox, gas starter, built-in lighting, and an outdoor TV setup — and I built every bit of it myself. If you’ve been dreaming about an outdoor living space with a real fireplace as the centerpiece, I’m here to tell you it’s absolutely doable.
This project started in November 2019 right after we bought the house and wrapped up around May 2020 — so about six or seven months from start to finish. The reason it took that long? I could only work on it on weekends, and a frustrating number of those weekends were wiped out by rain since I was building through the winter months. I finally sat down in January 2022 to edit all the footage and put this together, so what you’re getting here is a complete breakdown of everything I learned. If you’re into ambitious backyard builds like this, you might also want to check out my guide on the DIY backyard patio and fireplace build where I go deeper on planning the overall outdoor space.
Let me walk you through every step — from the very first shovel in the ground to the last piece of veneer stone going on the chimney. I’m going to cover each level and each phase exactly as I did it so you can follow along and build your own.

Finding and Adapting Plans for the Build
Before I touched a single shovel full of dirt, I needed a plan. I found my fireplace plans over at diyoutdoorfireplaces.com — a site run by a guy named Dan at Backyard Flare LLC. I purchased a set of plans that came with a full material list, an approximated cost breakdown, and a row-by-row guide for laying each cinder block. The plans are genuinely well done and walk you through exactly how each block is positioned at every level.
The catch was that Dan’s plans only went up to about six feet — roughly where the mantle sits — because they weren’t designed to connect with a large covered pergola like mine. I reached out to Dan directly, and he was incredibly helpful. His advice was simple: take the repeating level just below the chimney section and keep stacking it upward until the chimney clears the top of the pergola. That’s exactly what I did, and it worked out perfectly. The final fireplace uses approximately 360 cinder blocks total. It’s a big build, but when you take it one level at a time, it’s completely manageable.
Coordinating With the Pergola Team
One of the trickiest parts of this whole project was the timing. At the same time I was starting the fireplace, a crew was installing the covered pergola off the back of the house. That meant I had to coordinate everything — the footprint, the dimensions, the alignment — so the fireplace would fit precisely within the pergola footprint when both were done.
I used string guides to establish exactly where I needed to be and made sure the fireplace was perfectly parallel with the pergola structure. By the end, I was within about three inches of where the top of the pergola structure landed — close enough that the metal flashing between the chimney and the pergola roof created a watertight seal. Getting this coordination right early saved me from a major headache later, so if you’re building a fireplace within an existing or planned structure, measure obsessively and set up those string lines before you pour a single drop of concrete.
Digging the Footing and Pouring the Foundation
Every solid fireplace starts with a solid footing, and ours was no different. The ground in my area in North Carolina is mostly heavy clay, which made digging slow going. I used a shovel and a wheelbarrow to dig the entire footing by hand — not the most glamorous part of the job, but a necessary one. The footing box ended up being about 12 inches deep on the back side and about 8 inches deep on the front.
Once the framework was built and my wife was inside tying rebar, I rented a concrete mixer from Home Depot to make the pour manageable. It took 34 bags of 60-pound concrete to fill that space completely. At the same time, the pergola crew was clearing the topsoil and preparing the area for a sand base and travertine pavers, so things were happening on all fronts simultaneously. Getting the footing level and square was critical here — everything that followed depended on it.
Laying Rows 1 and 2 — The Foundation Rows
Once the footing cured, I started laying cinder blocks. The first two rows are the most important of the entire build. If these rows aren’t perfectly level in both directions, every row above them will compound the error, and by the time you’re 10 rows up, you’ll have a real problem. I took my time here, checked level constantly, and didn’t move on until I was confident.
These first two rows used approximately 60 to 64 cinder blocks. I also made sure to account for the hearth design in row two, which required a slightly different layout than a standard row. Before capping off this section, I also ran the low-voltage lighting wire that I knew I’d want later — much easier to do it now than try to fish wire through a completed structure later. This is also when I began running the wiring for the front accent lights that would eventually tie into the house’s front landscape lighting transformer.
Installing the Front Lights Before Capping Off
I always knew I wanted lights on the front face of the fireplace, and the time to install them is before you seal everything up — not after. I ran long low-voltage cable all the way back from the front of the house transformer to the fireplace location and installed two lights directly into the block face before capping that section. These lights are wired into the same circuit as the landscaping lights on the front of the house, so they run on a timer and automatically shut off around 1 a.m. every night.
There’s also an outdoor outlet on the back side of the fireplace that an electrician tapped into from an existing outlet, then ran up and around through the pergola structure. That outlet powers the outdoor TV we mounted above the mantle. If you’re planning any electrical at all — lights, TV, outlets — run your wire before you build around it. Trust me on that one.
Building Rows 3 Through 5 — Forming the Firebox Walls
With the foundation rows solid and the wiring in place, I moved on to rows three through five. These rows form the back and sides of the firebox cavity itself. There’s nothing dramatically complicated about these rows compared to the foundation — the key is keeping everything plumb and level as you go up, and making sure your mortar joints are consistent.
The mortar I used throughout the main block structure was Type S mortar, which is rated for exterior masonry. Each row got checked with a level before I mixed the next batch of mortar. The firebox cavity was taking shape by now, and at 43 inches wide, it’s genuinely large — big enough to throw serious logs on and generate real heat for the outdoor space.
Row 6 — Forming the Top of the Firebox With Angle Iron
Row 6 is where things got a little more technical. This is the row that closes off the top of the firebox opening, and it requires cutting and fitting two pieces of 2-inch angle iron to span the front opening and support the blocks above. The angle iron acts as a lintel — it carries the weight of everything above while leaving the firebox opening clear below.
Before I could set the angle iron and continue stacking, I also had to deal with the structural trough inside the block cavity. I cut a small section out of each adjacent cinder block to allow rebar to pass through horizontally, then cut a piece of 2×8 lumber to the exact interior width to act as a form. I used a car jack to hold the 2×8 in place while I poured concrete into the trough — this created a solid reinforced beam running across the top of the firebox. The rebar also extended all the way down to the footing for added strength. I let this cure for 24 hours before removing the jack and board, and it came out solid.
Rows 7 and 8 — Beginning the Chimney Transition
By the time I reached rows 7 and 8, the build was transitioning from firebox structure into chimney formation. I had initially labeled this as row 6 during filming but corrected it — these are rows 7 and 8. The key task at this stage was setting two additional pieces of 24-inch angle iron on each side to define the chimney flue opening. These angle irons create a 16-inch square opening that becomes the chimney flue running all the way to the top of the structure.
Getting these angle irons level was tricky because they sit on a very thin bed of mortar, and the metal tends to lift the blocks slightly rather than letting them settle. I had to work carefully and check level repeatedly. This stage is where the fireplace really starts to look like a fireplace rather than just a pile of block.
Rows 9 and 10 — Establishing the Chimney Flue
Rows 9 and 10 were about solidifying the chimney structure. I waited about 48 hours after the angle iron work to let everything set up firmly before loading more weight on top. At this point, the 16-inch square chimney flue was clearly defined, and the surrounding block was just filling in the mass of the fireplace structure around it.
The layout at this stage had two blocks on each side of the chimney void, with the corners filled in around the flue opening. The space outside the flue on the sides of the chimney mass isn’t structural in the traditional sense — it’s there to create the visual bulk of the chimney and to anchor the veneer stone later. I kept my shovel and mixing tools close because the mortar work was constant at this point.
Rows 11 Through 13 — Pushing Up Through the Pergola Height
Rows 11, 12, and 13 were all about height. By row 12, I had a six-foot ladder in play to reach the work surface — a good sign that the fireplace was getting impressively tall. These rows are essentially repeating the chimney column pattern established below, just continuing upward until the chimney clears the pergola roofline.
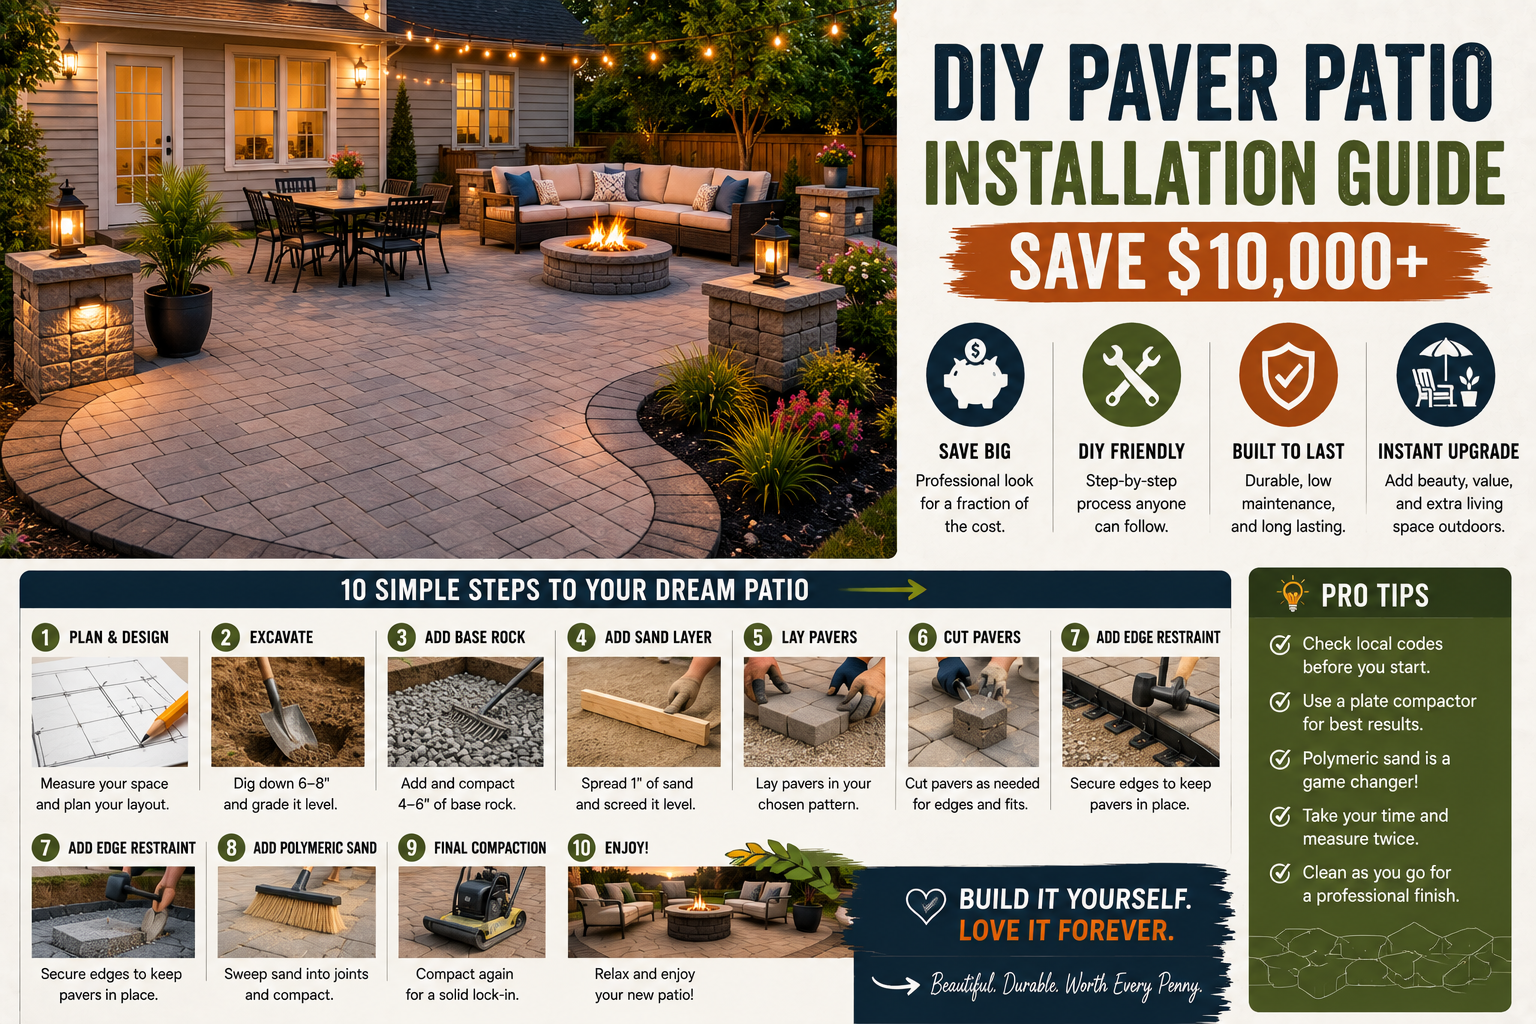
I followed Dan’s advice here exactly: take the repeating chimney-level pattern and stack it until you reach the height you need. The work itself is repetitive at this stage, but that’s actually a good thing — the pattern is established, and you’re just executing. Keeping the structure plumb as it climbs is the main concern. I used a long level and checked both faces regularly as I went up. If you enjoy big backyard builds, you might also find my write-up on DIY paver patio installation useful for planning the surrounding hardscape.
Row 14 — The Inspection Snag and Pivoting to Gas
Row 14 came with an unexpected complication. An inspector came by to check the covered pergola and noticed the fireplace — which hadn’t been permitted separately from the pergola project. He required it to be permitted on its own, and when I went through that process, he informed me he couldn’t approve it as a wood-burning fireplace. The only way to get his sign-off was to designate it as a gas-burning unit.
I finished row 14 and capped the top as directed, and then proceeded with the rest of the build knowing I’d have a gas system as the official fuel source — though I designed it to be a wood-burning fireplace in practice, with the gas line serving as a starter. The gas line comes in underground from the side of the house, where there’s a valve with a pressure regulator, and runs to a shutoff valve accessible inside the firebox. To start a fire, I just open the valve, light it, throw on some logs, and shut the gas off once the wood catches. It makes starting a fire incredibly fast and simple.
Applying the Scratch Coat
Before any veneer stone could go on, the entire cinder block surface needed a scratch coat. I learned pretty quickly that you can’t just mortar veneer stone straight onto bare cinder block — it won’t bond properly. The scratch coat process involves mixing up a thin slurry of water and mortar (I used Type S mortar throughout) to about a grout-like consistency, then spreading it over the block surface and dragging a trowel across it to create a rough, textured surface.
That roughed-up texture is what gives the veneer mortar something to grip onto. I started on the back side of the fireplace intentionally — since this was my first time doing any kind of masonry veneer work, I wanted to practice where mistakes would be less visible. My wife jumped in on this phase too, and having a second set of hands made the work go considerably faster. We let the scratch coat dry overnight before starting the veneer.
Laying Fire Brick Inside the Firebox
While the scratch coat was drying on the exterior, my wife and I worked on lining the firebox interior with fire brick. This is a non-negotiable step — standard cinder block cannot withstand the sustained heat inside a working firebox, and using regular mortar in this area is equally dangerous because it will crack and fail under heat.
The mortar for the fire brick is a special refractory mortar rated for high-temperature applications — you can find it specifically labeled for firebox use. My wife applied the mortar to each fire brick before pressing it into place. The fire brick lining protects the structural cinder block behind it and creates the proper interior surface for a functional, safe firebox. Don’t skip this step or try to substitute regular materials here.
Installing the Veneer Stone
With the scratch coat ready and the firebox lined, it was time for the most visually transformative phase — the veneer stone. This is what takes the fireplace from a pile of gray cinder block to a beautiful outdoor feature. I bought the veneer stone and worked out a random pattern to keep the look natural and varied, which takes a little planning before you start setting stone.
The process is mortar on the scratch coat, press the stone in firmly, and work your way across and upward. I practiced the random ordering pattern on the back side first and got comfortable with it before moving to the front faces where the work would be most visible. By the time spring arrived and the weather finally cooperated, I was able to get the veneer on in longer dedicated work sessions. The transformation when the stone goes on is dramatic — this is the moment the whole project really comes to life.
Installing the Mantle
The mantle above the firebox opening is a faux mantle — it’s not structural, just decorative — but it makes a huge visual difference and completes the fireplace look. I roughed up the surface, applied construction adhesive, and hung it on a French cleat mounted to the face of the fireplace. It’s been hanging for over two years without any movement or issues.
I also applied a coat of Pauley’s (a wood sealer/hardener) to protect the mantle from outdoor exposure, and it has held up perfectly through multiple seasons. The mantle gives you a surface for decor and, in my case, provides the base for mounting the outdoor TV above the firebox. Just make sure whatever you mount up there is rated for outdoor use — or at minimum, keep a weatherproof cover on it. I learned the hard way that an uncovered TV in an outdoor space does not survive. Now I use a TV cover from Amazon and it’s been perfect ever since.
Adding the Gas Starter Line
The gas setup for this fireplace was something I had actually planned for when the house was originally built. I had a natural gas stub-out installed on the side of the house at that time, knowing I’d eventually want either an outdoor kitchen or a fireplace. When the fireplace project came along, I hired a licensed plumber to run the gas line underground from that stub-out all the way to the fireplace location.
The line terminates at a shutoff valve with a pressure regulator on the house side, and then runs to a second valve accessible inside the firebox cavity. Per code in my area, the plumber included a loop in the line near the firebox — technically we could have made a shorter, more direct run, but this is what was required to pass inspection. To use it, I reach in, open the valve, let the gas flow, and ignite it. Once the logs are burning well, I shut the gas off. It makes every fire night quick and easy.
Setting Up the Outdoor TV and Outlet
One of the things that makes this outdoor space feel like a real extension of the living room is the outdoor TV. An electrician tapped into an existing outlet on the back of the house, then ran the wire up through the pergola structure and around to an outlet positioned just above the mantle on the fireplace face. This gave me a dedicated power source right where I needed it.
The TV mounts above the mantle and has a weatherproof cover that I found on Amazon — and I cannot recommend having one of those highly enough. The first TV I put out here didn’t have a cover, and it didn’t last. The covered one has been going strong ever since. With the fireplace, the TV, and the covered pergola overhead, this space genuinely functions like an outdoor living room — great for sports, movies, or just sitting by the fire on a fall evening.
Tips and Best Practices for Your DIY Outdoor Fireplace Build
Start with professional plans. Don’t try to design the block layout from scratch. Purchased plans gave me the row-by-row layout, material quantities, and structural logic that made this project possible as a first-time builder. Adapt them to your situation, but start with a solid foundation.
Get your footing right and let it cure completely. The footing is the single most important part of the build. A level, properly reinforced footing makes every row above it easier. Don’t rush the cure time — 24 to 48 hours minimum before loading weight on concrete work is a good rule throughout the build.
Use the right mortar for the right application. Type S mortar for the exterior block structure, refractory mortar for the firebox interior. Using the wrong mortar in the firebox is a safety issue, not just a structural one. The scratch coat slurry consistency also matters — too thick and it won’t bond well, too thin and it slides right off the block.
Run all wiring before you build around it. Lights, outlets, TV power — figure out where you want everything and run the wire before those sections are enclosed. I ran low-voltage cable for the front lights during the first two rows, and the electrician ran the outlet wire before the pergola was fully closed in. Retrofitting wire through completed masonry is a nightmare.
Plan for the chimney height relative to any overhead structure. If your fireplace is going under a pergola, pavilion, or roof, the chimney has to clear that structure. Use string lines and measurements to figure out your target height before you start building so you know exactly how many rows you need to add above the plans’ standard chimney height.
Coordinate permitting early. My inspection snag at row 14 could have been avoided with a separate permit pulled at the very beginning of the project. Check with your local building department before you start, especially if the fireplace is connected to or near any other permitted structure.
Protect any outdoor electronics properly. A weatherproof TV cover is not optional — it’s mandatory. Same goes for any outlets: use in-use covers rated for outdoor wet locations. The elements will find any weakness you leave uncovered.
Frequently Asked Questions
How much does a DIY outdoor fireplace build cost?
Costs vary widely depending on size, veneer material, and whether you hire out any portion of the work (gas line, electrical). For a build of this scale — roughly 360 cinder blocks plus veneer stone, a gas line, electrical, and materials — you’re looking at several thousand dollars in materials alone. Doing the labor yourself is where the major savings come from. Dan’s plans include an estimated materials cost that can help you budget before you start.
Do I need a permit to build an outdoor fireplace?
In most jurisdictions, yes — especially for a wood-burning or gas appliance. My project required a separate permit from the pergola, and the inspector required it to be designated as a gas unit rather than wood-burning. Check with your local building department early in the planning process. It’s much easier to pull a permit before you start than to deal with a stop-work situation mid-build.
What kind of mortar do I use for a fireplace build?
For the exterior cinder block structure, use Type S mortar — it’s rated for exterior masonry and load-bearing applications. For the interior firebox, use refractory mortar (also called fireplace mortar or high-temperature mortar) that’s specifically rated for sustained heat exposure. Standard mortar will crack and fail inside a working firebox. The scratch coat for veneer prep uses a thinner slurry mix of the same Type S mortar.
Can I build an outdoor fireplace if I’ve never done masonry before?
Absolutely — this was my first masonry project ever. The key is starting with good plans, taking it one level at a time, and not rushing the curing stages. The hardest parts are the precision work early on (footing, first two rows) and the more technical row 6 angle iron and trough pour. Everything else is repetitive and gets easier as you go. If I can do it with no prior experience, you can too. For another confidence-building project before tackling something this big, check out my DIY smokeless fire pit concrete build — it’s a great starting point for working with masonry materials outdoors.
Final Thoughts
This DIY outdoor fireplace build is hands-down one of the most rewarding projects I’ve ever completed. From the first shovel in the clay to the last piece of veneer stone, every step taught me something and pushed me further than I thought I could go as a first-time builder. The result is a 14-foot, 43-inch firebox fireplace that turns our backyard into a genuine four-season outdoor living space — and I built it myself for a fraction of what a contractor would have charged.
If you’re on the fence about tackling something like this, I want to encourage you to go for it. Get the plans, pull the permit, dig the footing, and take it one block at a time. The project will take longer than you expect and the weather will not cooperate on half your available weekends — but when it’s done, you’ll have something you built with your own hands that will last decades. Drop your questions in the comments below, and if you want more outdoor build inspiration, my full guide on patio fire pit backyard ideas and DIY stone builds has plenty to keep you busy.