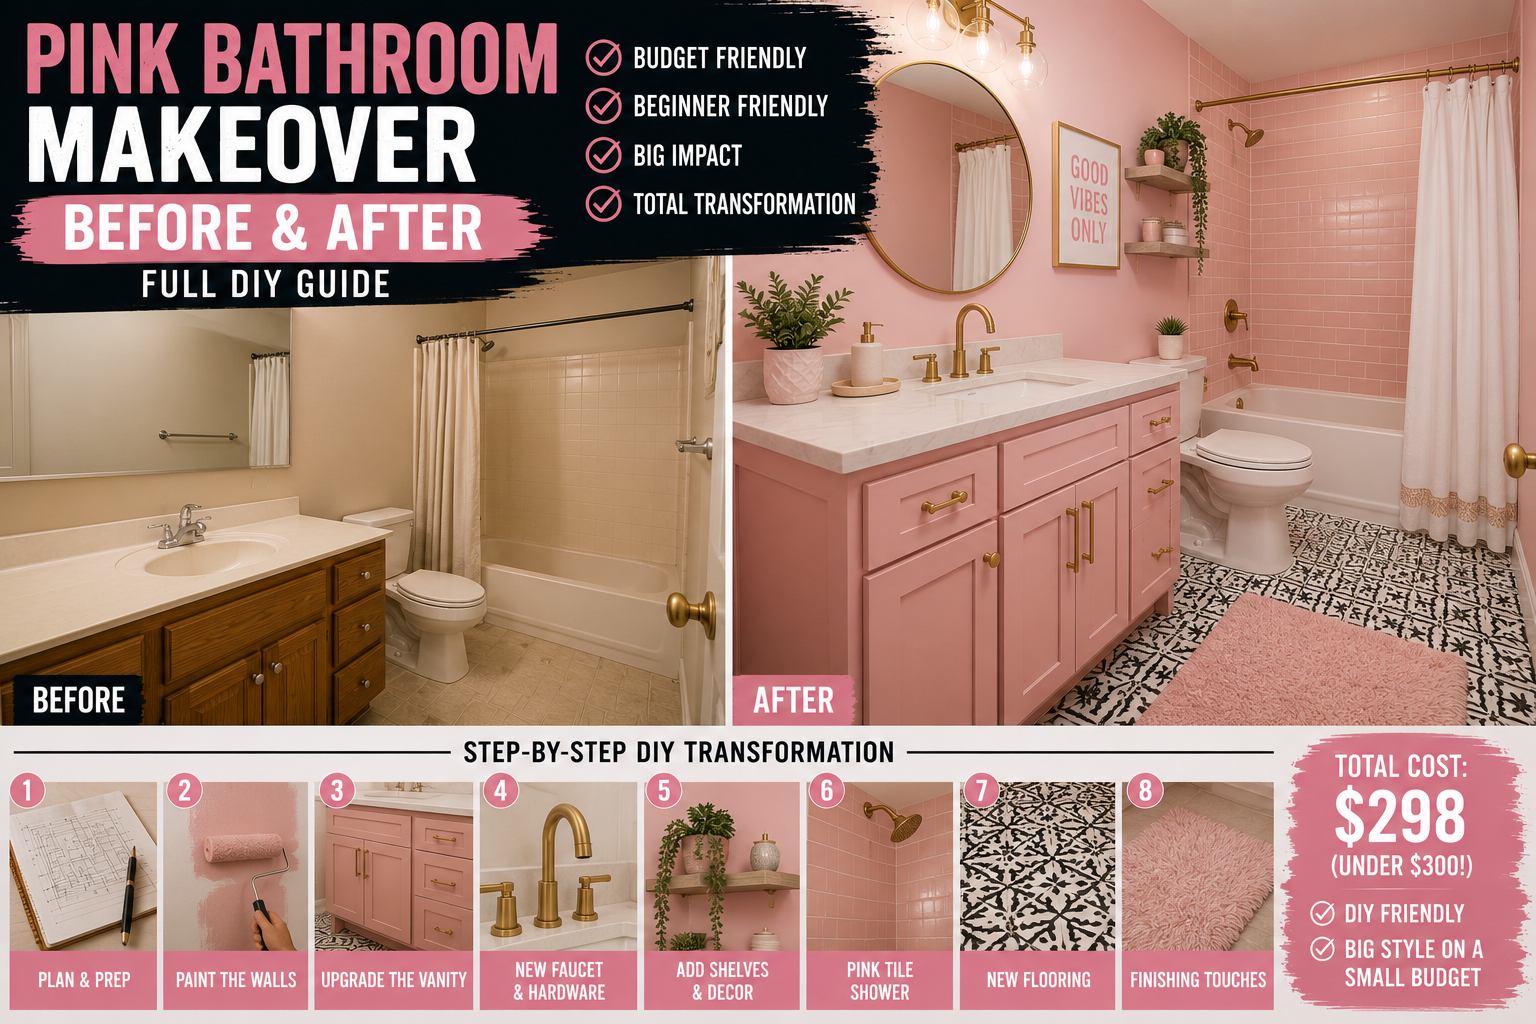
If you’ve ever walked into a bathroom covered floor to ceiling in Pepto-Bismol pink, you know exactly the kind of motivation that’ll send you straight to the hardware store. That’s where I found myself with this bathroom makeover — staring down walls that were somehow even worse in person than they looked on camera. This pink bathroom makeover before and after is the full story of how I took a dated, over-painted, builder-grade bathroom and turned it into something I’m genuinely proud of, all without gutting it completely.
This was a multi-day project that covered everything from painting and lime washing to cabinet updates, a wood accent wall, new hardware, and smart light switches. I tackled it step by step, rolling with the hiccups along the way (and there were plenty). If you’re staring down a similar situation and wondering where to even start, I’m going to walk you through everything I did — the wins, the workarounds, and the little hacks that saved me a ton of time. For more budget-friendly bathroom inspiration, check out my post on bathroom renovation without replacing fixtures that covers a $1,750 makeover using the same approach.
This project took three full days of work, and I’m breaking it all down below so you can follow along and do the same in your own space. Let’s get into it.
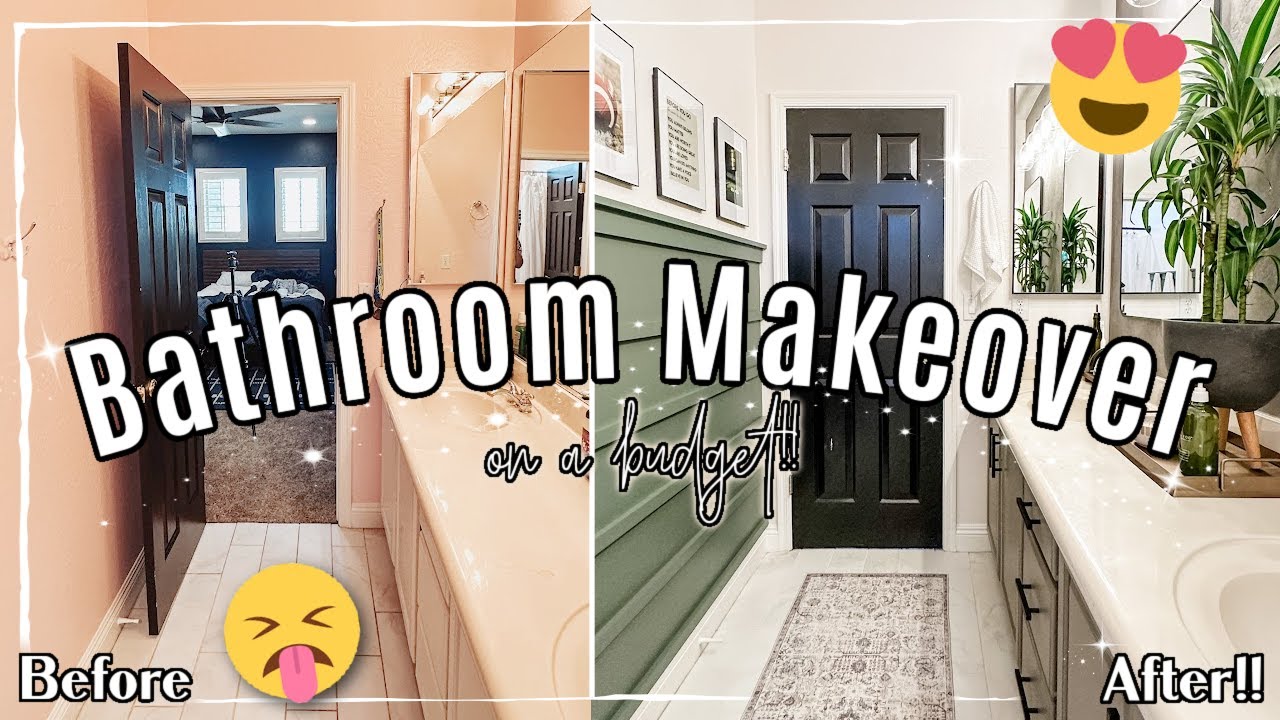
Day 1 Prep: Demo, Wall Repairs, and Getting the Space Ready
Before I could start the fun stuff, I needed to set myself up for success. The day before I officially started filming, I went through and did a full demo and prep session on the bathroom. That meant taking the door out between the shower area and the vanity, removing the old light fixture, pulling down the mirror, and taking off all the hardware. Then I went through every wall and repaired any damaged areas so I’d have a smooth surface to work with going into day one.
Doing all that grunt work upfront was 100% worth it. It meant that when I came back the next morning, I could actually hit the ground running instead of spending the first half of the day just patching holes. If you’re planning a bathroom makeover of your own, I can’t recommend this approach enough — front-load the messy prep so your “real” work days stay productive.
Installing the Light Fixture First
The very first thing I tackled on day one was getting a light fixture back up on the wall. Working under a small tool light is workable, but it’s not great, and I knew I’d be doing detail painting work all day. Getting real light in the space was a priority. The fixture I put up wasn’t the final one — I had another one on the way that would fit the space better — but it did the job while I worked.
One thing worth mentioning: I had originally planned to have two light fixtures, one on each side of the vanity wall. But when we were doing demo the day before, we discovered that the AC line runs straight up through the wall right where the second box would have gone. Thankfully I caught that before cutting any holes. Instead, I pivoted to using one slightly longer fixture that would look great with two mirrors — and honestly, it ended up working out better anyway.
Spray Painting the Medicine Cabinet Frame
Next up was updating the medicine cabinet. Ideally, I would have loved to rip it out and replace it with open shelves, but the closed storage in this cabinet gets used constantly, so I made the practical call to keep it and just refresh the look. I taped everything off around it and used spray paint on the frame edge to give it a fresh, updated finish.
I’d tried doing this same thing in another bathroom using black rub and buff, and it gave me nothing but headaches. Skipping straight to spray paint this time was absolutely the right call — faster, cleaner, and the result looked far more polished. One key tip: do the spray painting before you paint the walls, not after. Any overspray that lands on the wall just gets covered up when you roll. I learned that the not-so-fun way and can confirm — paint right over it and no one will ever know.
Painting Over the Pink Walls With Benjamin Moore Alabaster
This was the most time-consuming part of the entire day, but also the most satisfying. I went with Benjamin Moore Alabaster to replace the pink — a soft, neutral off-white that I’ve used in multiple areas of the house. It’s the perfect backdrop for almost any space, and best of all, I was using up paint I already had on hand, so there was zero extra cost for this part of the makeover.
One thing I want to flag: there’s both a Sherwin Williams Alabaster and a Benjamin Moore Alabaster, and they are not the same color. The Sherwin Williams version pulls slightly yellow, while the Benjamin Moore version is more neutral and clean. I’ve made the mistake of mixing them up before — make sure you specify which one you want at the paint store. Also, cutting into corners and edges without tape will save you enormous amounts of time once you practice it. I used to tape everything and it was eating up hours on every project. Learning to cut in freehand was a game changer.
Dealing With Overpainted Surfaces and Sloppy Previous Paintwork
Here’s where things got a little frustrating. The previous owners had painted this bathroom themselves but weren’t exactly careful about it. There was pink paint along the ceiling line, on the tub surround, and even on the window ledges. Once I started painting the walls white, every pink splatter and overpaint mark became painfully obvious. Pink on white just doesn’t hide.
I tried scraping the windowsill to get the paint off, but it started pulling up the finish underneath, so I pivoted — painted carefully around the edge instead, and it actually looked great. That’s my reminder to myself (and to you) that every project comes with hiccups. You adapt, adjust, and keep moving. Don’t let perfectionism slow you down when a practical solution is right in front of you. The two-coat process was necessary here because the original paint had such a glossy sheen that the new paint didn’t adhere as well on the first pass.
The Toilet Painting Hack That Saves So Much Time
This is one of my favorite little tricks that I’ve been using for years and it never fails to be useful. When you’re painting near a toilet, just grab a trash bag and pull it over the tank. That’s it. You can get right up close to the edges and paint without worrying about getting anything on the porcelain. Simple, free, and it works perfectly every time.
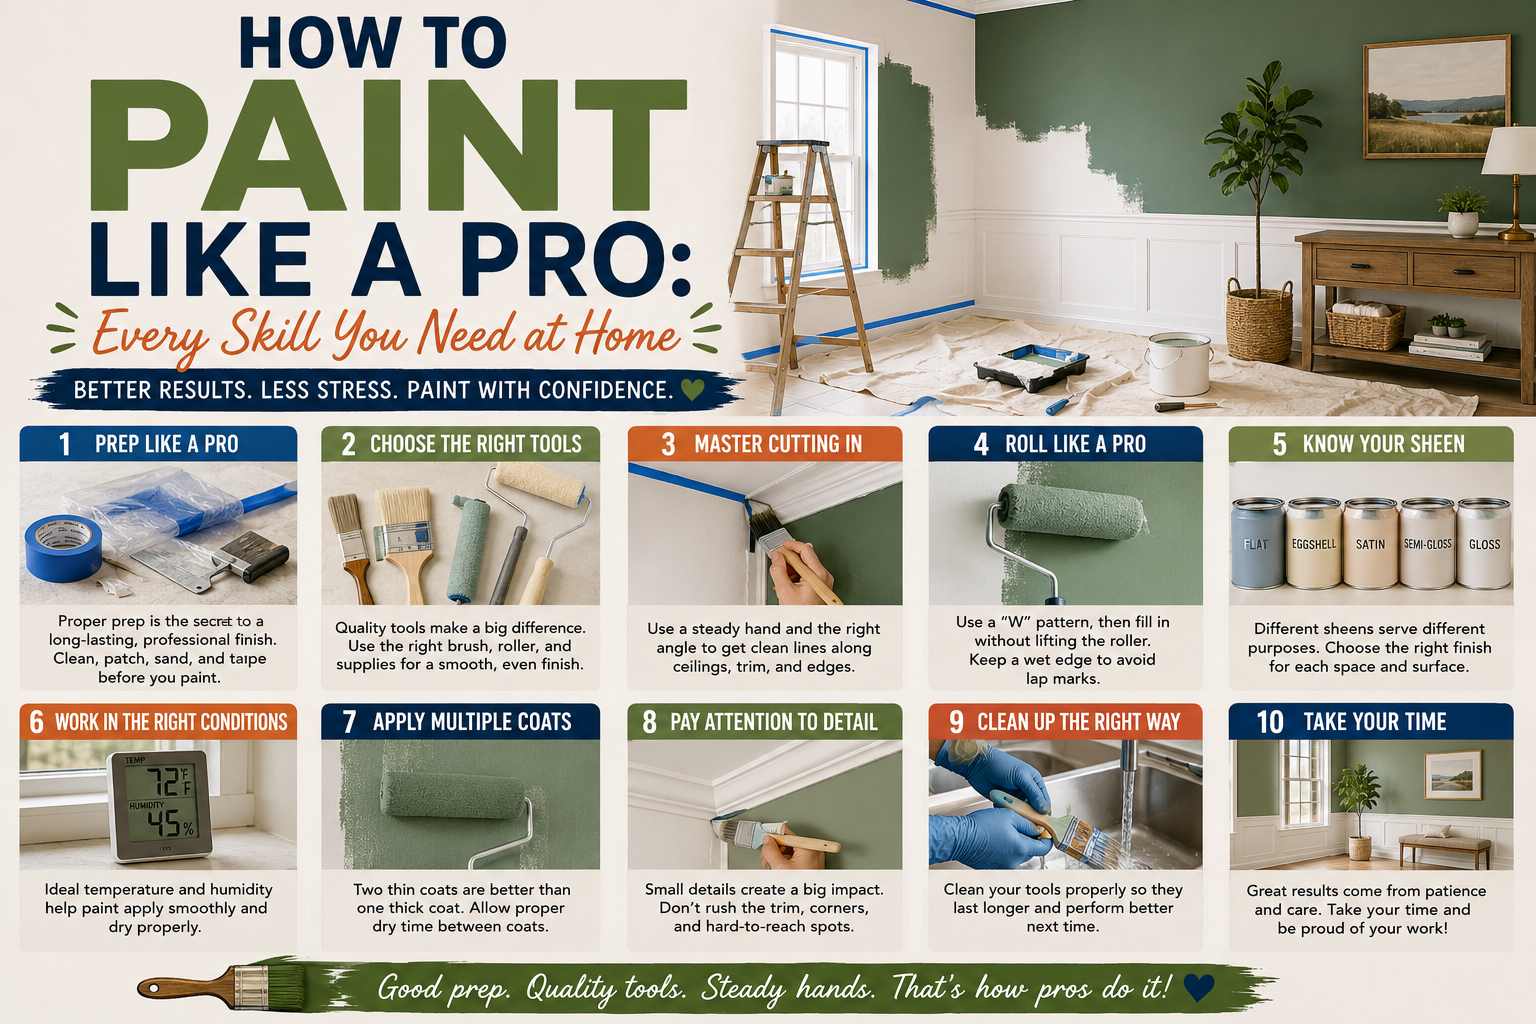
Little hacks like this are what make the difference between a stressful paint day and a smooth one. I’ve got a whole collection of these kinds of tricks built up from doing project after project — if you want more of them, my post on how to paint like a pro covers everything you need to know to paint any room efficiently.
Day 2: Lime Washing the Vanity Wall
Going into day two, I had one wall intentionally left unpainted — the wall above the vanity. Instead of painting it the same Alabaster as everything else, I wanted to add texture and depth with lime wash. I’d done this technique before in another bathroom in the house, and I was obsessed with the result. The process starts with a coat of primer, followed by applying the lime wash paint in a cloud-like pattern using a large, thick lime wash brush.
The technique is simple: dip the brush, make X strokes across the wall, connect the clouds, and repeat until the wall is covered. Then once the first coat dries (it goes fast since you’re applying a thin layer), do a second coat. I chose this wall specifically because I’m using two separate mirrors over the vanity, which means there’s going to be a wide empty wall section between them. Plain paint there would have looked flat and boring. Lime wash adds that visual interest without overwhelming the space. Even when my brush literally snapped in the Arizona sun mid-project, I just held the bristles in my hand and kept going — and it still came out beautifully. You truly cannot mess this up.
Installing Smart Light Switches
While the lime wash primer was drying and the light fixture was off the wall anyway, it was the perfect time to swap out the old light switches for smart ones. I already have these same switches in the boys’ rooms and they’ve been fantastic. They connect to Alexa, and — this is the feature I use constantly — you can set them to auto-shutoff after a set amount of time. Whether it’s 30 minutes or an hour, the light turns itself off.
Kids and lights left on are basically a universal parenting experience. These smart switches have genuinely saved electricity and sanity in equal measure. Installing them while the light was already off the wall made the whole process efficient — no doubling back, no extra trips to the breaker box. If you’re doing any kind of bathroom refresh, swapping standard switches for smart ones is one of those upgrades that costs relatively little but adds real daily value.
Painting the Vanity Cabinets With Beyond Paint
One of the biggest budget-saving decisions in this makeover was choosing to paint the existing vanity rather than replace it. The vanity itself was totally functional — it just looked dated and had no hardware. I used Beyond Paint in the color Pebble, which is the same color I’ve used across multiple projects in this house including other bathrooms, a closet, and a built-in desk. I’m now on my second gallon across all those projects, which tells you how far it stretches.
What I love about Beyond Paint is that you don’t have to sand. I cleaned the surfaces thoroughly, scraped off any drips or peeling areas, and went straight to painting. The technique matters here: never brush it on or you’ll see brush strokes. Instead, stipple it into corners and crevices with a paintbrush, then roll everything else. The first coat will look rough — don’t panic. The second coat is where it transforms into something that looks genuinely professional. I’ve painted full kitchens worth of cabinets with this product and it’s hands-down my favorite for this type of project.
Adding Hardware to the Vanity Cabinets
Along with painting, I also added door hardware to the cabinets for the first time — they’d been hardware-free since we moved in, which is such a common builder-grade issue. To drill the holes in exactly the right spot every single time, I used a cabinet hardware jig (similar to a Kreg Jig setup). You set your measurement — in my case three inches — clamp the jig to the cabinet door, and drill. Consistent, fast, and foolproof.
Adding door hardware is honestly one of the highest-impact, lowest-effort upgrades you can make to any kitchen or bathroom. It immediately makes everything look more intentional and finished. Combined with the fresh coat of Beyond Paint, these cabinets went from looking like basic builder-grade to looking like something you’d see in a magazine. If you’re doing a similar budget-focused makeover, this is a combination I’d highly recommend — check out my roundup of budget home improvement DIY ideas that save thousands for more projects like this one.
Day 3: Changing Out the Faucets
Day three kicked off with reassembling the vanity and swapping out the old faucet. Changing a faucet is one of those updates that looks like a big deal but is genuinely pretty approachable for a DIYer. New fixtures do a lot of heavy lifting when it comes to making a bathroom feel updated, and pairing a fresh faucet with the newly painted vanity made the whole thing look cohesive and intentional.
This is exactly the kind of upgrade I talk about when I say you don’t need to spend a fortune to make a space look brand new. You’re keeping the bones — the vanity, the sinks, the floor — and just refreshing the details. New door hardware, new faucet, fresh paint, and updated lighting can completely transform a space without a single contractor showing up.
Building and Installing the Wood Accent Feature Wall
The feature wall was the project I was most excited about on day three. The lower portion of that back wall had been left unpainted intentionally — I always knew it was getting a board and batten-style wood accent treatment. I went outside first to cut the backer board and wood pieces down to size, then painted them out there to save myself the hassle of cutting in around each piece once they were on the wall.
For the color, I chose Sherwin-Williams Rosemary — a beautiful olive green that I felt would complement the neutral Alabaster walls and the Pebble-colored cabinets perfectly. This was a similar concept to what I’d done in another bathroom down the hall, but I was intentional about making it feel different. Same hardware, same cabinet color, same mirrors — but a different board and batten style, different accent color, and different finishing touches. The result was two bathrooms that feel like they belong in the same house without being identical copies of each other. It’s a coordination strategy I’d use again in a heartbeat.
Coordinating the Two Bathrooms Without Making Them Identical
Since this bathroom is right down the hall from another one I’d recently renovated, I spent time thinking carefully about how to make them feel like they belong together without being a copy-paste situation. I used the same door hardware, the same cabinet paint color, and similar mirror styles. But the board and batten pattern was different, the accent wall color was different, and the finishing touches varied enough to give each bathroom its own personality.
The end result honestly amazed me — they feel custom and distinct, but you can still tell they’re part of the same home. That’s the sweet spot when you’re renovating multiple rooms. Shared elements create cohesion; varied details create character. It’s a lesson I’ve applied across this house and it makes every space feel more intentional overall.
Tips and Best Practices for Your Own Pink Bathroom Makeover Before and After
After spending three full days transforming this bathroom, here are the lessons I’d carry into any similar project. Do your demo and prep on a separate day before you start the “real” work — it makes your actual project days so much more productive. Spray paint cabinet frames before painting walls so any overspray gets covered. Learn to cut in without tape — it’s a skill that will save you hours on every future project. Use Beyond Paint for cabinets if you want a professional-looking result without sanding. Apply lime wash in a cloud pattern with overlapping X strokes, and don’t stress too much about perfection — the texture is the whole point.
Know the difference between Sherwin Williams Alabaster and Benjamin Moore Alabaster before you go to the paint store — they’re not the same and it matters. Add hardware to plain builder-grade cabinets using a jig for fast, consistent results. Swap standard light switches for smart ones while you have the wall open anyway. And finally, roll with every hiccup — a broken brush, an unexpected AC line, paint that needs an extra coat — none of it is the end of the world. Adapt and keep going.
Frequently Asked Questions
What paint color did I use to cover the pink bathroom walls?
I used Benjamin Moore Alabaster, a soft neutral off-white that works as a backdrop for almost any décor style. Just make sure you specifically ask for the Benjamin Moore version — the Sherwin Williams Alabaster has a slightly different undertone and the two are easy to mix up at the store.
Do I need to sand cabinets before using Beyond Paint?
No — that’s one of the best things about Beyond Paint. You don’t need to sand at all. Just clean the surfaces thoroughly, scrape off any peeling areas or drips, and go straight to painting. The key is to stipple into corners with a paintbrush and roll the flat surfaces rather than brushing everything on, which would leave visible brush strokes.
How hard is lime wash to apply as a DIYer?
Honestly, it’s one of the most forgiving finishes I’ve ever worked with. You prime the wall first, then apply the lime wash in overlapping X strokes to create a cloud-like pattern. You can’t really mess it up — I proved that by finishing half a wall with a broken brush held together with my bare hand and it still came out beautifully. Do two coats and let each dry fully before assessing whether you need more coverage.
How do I update a bathroom without replacing the vanity or floor?
Paint the cabinets with a product like Beyond Paint, add new door hardware, swap out the faucet, update the light fixture, hang a new mirror, and add a feature wall for texture and visual interest. These changes cost a fraction of a full renovation and can make a bathroom look completely unrecognizable. I covered a whole approach to this in my post on bathroom makeover under $300 if you want to go even more budget-friendly.
Wrapping Up This Pink Bathroom Makeover Before and After
Three days, zero contractors, and a bathroom that looks like a completely different space. That’s what this pink bathroom makeover before and after was all about — proving that you don’t need to tear everything out and start over to make a dramatic change. Fresh paint, updated cabinets, new hardware, a lime wash feature wall, a wood accent wall, smart switches, and a new light fixture added up to a transformation that feels intentional, modern, and completely customized.
The biggest takeaway I want you to leave with is this: every hiccup is solvable. The broken brush, the AC line blocking the second light box, the overpainted ceilings, the extra coats of paint needed — none of it derailed the project. You adapt, you adjust, and you keep going. That’s the DIY mindset, and it’s what gets results. If this inspired you, I’d love for you to subscribe to the channel, drop a comment below with your biggest bathroom makeover question, and share this post with someone who’s been staring at their own dated bathroom wondering where to start. You’ve got this.