Does your kid’s closet look like a black hole where clothes, toys, and random stuff go to disappear forever? You’re not alone. Those standard builder-grade closets that come with most homes are basically just a rod and a shelf — and they waste so much potential storage space, especially in the corners. If your child doesn’t have a lot of hanging clothes, that setup is even more of a disappointment.
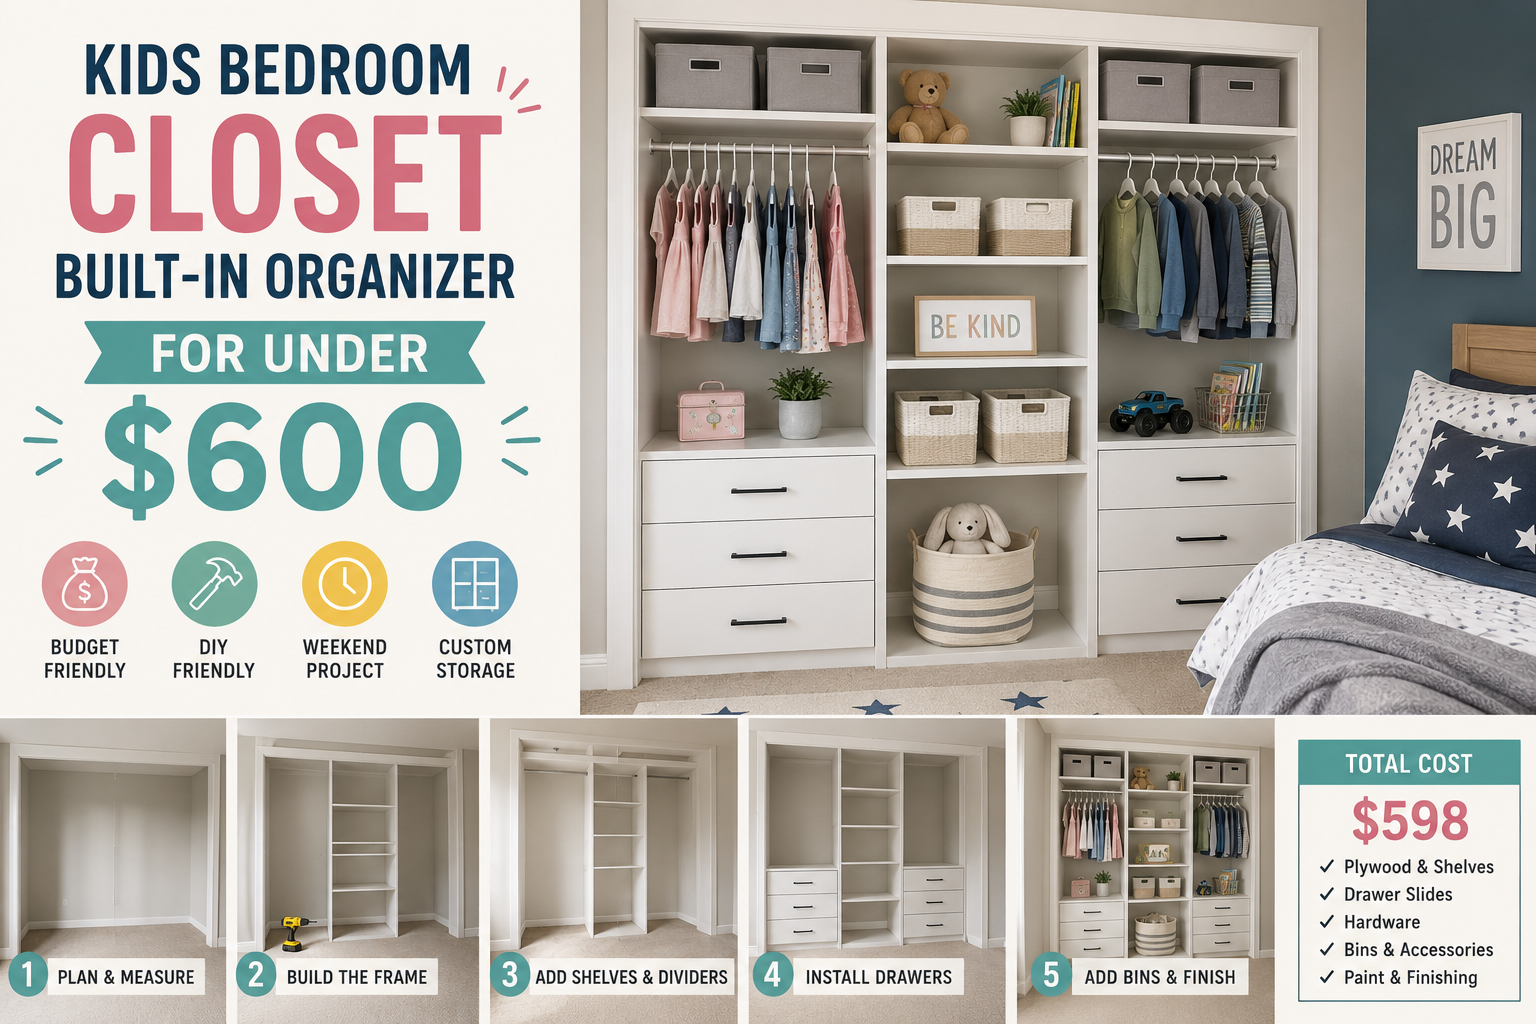
In this project, a basic locker-style builder closet gets completely transformed into a sleek, seamless kids bedroom closet built-in organizer complete with drawers, upper cabinets, and a dedicated homework and Lego-building desk. The whole thing came in at under $600 — and the result looks like something straight out of a design magazine. Ready to follow along? Let’s get into it.
This is a full-room series build, so if you’re curious about more ideas check back on The DIY Journey for the upcoming Star Wars-themed floating bed guide. But today, we’re all about turning that sad, underused closet into the storage dream your kid deserves.
Start with a Design Plan (and Let AI Help You Visualize It)
Before you ever pick up a saw, spend some time figuring out exactly what you want. In this build, the inspiration came from Pinterest — specifically a two-tone kitchen design that translated perfectly into a closet context. The goal was form AND function: good looks and serious storage. If you can’t find a closet reference that fits your vision, look at kitchens or home office built-ins for ideas that translate well.
Once you have a rough sketch, try plugging your description into an AI image generator like Gemini. You’ll get a surprisingly accurate visual render of your idea, which makes it much easier to commit to a design before you start spending money on materials. Technology is your friend here, and it’s free to use.
For this build, the space measured about 28 inches from the wall and 67 inches across. The decision to make the unit 24 inches deep was intentional — it maximized plywood sheet efficiency and kept material costs down. That kind of thinking at the planning stage saves you real money at the lumber yard.
Plan a Three-Zone Layout for Maximum Functionality
Rather than trying to build one giant monolithic unit, breaking the closet into three separate zones makes the build far more manageable. In this project, the layout included a left cabinet, a center desk area with an upper cabinet, and a right cabinet. Building them as separate units and then joining them together — with trim work to tie it all in — gives you the built-in look without the headache of moving one enormous piece.
Think about how your child actually uses their space. In this case, the son wanted a large desk area for homework and Lego building, plus drawer storage and cabinet space. One cabinet was intentionally built to 66 inches tall on the left side to accommodate longer hanging garments like dresses — a smart, future-friendly detail that keeps the next homeowner in mind too.
Once you complete this project you might want to Convert a Small Bedroom to an Office for your next project!
Remove Drywall the Low-Dust Way
To recess the built-in and get that seamless, flush-with-the-wall look, you’ll need to remove some drywall. The cleanest approach is to use a laser level and painter’s tape to mark a precise cut line, then score along it with a utility knife before removing the drywall. In the builder’s experience, this is the least dusty method of the bunch — and when you’re working in a kid’s room, that matters.
Tearing out perfectly good construction feels counterintuitive, but keeping the vision of the finished product in your head is what keeps you moving forward. Once you’ve got a clean slate, patch any electrical you need to move — in this project, an outlet was relocated and a new line was tapped to add lighting to the wall unit.
Use a Cut List Optimizer to Plan Your Plywood
Before you start cutting sheet goods, run your dimensions through a cut list optimizer. These free online tools let you input your sheet size and all the pieces you need, then spit out the most efficient cutting layout. It’s a game-changer for keeping waste low and costs down. In this build, the main cabinet carcasses came in at around $200 total — largely because of smart plywood planning.
The two main cabinets were each 24 inches wide by 24 inches deep, which mapped perfectly onto standard plywood dimensions. One honest lesson from this build: don’t try to cut two sheets of plywood simultaneously to save time. It sounds efficient, but it gets “super wonky” fast — especially if your blade is getting dull. Cut one piece at a time and keep things square.
Build Simple Cabinet Carcasses with 2×4 Reinforcement
The cabinet boxes themselves don’t need to be complicated. Cut your panels square, use corner clamps as a third hand while assembling, and add scrap 2×4 blocking for extra structural support. A mid-shelf divides the drawer section from the upper cabinet space, and using a piece of blocking as a physical stop means you get the shelf exactly where you want it — no measuring required.
The key takeaway here is precision over speed. The more experience you get with woodworking, the more you appreciate taking your time to get things perfectly square. That extra care at the carcass stage means your doors and drawers will fit right the first time, saving you frustrating rework later.
Build Face Frames with Select Pine for a Clean Finish
For this build, 1.5-inch select pine was used to build face frames that get glued directly onto the cabinet boxes. This is a slightly different approach than using inset doors on a frameless cabinet — here, the doors sit on top of the face frame as overlay doors. It’s a great technique to try if you want to challenge yourself with a new method.
Pre-build your face frames flat before attaching them to the boxes, laying out all pieces first to confirm the fit. Fill nail holes, give everything a final sand, and you’ll have a crisp, paint-ready surface to work with. Taking the time to prep your face frame properly is what separates a “good enough” result from a truly polished one.
Build Drawer Boxes with Pocket Holes and a Router Table
Drawer boxes are cut from 3/4-inch plywood and assembled with pocket holes — 12 pocket holes per box, to be exact. It’s repetitive work, but having a miter saw setup with a stop block makes batch-cutting all those identical pieces much faster. Before you cut everything, always test-fit your drawer slides first. Discovering you’re slightly oversized after making all your cuts is a hard lesson.
For the drawer bottoms, this build used a thin hardboard (yuka board) slid into a routed groove rather than just screwing a panel to the bottom. A router table makes cutting that groove much easier and more consistent than adjusting a table saw blade repeatedly. If you get tearout on the router table, leave a comment on the original video — the community is always happy to troubleshoot together. One extra touch: a hidden drawer was built from a leftover slide — a perfect secret compartment for a kid to stash things from younger siblings.
Install the Desk with a Laminated Butcher Block Top
The centerpiece of this build is the desk. Solid butcher block was the original plan, but the cost adds up fast. The solution? A laminated butcher block from Home Depot for around $130. It looks identical to solid butcher block, it’s durable, and it fits the budget beautifully. At 50 inches wide, the desk required notching out the face frame to fit — a small extra step that’s absolutely worth it for the workspace you get.
The desk surface was attached to the cabinet below it using pocket holes, keeping everything solid and seamless. Behind the desk, leftover shiplap paneling from a previous bedroom build was used to create a warm, textured accent wall — a great example of how repurposing materials from other projects keeps costs down and adds character.
Add Shiplap Paneling and Trim Details for a Built-In Look
The difference between a cabinet sitting in a closet and a true built-in is all in the trim work. Since no room is perfectly square or level, trim gets pieced in gradually — cutting to fit, caulking gaps, and working toward a seamless final appearance. Thin strips of hardboard were ripped down to use as trim pieces throughout, hiding gaps at the ceiling and along edges.
2x4s were used for toe kicks at the base of the cabinets, which will get trimmed out at the end. The upper cabinets were locked together with 2×4 blocking that also forms a false wall behind the desk. Screwing everything into studs ensures it stays put for years of daily use. A dimmer switch and an outlet were also added to the wall unit, along with a small spotlight aimed at the desk surface.
You might also like the Peel & Stick Budget Makeover Ideas to save some money on new materials.
Prime and Paint for a Professional Finish
Primer gets overlooked, but it’s genuinely one of the most impactful steps in the whole build. A coat of primer followed by a light sand is the least glamorous part of the process — but it’s what gives you that smooth, furniture-quality paint finish at the end. Don’t skip it.
The color choice here was Urban Bronze by Sherwin Williams for the doors — a deep, sophisticated dark gray. One hard-won lesson: if you’re ever painting doors a dark color, spray them if at all possible. Rolling dark paint reveals every imperfection, and it’s very unforgiving. MDF doors were used for the painted cabinets, and the community recommendation to try MDF paid off — it paints beautifully and feels solid.
Build Router-Bit Cabinet Doors for a High-End Look
Cabinet doors are where the build really starts to look high-end. This project used a new set of router bits to cut mortise-and-tenon style rail and stile joints, with a slight bevel on the inside edge of each door. That small detail alone makes the doors look custom and expensive. Half-inch material was used as the backer board instead of the usual quarter-inch, making the doors noticeably sturdier — important when they’re going to get slammed by a kid every single day.
Each corner got a small roundover to knock off the hard edge. If you’re building doors you plan to paint, MDF is a great material to work with — it’s smooth, stable, and takes paint without the grain telegraphing through. A dedicated miter station with a stop lock makes cutting all the rails and stiles to consistent lengths fast and accurate.
Add Red Oak Doors with Solid Edge Banding for a Two-Tone Look
To create the two-tone design, the upper section got red oak doors stained with dark walnut — a warm, earthy contrast to the painted lower cabinets. Solid oak edge banding was attempted for the first time here, and while it’s definitely more durable than iron-on veneer tape, the thin pre-made banding arguably looks more like a continuous solid piece. Honest verdict: both have their place, and you can be the judge.
Red oak doesn’t get nearly enough credit in modern DIY builds. It has a beautiful earthy tone that pairs naturally with dark grays, and the nostalgia factor is real for anyone who grew up in the 80s. With a dark walnut stain, it looks rich and warm — don’t sleep on red oak.
Build a Floating Shelf to Complete the Look
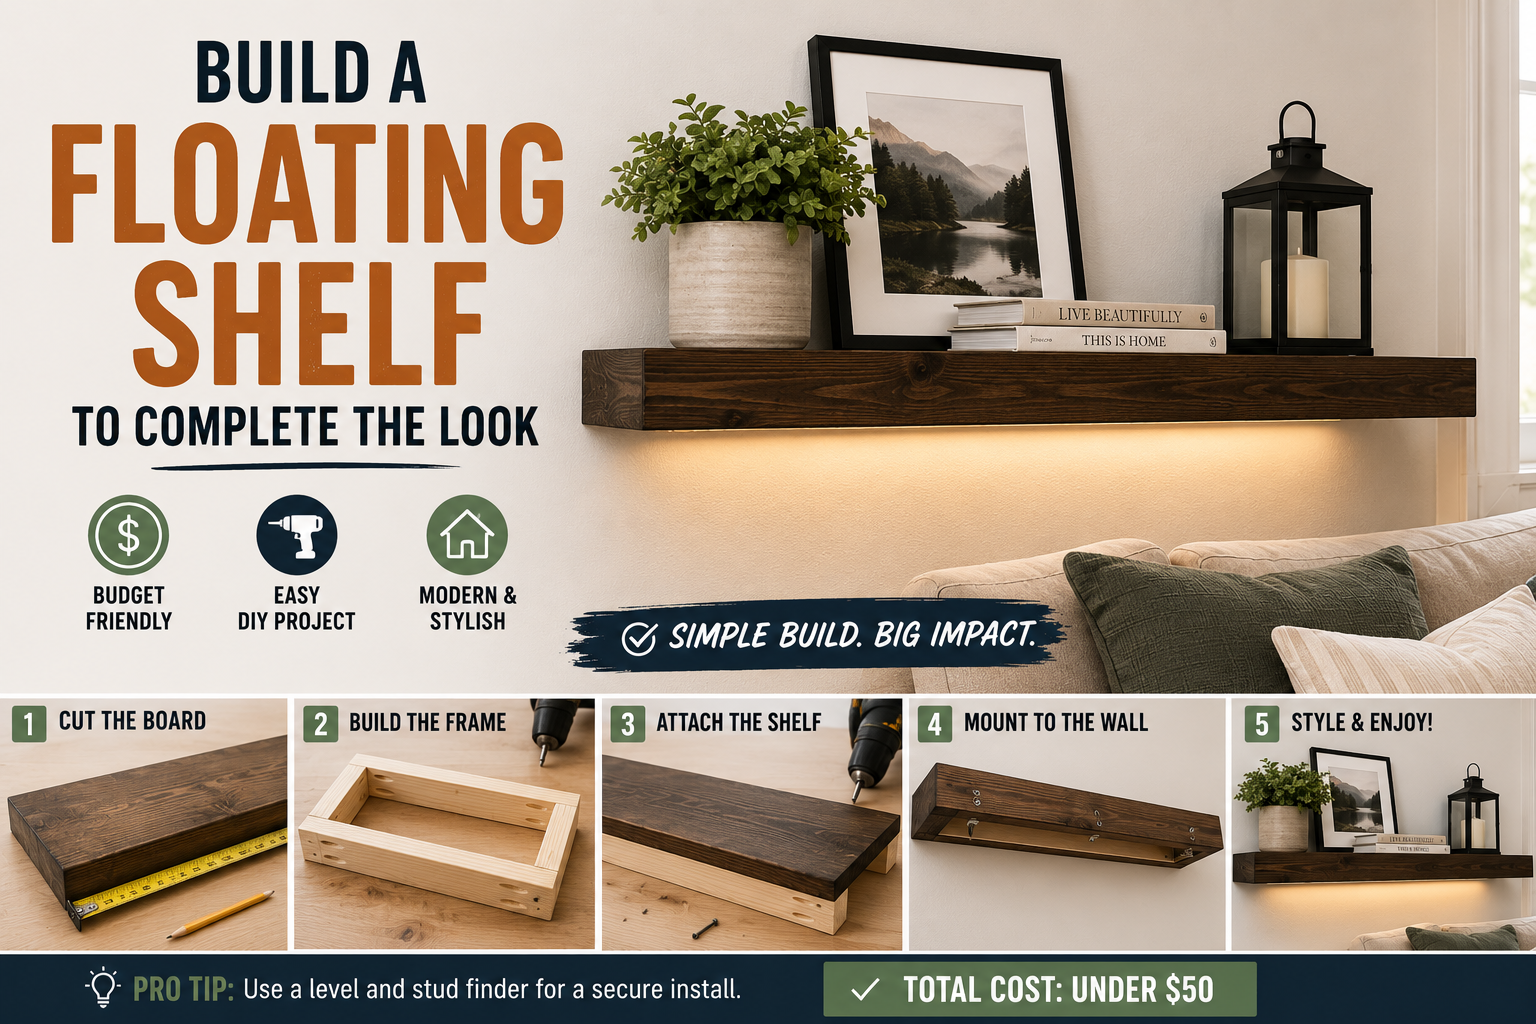
A scrap piece of wood left over from the bed build was repurposed into a floating shelf above the desk area. Getting a floating shelf perfectly level and anchored securely takes a little patience — admittedly, this one required a repaint after some installation drama — but the finished result adds valuable display space and ties the whole unit together visually.
A dowel was attached with pocket screws, and a couple of additional shelves were cut from leftover plywood for inside the cabinets. Every scrap of material found a home in this build, which is exactly how you keep a project under budget.
Finish with a Clothing Rod and Rope Lights
The final functional element was a simple dowel clothing rod installed in the tall cabinet section, giving the space a proper place to hang clothes. And for the finishing atmospheric touch, a GOI rope light was added — chosen specifically for its warm tone that plays beautifully off the wood and the dark gray paint. It ties the whole mood of the room together.
The dimmer switch installed earlier means the desk lighting can be adjusted for homework focus or a cozy ambient glow at night. Little details like lighting make a space feel truly finished rather than just functional.
Tips and Best Practices for Building a Kids Closet Built-In
Think about order of operations before you start installing. The worst thing you can do is have to rip something out after it’s already attached to the wall. Mentally walk through the full installation sequence before you start screwing things in place.
Always test-fit hardware before batch-cutting. Whether it’s drawer slides, hinges, or any other hardware, install one test piece first. Discovering you’re off by a quarter inch after cutting twenty identical pieces is a very avoidable mistake.
Precision matters more than speed. An eighth of an inch feels insignificant until you’re trying to hang a door and it won’t close right. Take the extra minute to get the cut right the first time.
Use blocking instead of measuring for shelf placement. Cut a scrap piece to your desired spacing and use it as a physical stop. It’s faster and more consistent than measuring every time.
Caulk and paint are the great equalizers. Even imperfect trim work looks seamless once it’s caulked and painted. Don’t let small gaps or imperfect miters discourage you — that’s what the finishing stage is for.
Frequently Asked Questions
How much does it cost to build a kids bedroom closet built-in organizer?
This full built-in with cabinets, drawers, a desk, and lighting came in at under $600. The cabinet carcasses alone cost around $200 in plywood, the butcher block desk surface was about $130, and the remainder went to hardware, paint, and trim materials. Costs will vary based on your location and material availability.
What tools do you need to build a closet built-in?
The core tools for a project like this include a circular saw or table saw for breaking down sheet goods, a miter saw for cutting trim and face frame pieces, a pocket hole jig, a nail gun, a router table for door joinery and drawer grooves, and a laser level for layout. A drill and basic hand tools round out the list.
Can I build this without a router table?
Yes — a router table makes door joinery and drawer bottom grooves easier and more consistent, but it’s not strictly required. You can use a table saw for grooves and build simpler flat-panel doors without router bit profiles. The result will be slightly less decorative but still completely functional.
What’s the best wood for painted cabinet doors?
MDF (medium-density fiberboard) is widely recommended for painted cabinet doors, and this build confirmed why. It has no grain to telegraph through the paint, it’s dimensionally stable, and it takes primer and paint beautifully. It’s also more affordable than solid wood for door panels.
How do I make a built-in look seamless in a closet?
The key is trim work and caulk. Build your cabinets to fit as close to the walls and ceiling as possible, then use ripped strips of thin material to bridge any gaps. Screw cabinets into studs, use toe kicks at the base, and add crown or other trim at the top. Caulk all seams before painting, and the whole unit will read as one cohesive piece.
Ready to Transform Your Kid’s Closet?
Building a kids bedroom closet built-in organizer like this one is absolutely within reach for a motivated DIYer — even if you’re still building your skills. The key is to plan carefully, work in stages, and not rush the details that matter most. The result is a space your kid will actually use, that stores everything they need, and that looks custom-built at a fraction of what you’d pay a contractor.
If you tackle this project, we’d love to see how it turns out! Drop a photo in the comments or tag us on social. And if you found this walkthrough helpful, share it with another parent who’s staring at their own sad builder-grade closet wondering where to start. You’ve got this.