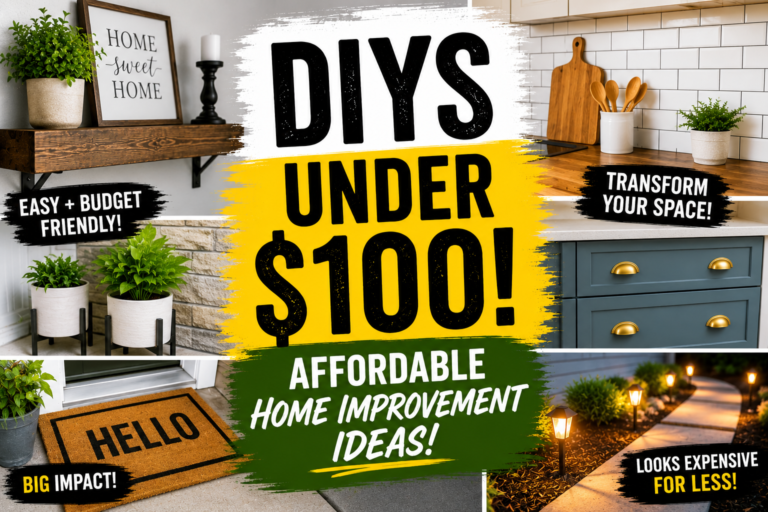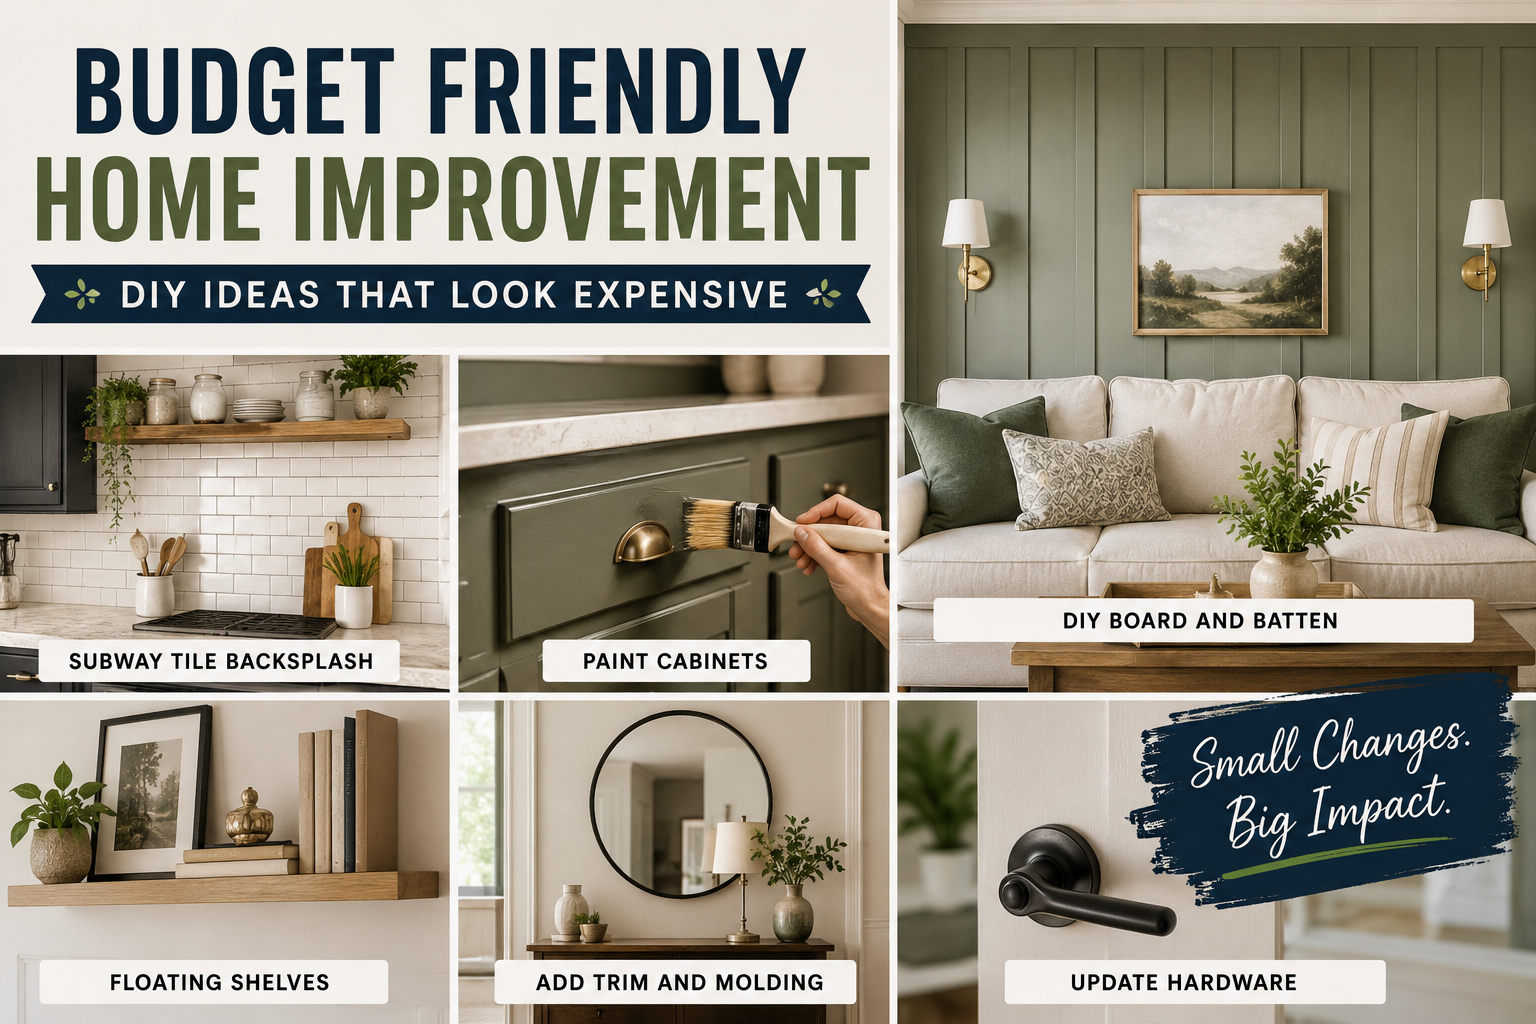
If you’ve ever scrolled through a design magazine and thought “I could never afford that,” I’m here to tell you — you probably can. I’ve spent years figuring out how to get that custom, high-end look without spending anywhere near high-end prices, and the results honestly surprise even me sometimes. These budget friendly home improvement DIY ideas are the exact same tricks designers use, just done the smart, affordable way.
In this post, I’m walking you through 10 projects that range from a quick weekend afternoon to a full Saturday build. Some of these will cost you less than $50. Others might run a couple hundred dollars — but compared to hiring a pro or buying the real thing, you’re saving thousands. I’ve personally done most of these in my own home, and the impact they make on how a space looks and feels is genuinely dramatic. If you want even more quick wins, check out my list of 20 Budget Home Improvement Ideas You Can Do in 30 Minutes — perfect companion reading for this post.
Ready to transform your home room by room without emptying your wallet? Let’s get into it.
1. Use IKEA Cabinets to Build Custom-Looking Built-Ins
One of my absolute favorite budget friendly home improvement DIY ideas is using IKEA cabinets to create built-ins that look completely custom. I’ve done this in my own home using the IKEA Brimnes cabinets — five of them lined up wall to wall. Once I added baseboards, small trim details, my own door hardware, and a fresh coat of paint, they looked like something a custom cabinet maker charged thousands for.
The IKEA PAX system works brilliantly for closet built-ins the same way. The secret is all in the finishing — trim hides the gaps, paint unifies everything, and suddenly those flat-pack pieces look like they were built into the wall. Having someone come in and build true custom lower cabinets from scratch can easily run $5,000–$15,000+. Doing it the IKEA hack way? A fraction of that. If you want to go deeper on this approach, my post on Built-In Bookcase: IKEA Billy vs Custom breaks down the full comparison.
2. Install Rechargeable Wall Sconces for a Designer Lighting Look
Lighting is everything when it comes to making a space feel thoughtfully designed. I truly believe that sconces are one of the highest-impact, lowest-effort upgrades you can make — and the rechargeable versions mean there’s zero hardwiring required. I’ve installed these multiple times and the process is basically the same as hanging wall art. You screw in the mounting plate, attach the light fixture, pop in a rechargeable bulb, and you’re done.
The best part? These can be controlled with a remote, you can adjust the color temperature of the bulb, and you just recharge them over time. Even when they’re not turned on, wall sconces add that three-dimensional, jewelry-like quality to a room that instantly signals “this space was designed with intention.” This is one of those budget friendly home improvement DIY ideas that renters can absolutely take advantage of too — no holes, no rewiring, no landlord drama.
3. Paint Your Outlet Cover Plates to Blend Into the Wall
This one might be the easiest tip on the entire list, and yet it makes such a noticeable difference. Standard white outlet covers interrupt walls — especially if you’ve got a bold paint color, wallpaper, or a dramatic accent wall. I specifically buy paintable outlet cover plates so I can match them exactly to the wall surface they’re on.
It’s one of those details that you don’t consciously notice until it’s done right. Once those outlet covers disappear into the wall, the whole surface feels more intentional and finished. This project costs almost nothing, takes under an hour with the right Painters Tape and a small brush, and delivers a genuinely elevated result. It’s the kind of tiny detail that separates a space that just “looks okay” from one that looks professionally designed.
4. DIY a Staircase Runner for Under $400
A custom staircase runner is one of those things that looks incredibly high-end — and usually costs like it, too. I was quoted $2,000–$4,000 to have a custom runner made for my staircase. Instead, I bought three smaller affordable runners (about 2.5 ft wide by 8 ft long each), attached them together, and installed the whole thing myself for just under $400. The result looks completely seamless.
The trick is hiding all the seams in the corners and crevices of the staircase — the natural shadow lines swallow up any transition between pieces. To figure out how much runner you need, just add your tread depth plus your riser height, then multiply by the number of stairs. That gives you your total length. Shorter runner rugs also have a much wider selection online, which means more style options at better prices. This is genuinely one of the most impressive budget friendly home improvement DIY ideas I’ve executed in my own home.
5. Paint Trim and Walls the Same Color in Different Sheens
Here’s a painting trick I come back to again and again: paint your trim and walls the exact same color, but use two different sheens — typically a flat or matte for the walls and a satin or semi-gloss for the trim. The tonal difference between the sheens creates a subtle, sophisticated look that reads as very intentional and designer.
This can be done in a single weekend, it requires minimal paint, and it’s completely reversible if you change your mind later. The visual effect is remarkable — the room feels larger, the ceilings feel taller, and the whole space has a quiet elegance that’s hard to pinpoint but impossible to ignore. Grab a quality sherwin williams paint in your chosen color and an extendable roller stick to make the ceiling work easier. One of the simplest budget friendly home improvement DIY ideas with the biggest visual payoff.
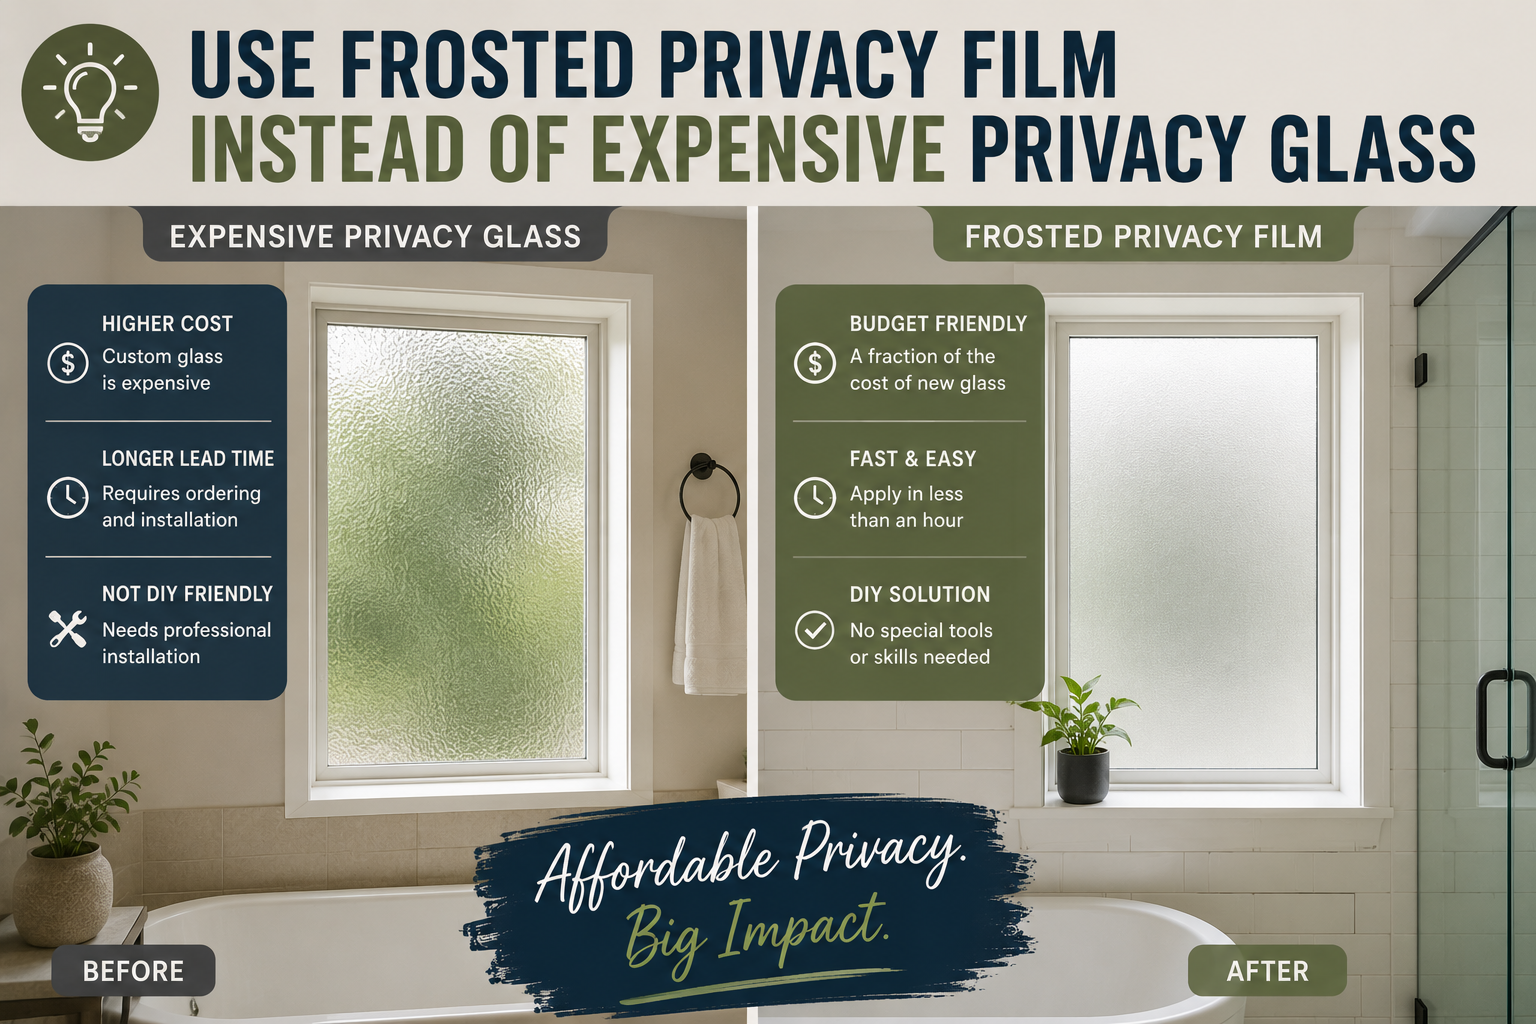
6. Use Frosted Privacy Film Instead of Expensive Privacy Glass
When I was ordering doors and windows, I quickly noticed that anything with frosted or privacy glass came with a significant price premium. The solution I found works just as well and costs a tiny fraction of the price: frosted privacy window film. It goes right over your existing clear glass, gives you that etched, frosted look, and provides the same privacy functionality.
What I love about this approach is the flexibility. The film attaches with just water, so it’s removable if you ever change your mind or want to return the glass to its original clear state. The whole installation takes about 20 minutes per window or door panel, and the finished result genuinely looks like it came from the factory that way. For anyone doing a bathroom refresh or adding privacy to a front door sidelight, this is one of those budget friendly home improvement DIY ideas that’s almost too easy.
7. Frame Out a Builder-Grade Bathroom Mirror
Builder-grade bathrooms almost always come with the same thing: a large sheet of mirror glued flat to the wall with zero framing. It works, but it looks unfinished and generic. The fix is surprisingly simple — just build a frame around it and leave the mirror right where it is.
You don’t even need screws or nails for this. Liquid nails (specifically the type rated for mirrors and glass) holds the frame securely without any risk of cracking or pulling the mirror off the wall. You can paint the frame to match your wall color for a tone-on-tone effect, or go with a contrasting accent color for a bolder statement. Either way, this project costs under $50, takes a few hours, and turns a forgettable builder bathroom into something that looks like a intentional design choice. Pair it with a new light fixture above and you’ve got a bathroom that looks completely renovated for minimal spend.
8. Reupholster Your Bed Frame or Headboard
If your bedroom is feeling dated or just lacks personality, reupholstering your headboard is one of the most transformative budget friendly home improvement DIY ideas you can tackle in a single afternoon. And here’s the thing — your headboard doesn’t even need to already be upholstered. You can do this on a flat wood headboard by adding foam and batting, wrapping it in new fabric, and stapling everything securely to the back.
The result is a headboard that looks like it came from a high-end furniture boutique. You can stay current with design trends by choosing a fresh fabric — a textured boucle, a rich velvet, a crisp linen — and completely change the entire feel of your bedroom without buying a single piece of new furniture. Pair the new headboard with fresh bedding and maybe an organic cotton duvet cover and your bedroom will look like a magazine shoot. I also love checking out Blue and White Bedroom Decor Ideas for styling inspiration once the structural changes are done.
9. Install Peel and Stick Tile for a No-Demo Floor or Wall Refresh
Peel and stick tile has come a long way, and the quality options available now are genuinely impressive. I’ve used peel and stick vinyl floor planks and adhesive tile multiple times, and the reaction from guests is always the same — complete disbelief that it’s not real tile. The thickness and texture on the better products feel remarkably realistic underfoot and to the touch.
I used peel and stick tile in my sunroom over existing tile I plan to eventually rip out. Rather than live with flooring I didn’t love while saving up for the real renovation, I covered it and now the space looks exactly how I want it. Think of it as a bridge solution — it gives you the look you’re going for right now, and when you’re ready for the permanent fix, you pull it all up together. For more ideas on this approach, my full post on Peel & Stick Budget Makeover Ideas That WOW Your Home goes deep on all the ways I’ve used this technique. A microfiber cloth and a tape measure are your two most important tools for a clean install.
10. Add Wall Trim for Dimension and a Custom High-End Feel
If there’s one single thing I’d recommend to anyone who wants their home to look more expensive, it’s adding wall trim. Any kind — picture frame molding, board and batten, wainscoting, wall panels. That added dimension changes everything about how a room reads. It adds architectural interest, it makes spaces feel more curated and custom, and it works in literally any room regardless of size or light level.
I’ve done this in multiple spaces throughout my home and every single time the transformation is dramatic. What I also love about wall trim is that it actually reduces how much you need to spend on other decor. When your walls have dimension and detail built in, you don’t need to hang as much art or buy as much furniture to fill a space. The walls do the work. Use brad nails and caulk for a clean, seamless finish before painting. If you want a step-by-step walkthrough, my DIY Wainscoting Accent Wall Tutorial covers the whole process from start to finish.
Tips and Best Practices for Budget Friendly Home Improvement DIY
Before you dive in, here are a few things I’ve learned from doing these projects myself that’ll save you time, money, and frustration:
Start with paint. Paint is almost always the highest-impact, lowest-cost change you can make. Whether it’s Benjamin Moore or sherwin williams paint, a quality product makes a real difference in coverage and finish. Don’t cheap out on paint — cheap out on other things.
Prep is everything. Especially for tile, trim, and upholstery projects, the prep work determines the final result. Clean surfaces thoroughly with a microfiber cloth, use a tape measure obsessively, and always apply primer before painting raw surfaces or patched walls.
Think in layers. The best-looking rooms have multiple layers of detail — wall trim plus good lighting plus thoughtful textiles. None of these projects work in isolation. Stack two or three of them in the same room and the cumulative effect is extraordinary.
Document before and after. I always take photos before I start any project. Not only is it motivating to see the transformation, but it also helps you troubleshoot if something doesn’t look right mid-project.
Frequently Asked Questions
What are the easiest budget friendly home improvement DIY ideas for beginners?
Painting outlet covers, applying frosted window film, and painting trim and walls the same color in different sheens are my top picks for true beginners. All three require minimal tools, minimal skill, and can be completed in a few hours. The impact is immediate and surprisingly dramatic for the effort involved.
How much can I realistically save by doing these DIY projects myself?
Quite a bit. The staircase runner project alone saved me $1,600–$3,600 compared to the pro quotes I received. The IKEA built-in hack can save you $3,000–$10,000+ compared to custom cabinetry. Even smaller projects like framing a mirror or adding wall trim can save $200–$800 in labor costs. Over several projects, you’re easily looking at $5,000–$20,000 in savings.
Are peel and stick tiles durable enough for high-traffic areas?
The quality peel and stick options available today hold up well in moderate-traffic areas like sunrooms, laundry rooms, and even bathrooms. I wouldn’t install them in a main entryway or kitchen as a permanent solution, but as a temporary upgrade while saving for a full renovation, they perform really well. Proper surface prep — clean, dry, and smooth — is the key to longevity.
Do I need any special tools for these budget friendly home improvement DIY projects?
Most of these projects require very basic tools: a tape measure, a Painters Tape, a sanding block, and a hammer. The wall trim project benefits from a circular saw for clean cuts, but a miter box and hand saw work too. None of these projects require professional-grade equipment to achieve a great result.
Conclusion
There you have it — 10 genuinely impactful budget friendly home improvement DIY ideas that can make your home look like it was designed by a professional without the professional price tag. From IKEA built-ins and rechargeable sconces to peel and stick tile and wall trim, every single one of these projects is approachable, affordable, and achievable on a weekend. The most important thing is just to start. Pick one project that excites you, gather your materials, and go for it.
I’d love to know which of these you’re planning to tackle first — drop it in the comments below! And if you’re hungry for more ideas, my post on Affordable Home Improvement Projects Under $100 has even more ways to upgrade your home without the big spend. You’ve got this.