Is your home stuck in a decade long gone? Do you daydream about the day you can finally give it the overhaul it deserves and come home to a place you actually love? Believe me, I completely get it. My first home was seriously dated — I’m talking floral wallpaper, green shag carpet, and pink tile. It looked like it hadn’t been touched since 1987, and every single day I walked through the door I felt it.
The good news? You don’t have to gut the whole place to make it feel like a brand-new home. I know firsthand that a handful of smart, affordable updates can completely change the look and feel of a space. When I tackled these projects in my first home, people couldn’t believe the before-and-after photos. And when it came time to sell, I made back every dollar I put in — and then some. That’s the power of smart, budget home improvement DIY ideas that save thousands.
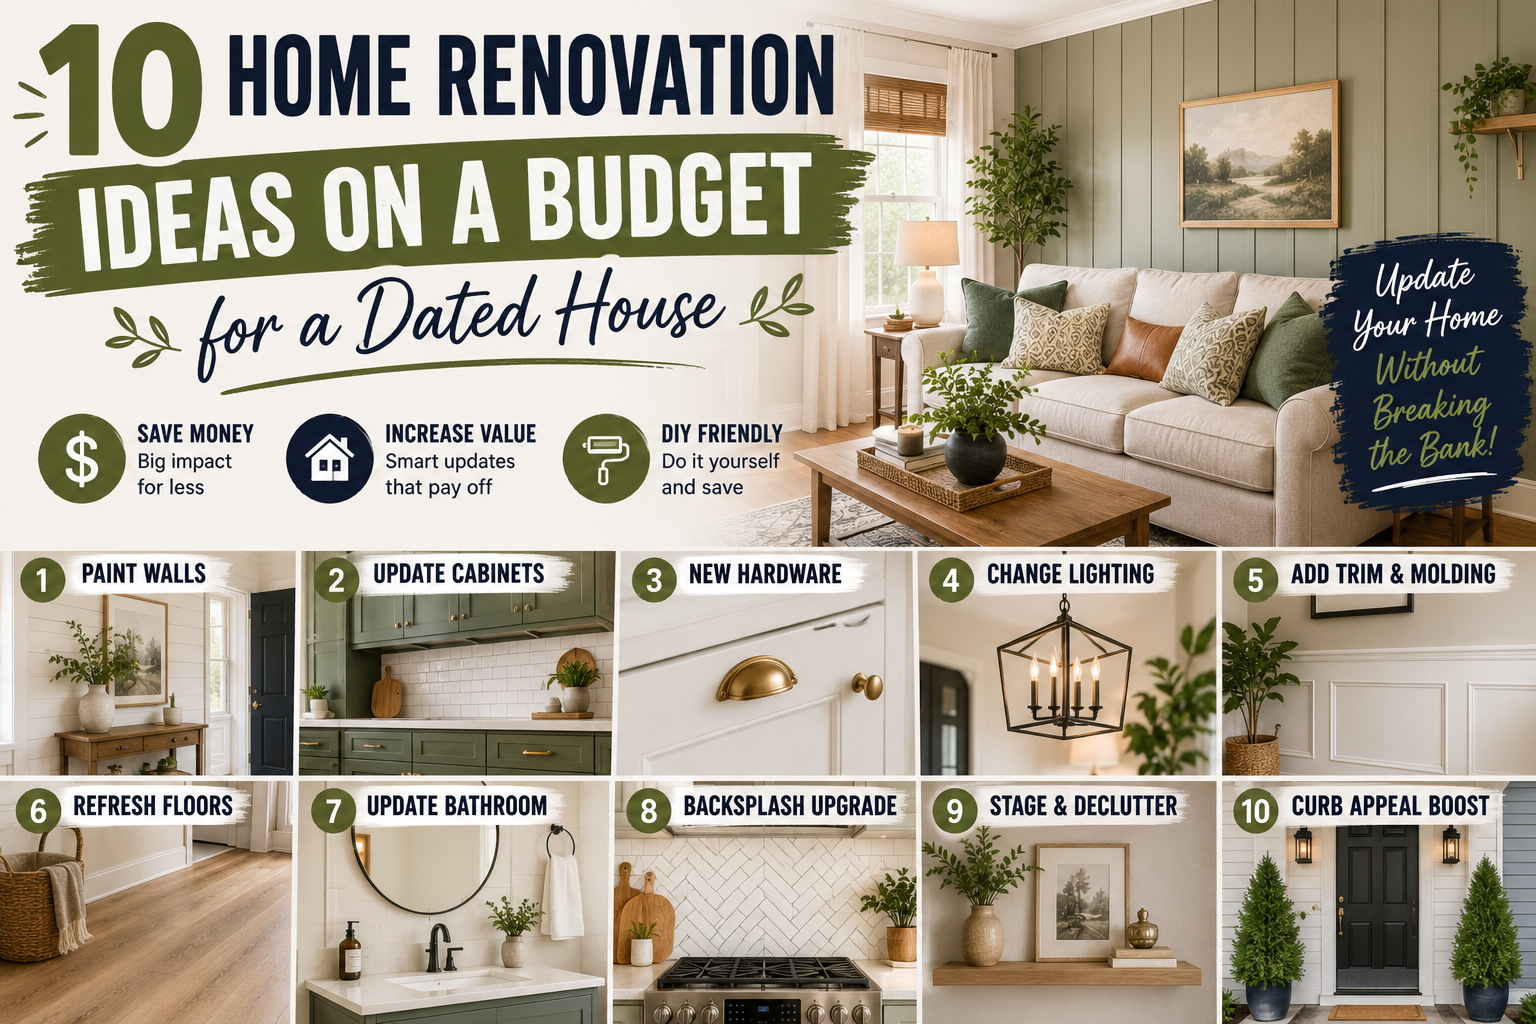
So if you’re ready to stop dreaming and start doing, here are my 10 favorite home renovation ideas on a budget that will drag your dated house right into the current century — no full remodel required. I’ve done every single one of these myself, and I’m excited to walk you through each one.
1. Paint Everything — Yes, Everything
Hands down, paint is the single most powerful weapon you have against a dated home. I’m not just talking about slapping a fresh color on the walls, either — though you absolutely should do that. The real magic happens when you start thinking about everything paint can transform. Sherwin Williams paint is my go-to for a smooth, durable finish that actually lasts, and pairing it with a quality Painters Tape and an extendable roller stick makes the job so much easier.
Here’s a quick rundown of what I’ve painted — and what you should consider painting too. Kitchen cabinets are one of the most dramatic transformations you can make; painting wood-tone cabinets a fresh new color is jaw-dropping. Bathroom vanities get the same treatment. Your exterior and interior doors — especially the front door — can go from blah to bold with a quality door paint. Don’t sleep on baseboards and trim either; painting stained wood trim bright white completely changes the energy of a room. Built-ins, tile, floors, countertops, brick fireplaces, dated light fixtures, and even your door hardware — all of it can be refreshed with the right paint or spray paint.
One of my favorite examples is a bathroom makeover where the homeowner painted the linoleum floor, the wall tiles, the walls, the ceiling, the tub surround, and the vanity. It is almost impossible to believe it’s the same bathroom. If you want a trendy tile-pattern look on your floors without the cost of real tile, grab a stencil from Etsy and use paint — it’s a fraction of the price and looks incredible. Paint is truly your best friend when it comes to home renovation ideas on a budget.
2. Replace Your Light Fixtures
Swapping out dated light fixtures is one of those updates that makes an immediate, noticeable difference — and it’s way easier than most people think. You don’t need an electrician for most fixture replacements. A basic understanding of how to turn off the breaker and connect a few wires is all it takes. I always start with the entry lights and dining room chandelier since those are the first things guests see, then move to bathroom vanity lights.
From there, I work through the rest of the house and swap out those old flush-mount ceiling lights — especially the classic “boob lights” that seem to appear in every home built before 2010. Replacing them with something more modern, whether it’s a sleek flush mount, LED can lights, or even a stylish ceiling fan, instantly elevates the room. And if a full replacement isn’t in the budget right now, remember — you can always spray paint an existing fixture to change its finish and buy yourself some time.
3. Update Your Interior Doors
When I bought my first home, every single door was a hollow, flat wood panel with shiny brass knobs. Not exactly the look I was going for. I replaced all of them with clean white panel doors from Home Depot, and the change was honestly shocking. The hallway went from feeling dark and cramped to bright and modern almost overnight. It’s one of those updates where you do it once and immediately wonder why you waited so long.
Now, you don’t have to replace every door to see a big improvement. Even just painting your existing doors with a good door paint and updating the door hardware can completely change the vibe. Another trick I love: add some simple decorative molding directly to a flat door. It’s inexpensive, it’s easy to do with brad nails and caulk, and it makes a plain door look like it cost three times as much. This is one of those affordable home improvement projects under $100 that punches way above its weight.
4. Replace or Upgrade the Baseboards and Trim
My first home had small oak baseboards that blended right into the floor — not exactly making a statement. When I replaced the doors, I tackled the trim and baseboards at the same time. I installed taller baseboards, painted everything crisp white, and the difference was huge. It made the whole space feel more finished, more polished, and more modern without touching a single wall.
If your baseboards are already white and in decent shape, you’re probably fine. But if they’re small, stained wood, or just looking tired, I’d strongly recommend replacing them or giving them a visual upgrade. One of my favorite budget tricks: add a thin piece of trim an inch or two above your existing baseboards and paint both the trim and the gap between them the same white. It creates the illusion of a much taller, more sophisticated baseboard without the cost of a full replacement. Simple, cheap, and effective.
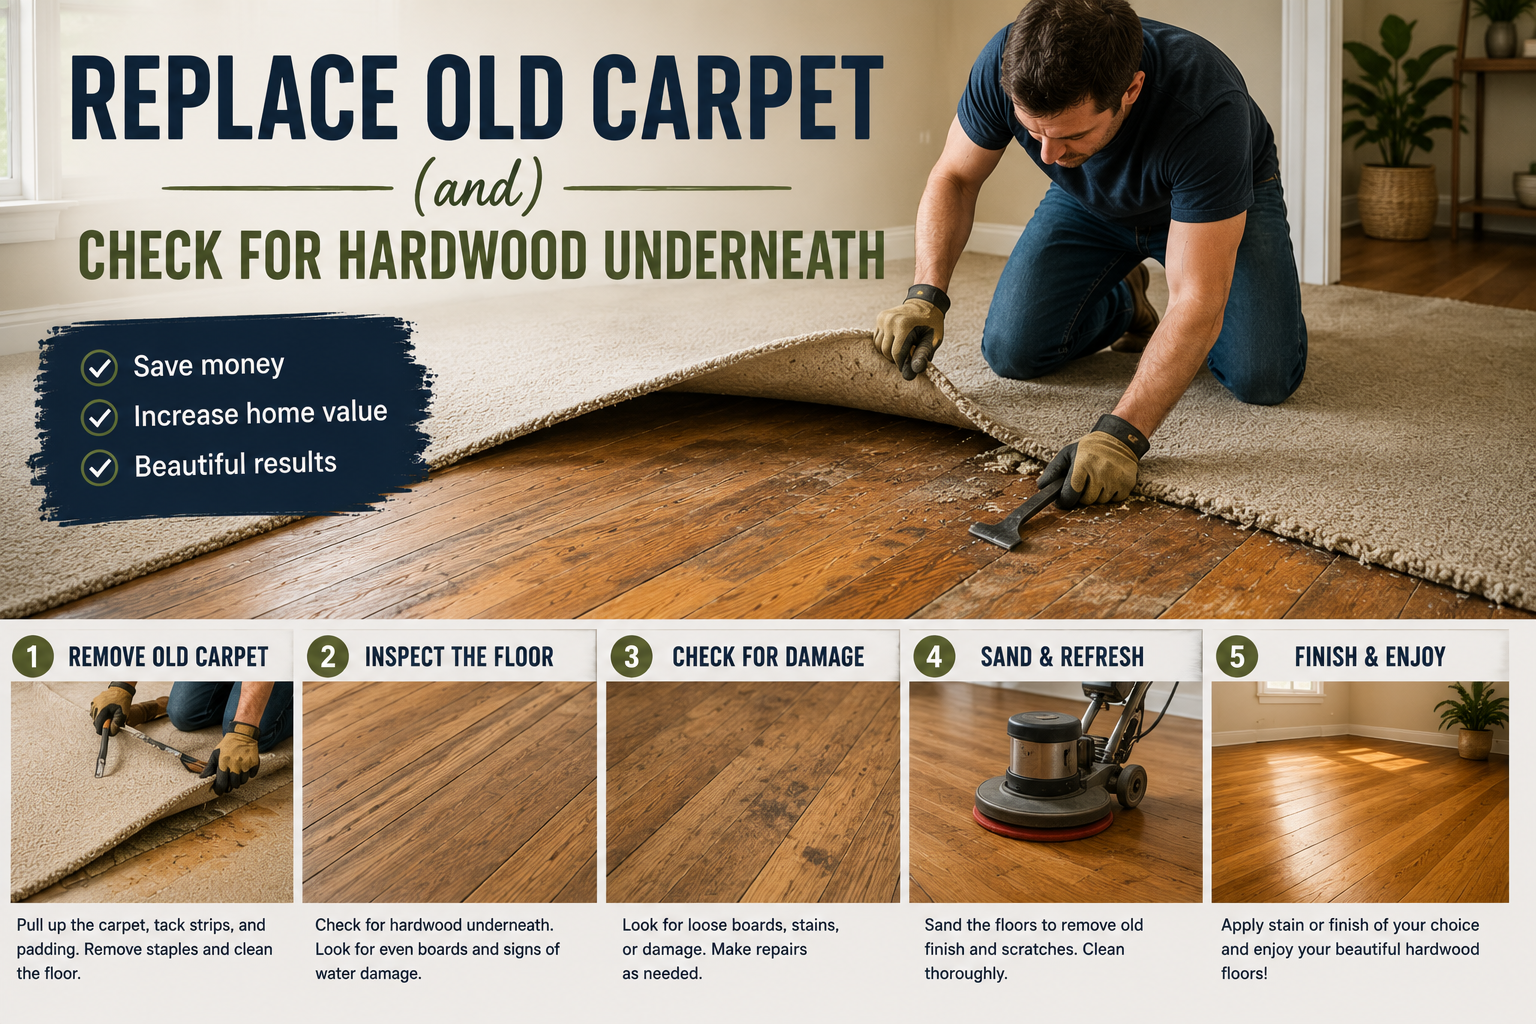
5. Replace Old Carpet (and Check for Hardwood Underneath)
Carpet has a lifespan of about 10 to 15 years, and once it’s past that point, it needs to go — no debate. Old carpet holds allergens, looks dingy, and makes a room feel instantly dated no matter what else you do. Before you replace it though, do yourself a favor and check what’s underneath. Pull up a floor vent or lift a corner of the carpet in a closet. You might be sitting on top of beautiful hardwood floors and not even know it.
I’ve seen this happen time and again, and it’s one of the best surprises in home improvement. Hardwood is timeless, easy to clean, and doesn’t harbor allergens the way carpet does. If the floors underneath are in rough shape, most can be refinished and made to look brand new. If they’re damaged beyond refinishing, I’d go with luxury vinyl plank as my next choice — it’s durable, water-resistant, stylish, and much more budget-friendly than solid hardwood. Either way, getting rid of old carpet is one of the highest-impact home renovation ideas on a budget you can make.
6. Replace Outlets, Switch Plates, and Your Thermostat
This one sounds minor, but trust me — it adds up. Years ago, ivory was the standard color for electrical outlets and switches, but compared to crisp white, ivory looks old and dingy. Swapping out outlet Covers and switch plates takes just a few minutes per outlet with a screwdriver — no electrician needed — and the cumulative effect throughout the house is surprisingly noticeable.
While you’re at it, take a hard look at your thermostat. Older analog thermostats don’t just look dated — they’re actually costing you money because they can’t optimize your heating and cooling schedule the way a modern digital programmable thermostat can. Replacing it is easy, it pays for itself over time through energy savings, and it looks a whole lot better on the wall. It’s one of those rare updates that improves both the aesthetic and the function of your home at the same time.
7. Replace Your Faucets
Old, grimy faucets are one of the fastest ways to make a bathroom look neglected — even if everything else is clean. The good news is that a faucet replacement is one of the easiest DIY plumbing jobs out there. No plumber needed. Just shut off the water supply, disconnect the old faucet, and install the new one. Most faucets come with clear instructions, and the whole job usually takes under an hour.
The key thing to keep in mind is matching the hole configuration. If your sink has a single faucet hole, you’ll need a single-hole replacement. If it has three holes, you’ll need a widespread or centerset faucet to match. Getting this right before you buy saves you a return trip to the hardware store. A fresh, modern faucet paired with updated door hardware and a new light fixture can make a bathroom feel like a completely different space — all without touching the tile or vanity.
8. Add Molding and Architectural Details
If you want your home to feel like it has character and quality, adding molding is one of the best ways to get there. Crown molding, wainscoting, window casing, and board and batten details all add a sense of craftsmanship and elegance to a room that might otherwise feel flat and generic. I’ve added vertical shiplap and wainscoting to rooms in my own projects, and the transformation is always dramatic. If you want a detailed walkthrough, check out my DIY Wainscoting Accent Wall Tutorial — it covers everything step by step.
If your home already has original architectural details like crown molding or built-in shelving, don’t rip them out. Showcase them. A fresh coat of paint in a contrasting or complementary color is often all they need to become a feature rather than an eyesore. And if your home lacks these details entirely, adding them with a hammer, some brad nails, and a tube of caulk is a very manageable DIY weekend project that will genuinely elevate the entire room.
9. Update Your Cabinet and Door Hardware
If your cabinets are in great shape and you’re not interested in painting them, there’s still a very easy and very affordable way to give them a fresh, modern look: swap the hardware. New knobs and pulls are inexpensive, they’re easy to install, and the visual difference is immediate. This goes for both kitchen cabinets and bathroom vanity cabinets — new hardware ties the whole look together and makes everything feel more intentional and updated.
Don’t stop at the cabinets, either. Your interior door hardware — knobs, levers, hinges — makes a big difference too. Replacing old brass knobs with matte black or brushed nickel hardware throughout the house creates a cohesive, modern feel that ties every room together. It’s one of those small details that most people don’t consciously notice, but everyone feels when it’s done right. And if buying all new hardware isn’t in the budget yet, a can of spray paint in a matte finish can bridge the gap for now.
10. Change Your Window Treatments
Nothing ages a room faster than window treatments from two decades ago. Heavy fabric valances, yellowed mini-blinds, and ornate curtain rods scream “1998” no matter what else is going on in the room. If you have old, dark, or heavy window treatments, take them down. Seriously — taking them down is the first step, and it’s free. You’ll immediately notice how much more light comes into the room and how much more current and open the space feels.
From there, replacing them with something cleaner and more minimal — simple linen curtain panels, Roman shades, or even leaving windows bare if the view allows — makes a huge difference. Fresh window treatments are an easy way to bring in texture, color, and a modern aesthetic without spending a lot of money. Combine this update with a new light fixture, a large piece of large artwork for wall, and maybe a new mirror, and you’ve got a room that looks professionally designed on a shoestring budget.
Tips and Best Practices for Budget Home Renovation
After doing all of these updates in my own home — and helping others do the same — here are the most important things I’ve learned along the way. Start with paint. It’s always your highest return-on-investment project, and it sets the tone for everything else. Work room by room rather than starting projects in every room at once; finishing one space completely gives you momentum and keeps the home livable during renovations. Buy quality where it counts — on things like paint, light fixtures, and faucets — and save money on things that are more about aesthetics, like hardware and window treatments.
Always use Painters Tape for clean edges when painting trim and walls. Keep a tape measure handy before purchasing any fixtures, hardware, or treatments to make sure everything fits. And don’t underestimate the power of a mirror to make a small space feel larger and brighter. A few floor lamps in dark corners and some sconces on accent walls go a long way toward creating warmth and ambiance without any wiring required. If you want even more fast ideas, my post on 20 Budget Home Improvement Ideas You Can Do in 30 Minutes is a great companion to this one.
Frequently Asked Questions
What is the cheapest way to renovate a dated home on a budget?
The cheapest and most impactful thing you can do is paint. Paint transforms walls, cabinets, trim, tile, floors, and even hardware for a fraction of the cost of replacing anything. Combined with new outlet covers, updated hardware, and fresh window treatments, you can dramatically change the look of your home for just a few hundred dollars.
Can I really paint tile and floors instead of replacing them?
Yes — and the results can be genuinely impressive. There are paints specifically formulated for tile and floors, and when applied correctly with proper prep and priming, they hold up well. It’s not a permanent solution forever, but it can buy you years of a fresh new look for a very small investment. A stencil from Etsy can even give painted floors a trendy patterned-tile look.
Do I need to hire a contractor for any of these updates?
For most of these projects, no. Paint, hardware swaps, faucet replacements, trim work, outlet covers, and window treatments are all solid DIY territory that require basic tools and a little patience. Light fixture replacements are also DIY-friendly as long as you turn off the breaker first. If you’re ever unsure, consult a licensed professional — but the majority of these updates are designed to be done by a motivated homeowner on a weekend.
How much can I expect to spend on these home renovation ideas on a budget?
It really depends on how many updates you tackle and the size of your home, but many of these individual projects can be completed for under $100 to $200 each. Painting a room might cost $50 to $100 in supplies. New cabinet hardware could run $50 to $150 for an entire kitchen. Faucet replacements typically range from $50 to $150. When you add it all up across the whole house, you might spend $1,000 to $3,000 — but the impact looks like a $20,000 renovation.
Your Home Has More Potential Than You Think
I’ve seen it firsthand: a dated, tired home that everyone writes off can become something truly beautiful with the right updates. None of these projects require a contractor, a massive budget, or months of disruption. What they require is a little vision, a little elbow grease, and the willingness to try. My first home was proof of that — and every home I’ve worked on since has reinforced it.
Pick one or two of these home renovation ideas on a budget and start this weekend. Start with paint if you’re unsure where to begin — you really can’t go wrong. Once you see that first transformation, I promise you’ll be hooked. And if you want to keep the momentum going, explore my full guide on 8 DIY Home Improvement Projects on a Budget That Transform Your Space for even more inspiration. You’ve got this — and your home is worth it.