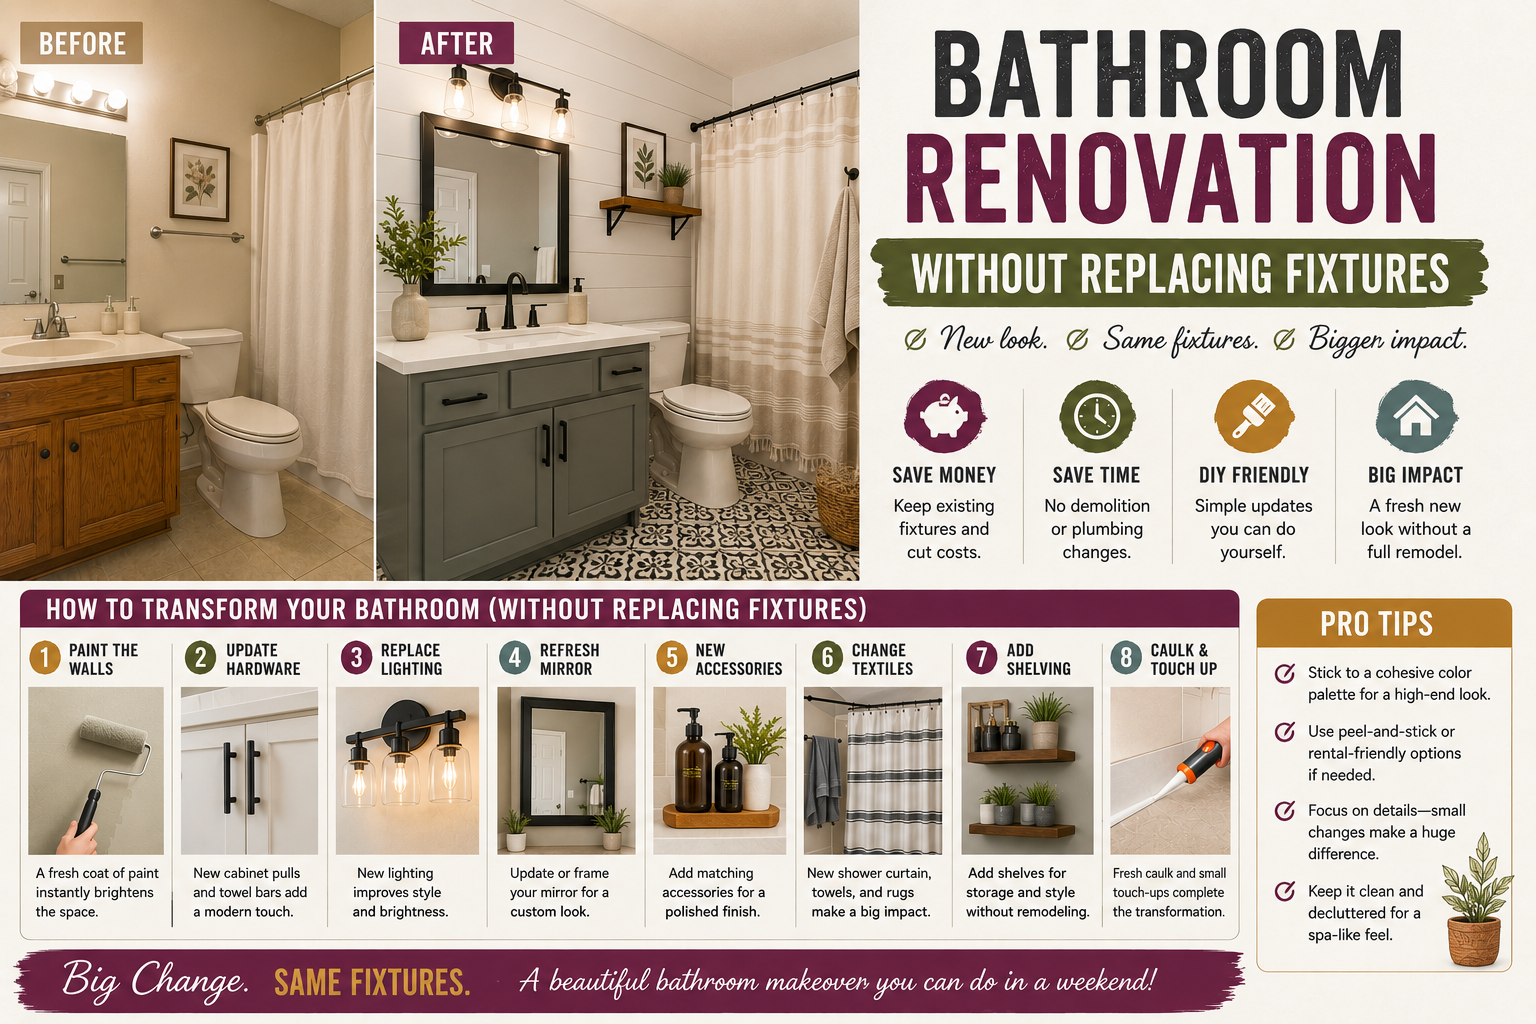
If you’ve got an older house or you’re stuck with builder-grade basics, it can feel like a beautiful bathroom is completely out of reach — like the only option is to gut everything and start fresh. I’m here to tell you that’s just not true. I transformed a bathroom that had been sitting untouched for over three years, in a house that’s more than 20 years old, and I kept almost every major fixture in place. The result? A dramatic before-and-after that cost me an estimated $1,750 in materials — not the tens of thousands a full remodel would run.
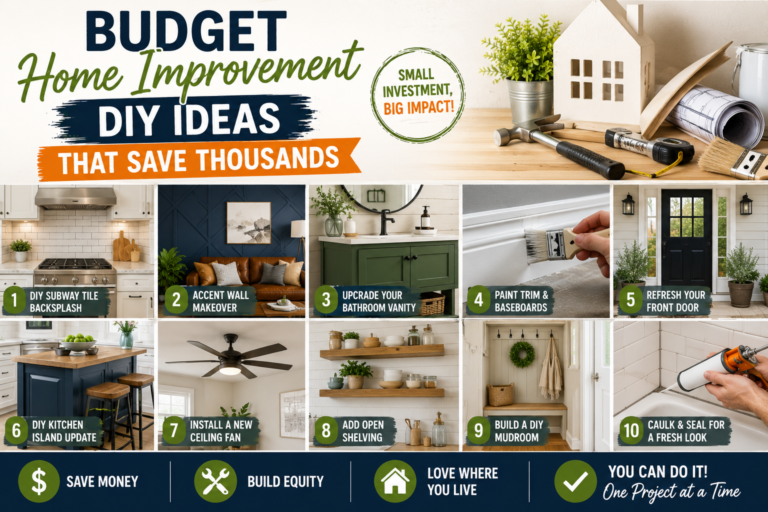
This wasn’t a clean, straightforward project either. There were surprises along the way — crumbling walls, water damage, and moments where I genuinely had to stop and collect myself. But every single problem had a solution, and I’m going to walk you through the entire journey so you can tackle something similar in your own home. If you love finding ways to stretch your renovation budget, you’ll also want to check out my post on budget home improvement DIY ideas that save thousands — it pairs perfectly with everything I’m covering here.
I’ll be honest: there were moments in this project where I couldn’t see past the current state of the space. I had to just start chipping away, piece by piece, and trust the process. That mindset shift made all the difference. So if you’re staring at a sad, dated bathroom right now and wondering if it’s even worth trying — it is. Let me show you exactly how I did it.
Step 1: Strip Out the Accessories and Assess the Space
Before I could do anything creative, I had to clear the slate. I started by scoring the perimeter of the toilet paper holder with a utility knife, then gently pried it off the wall. Next came the towel rack, then I removed the wall covers from the outlets, and finally I took down the mirror medicine cabinet. Every accessory that could come off, did.
I also shut off water to the entire house so I could safely remove the older fittings. Then down came the vanity light. What surprised me most about this phase was how clarifying it was — the more I removed, the easier it became to see what actually needed repair. The mental fog started to lift once the clutter was gone. If you’re starting a similar project, don’t underestimate the power of this step. A clean, stripped-down space tells you the truth about what you’re working with.
Step 2: Dealing With Unexpected Wall Damage
I’ll be real with you — this is where things got stressful. My original plan was to leave the tiles around the tub, fix the drywall, and keep the step in place. I was figuring it out as I went, piece by piece, trying to avoid a full gut job. Then I got to the north side of the tub, which shared a wall with the shower, and the wall literally started disintegrating in my hands.
That was a gut-punch moment. There was clearly water damage inside the wall, and once I traced it back, I could see that the stone had lost its overhang at the far end — causing water to catch on the wall and seep inside. With the wall already crumbling, I had a decision to make. I took a breath, looked forward, and realized I could still avoid a complete remodel. What I thought was a poured concrete step turned out to be cinder blocks — which was actually a win, because the whole panel came off with a little prying. Whatever problem you find in a renovation, it can be fixed. Some are simple DIY fixes; others need a professional. It’s just a matter of time and budget.
Step 3: Repairing the Shared Wall Between the Tub and Shower
Off camera, I repaired the shared wall between the shower and the tub. Rather than using the metal stud that was already there, I used pressure-treated lumber to reinforce the wall. On the other side of the cement board there were tiles I didn’t want to touch, so instead of screws, I used an excessive amount of liquid nail — and 24 hours later, I was fully confident it had bonded remarkably well.
To be clear, I intentionally decided not to tackle the shower itself during this project. That’s a fun build for another day. But I couldn’t leave the wall without any support, so I installed two strips to the cinder block — one pushed up slightly to join two pieces of drywall in the middle of the wall, and one left near the bottom closest to the tub. That way, the wall was fully supported before drywalling, and I left the option open to tile it later if I choose to.
Step 4: Patching Drywall and Building a Partition Wall
With the structural work sorted, it was time for drywall. I also taped off the windows ahead of painting, just to stay ahead of myself. One decision that really shaped the space was adding a small partition wall between the tub area and the rest of the bathroom. It wasn’t in the original plan, but it just made sense — it created visual separation, and building it was quick, simple, and cheap.
I was going for a snug fit on the partition, and it came out a little tighter than intended, but it still worked perfectly. I’ve learned that tangible elements like this help pull the vision together when you’re struggling to see past the current state of a space. Once that wall was in, the whole bathroom started to feel like it was becoming something.
Step 5: Refreshing the Shower Frame With Matte Black Spray Paint
The shower needed attention in a big way. I started by scraping off all the old silicone to create a clean, defined line between the shower frame and the stone. Then I scraped the glass and cleaned the entire perimeter so the masking tape would adhere properly. I taped off the shower both inside and out, and then I sprayed the shower frame with a matte black finish.
I actually did this around 1:00 a.m. — I was nervous about how it would turn out, but when I pulled the tape the next day, it looked pretty great. There was some overspray on the glass, which I expected, and it cleaned off easily. I also found a replacement trim kit online to swap out the old chrome mowing trim, which finished the look nicely. Then I carefully installed the new shower arm and head, keeping everything cohesive with the matte black theme I was building throughout the space.
Step 6: Replacing the Tub Faucet and Creating a Custom Escutcheon Plate
At first, I considered spray painting the old tub faucet to save money — but once I really looked at it, I knew the shape was all wrong. A new faucet would improve the look far more than paint ever could. Because I decided to replace it, I left the tub wall partially open so I could access the connections — which meant I had to hold off on closing up that section while I continued drywalling elsewhere.
Once the new parts arrived, I discovered the area around the faucet connections had seen better days. The holes didn’t line up perfectly, and I was worried about having to repaint the whole tub. Then I found a clever solution: I had a piece of aluminum lying around, traced the holes onto it, drilled them out, cut the plate to size, sanded it smooth, and spray painted it matte black. It was a completely custom escutcheon plate made from scrap material. I used masking tape to protect the finish as I worked, tested the connection — no leaks — and closed everything up. Small detail, big impact.
Step 7: Sanding and Painting the Vanity
One of the biggest money-saving decisions I made was keeping the original vanity. Replacing it entirely would have cost significantly more. But keeping it meant more work on my end — and I was okay with that trade-off. I sanded the drawer fronts along with the cabinet body to give the paint something to grip, then applied an all-in-one paint primer with a satin finish. On camera it looks white, but in person the color reads differently — it was a deliberate choice that gave the vanity a much cleaner, more modern feel.
I ended up applying two full coats of paint to the vanity. It’s one of those upgrades that sounds simple but makes a massive difference in how the whole space reads. If your vanity is structurally sound, don’t replace it — paint it. It’s one of the best returns on time investment in a bathroom renovation without replacing fixtures.
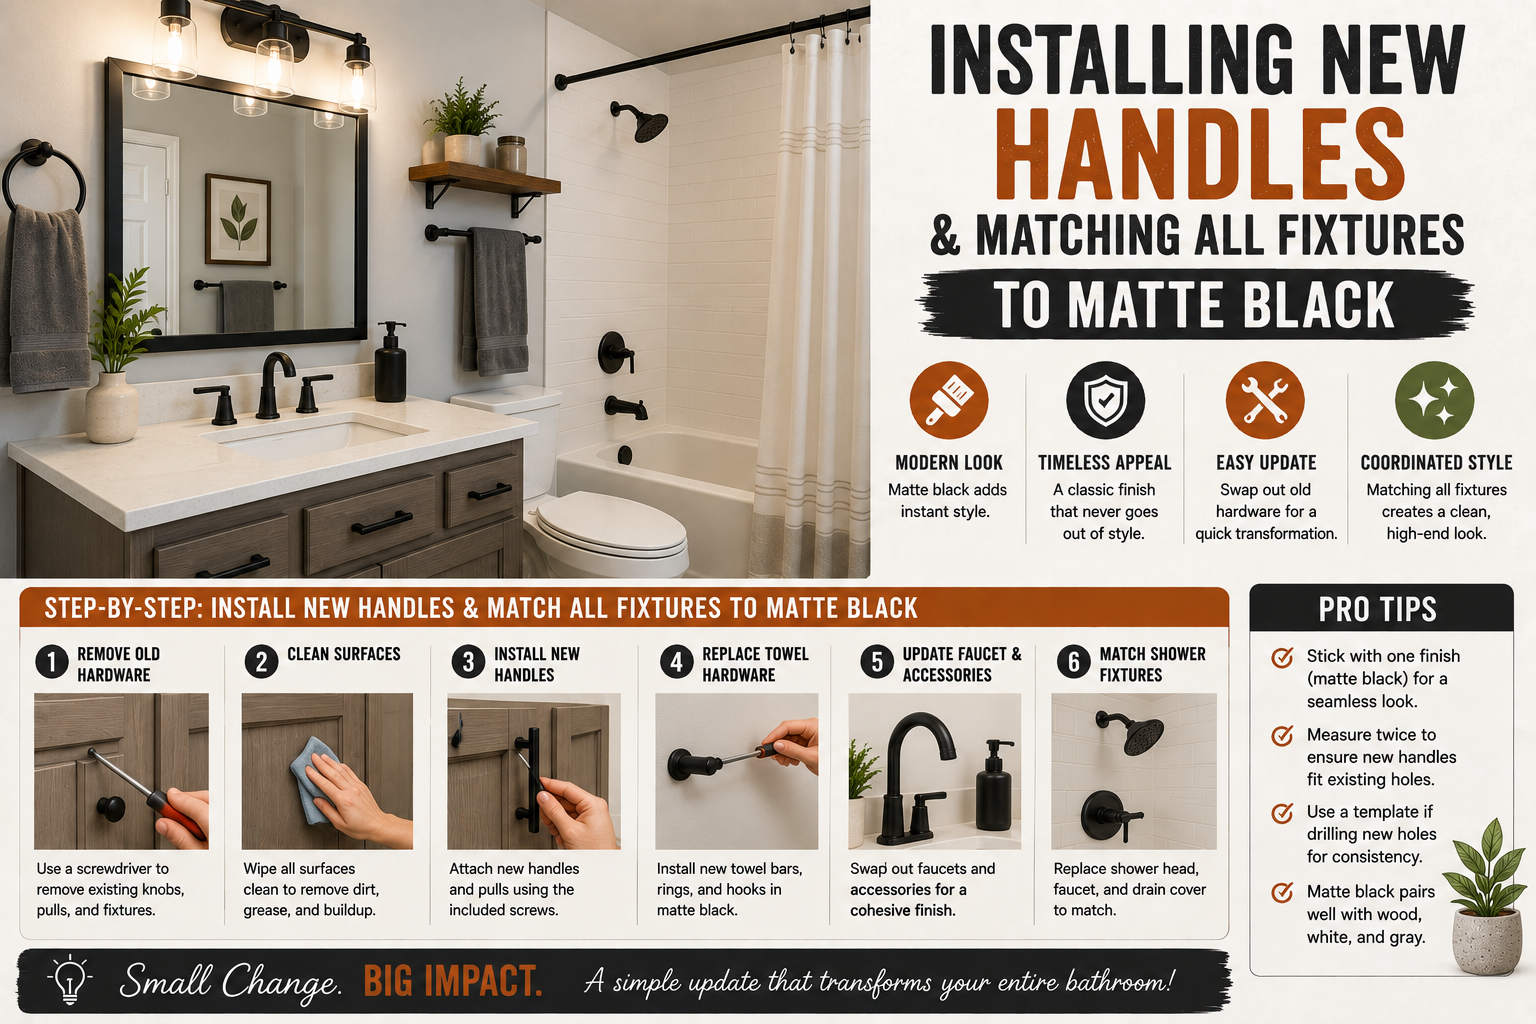
Step 8: Installing New Handles and Matching All Fixtures to Matte Black
My first instinct for this whole project was to tie as many fixtures together as possible under one finish — matte black. It creates a cohesive, intentional look without requiring expensive custom work. One of my biggest early challenges was finding black modern handles that fit the existing hole spacing in the drawers. After a lot of searching, I found adjustable black handles that worked perfectly with the existing holes, even if they weren’t exactly my favorite style. They’re black, they’re adjustable, and they match the rest of the space.
From there, I installed the new faucet on the vanity, followed by the plumbing. One tip I always use: run water through the line before connecting it to the faucet to flush out any debris. It takes an extra 30 seconds and saves you a headache. Everything that touches the eye is either an improvement or a distraction — and getting the finishes to match turned this space from a collection of random parts into a designed room.
Step 9: Upgrading the Outlet Covers for a Modern Look
This is one of those small details that most people skip, and it shows. I replaced the old GFCI outlet with a more modern one, and paired it with screwless outlet covers in a decor style I love. The screwless plates give a much cleaner look — no visible hardware, no dated plastic trim ring. It’s maybe a $10–$15 upgrade that makes the wall look intentional rather than forgotten.
When you’re doing a bathroom renovation without replacing fixtures, these detail-level swaps are where you win. Nobody walks into a renovated bathroom and says “wow, great tiles” — they feel the overall polish, and that polish comes from all the small things adding up together. Outlets, switch plates, and hardware are your lowest-cost, highest-impact moves.
Step 10: Framing the Existing Mirror to Save Money
I never loved the big builder-grade mirror on the wall, but buying a new mirror would have cost more money — and saving money was the whole point. So instead, I framed the existing one. I applied liquid nail to the mirror and then attached a custom-built frame directly to it. The result is a mirror that looks purposeful and styled rather than like a leftover from the original build.
If you have a big frameless mirror in your bathroom right now, this is the move. It costs a fraction of a replacement, takes a couple of hours, and completely changes how the mirror reads in the space. I’ll be posting a full build video for the frame separately — make sure notifications are on if you want to catch that one.
Step 11: Installing Vinyl Plank Flooring Over the Existing Tile
Here’s something a lot of people don’t realize: you can install luxury vinyl plank directly over existing tile — as long as the prep work is done right. I scraped the floor as thoroughly as I could early in the project, knowing this was the plan. Preparation really is everything with floors.
I found a vinyl floor at the store that practically grabbed me — I ended up taking home five boxes at $66 each. Because it was a small area, I didn’t use all of it, but working around a toilet, vanity, and doorway made the installation more technical than a straightforward room. I got lucky that one of the planks lined up almost perfectly with the toilet drain. After laying the floor, I noticed the door swing was interfering with the transition strip, so I trimmed a thin strip from the bottom of the door — a small fix that made everything sit cleanly. For anyone who wants a deeper dive on floor installation, I have a full video on my channel covering the process in much more detail.
Step 12: Patching the Subfloor With Salvaged Tiles
Here’s a little secret: when I pulled tile off the walls earlier in the project, I accidentally bought a box of matching floor tiles thinking I’d need them for repairs. Once I assessed the actual floor, I realized I only needed one tile — and I happened to have a salvaged tile from the wall demo that worked just as well. I carefully cut the salvaged tile to fit the required area, mixed up some fast-setting cement (and when I say fast, I mean you have maybe two minutes of work time), spread the mix, and placed the tile to match the level of the surrounding floor.
I failed on a couple of tiles the first time because I wasn’t moving fast enough, but I was able to correct them before the cement cured. The goal was simple: one flat, level floor — not matching tiles. Anyone walking into that bathroom later would have no idea those tiles came from two different sources. That kind of creative problem-solving is what a renovation without replacing fixtures is all about.
Step 13: Replacing Baseboards and Door Casing
Replacing the baseboards and door casing might sound like a small thing, but it made the space feel dramatically more modern. Old, scuffed, beat-up trim is one of those things your brain registers as “dated” without consciously knowing why. Fresh trim is like putting a new frame around a painting — it sharpens everything.
Once all the trim was installed, I went around and filled every nail hole with drywall mud. Spackling works too, but drywall mud is my preference for a smoother finish. Then came sanding and paint. The trim next to the shower was especially important to me — it’s highly visible, and getting it right raised my standard for the rest of the project. That’s one of the things I love about doing more of this work: the more I do it, the higher my expectations become, and the better my results get.
Step 14: Painting the Walls for a Fresh, Clean Look
There’s something deeply satisfying about painting over walls that haven’t been touched in years. I used an all-in-one paint primer with a satin finish on the walls — the same product I used on the vanity. The greenish builder-grade color that was there before? Gone. The new color brings warmth and intention to the space in a way no amount of accessorizing could have matched.
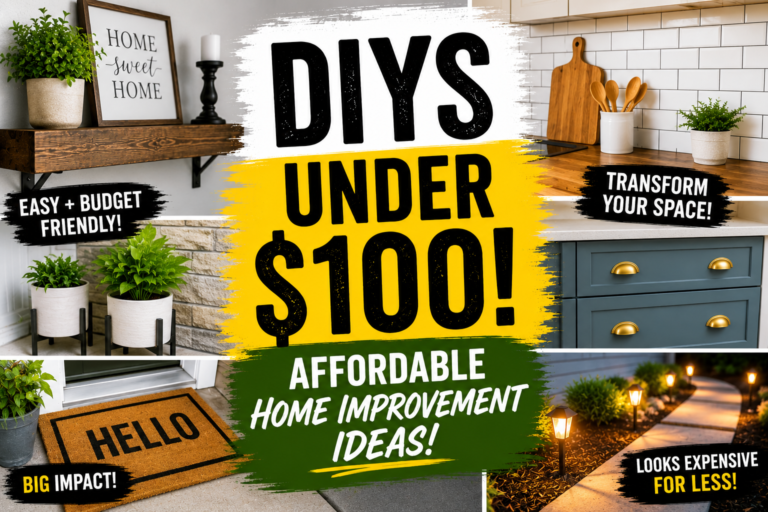
I taped off the windows before painting, which I had actually done early in the project to stay ahead of myself. If you’re working on a similarly dated space and want more painting inspiration, my post on affordable home improvement projects under $100 covers wall treatments that make a huge impact for very little money. Paint is genuinely the best return on investment in any renovation.
Step 15: Swapping the Soap Holder for a Modern Soap Dispenser
I tried to ignore the old built-in soap holder — I really did. But eventually I couldn’t look past it anymore. I carefully pried it off the wall, removed the tile piece behind it, and — luckily — had a salvaged tile from the earlier wall demo that fit the gap perfectly. Once that was cleaned up and set, I installed a wall-mounted soap dispenser in its place.
It’s a small upgrade, but it’s the kind of thing that signals “this bathroom was thought through.” When you’re working on a bathroom renovation without replacing fixtures, these finishing touches are what separate a refreshed space from a truly renovated one. Every detail counts.
Tips and Best Practices for a Budget Bathroom Renovation Without Replacing Fixtures
After going through this entire process, here’s what I’d tell anyone about to take on a similar project. Start by stripping everything non-essential — it clears your head and shows you exactly what you’re working with. Commit to a single finish color for all hardware — matte black was my choice, and it unified the entire space without a single expensive fixture replacement. Don’t be afraid to use salvaged materials — the tiles I reused saved me money and solved a problem I hadn’t anticipated.
Prep your floors before doing anything else — if you’re going over existing tile with luxury vinyl plank, scraping and leveling the surface first is non-negotiable. Use liquid nail strategically — it bonded my cement board to cinder block better than I expected, and it saved me from having to use screws through the tile on the other side. Frame your existing mirror instead of replacing it — it’s one of the highest-impact, lowest-cost moves in the room. And finally, when you hit a surprise problem, take a breath and look forward — every issue in a renovation has a solution. Some are simple, some take more time, but none of them are the end of the world. If you love tackling projects like this one, my guide on 10 home renovation ideas on a budget for a dated house is a great next read.
Frequently Asked Questions
Can you really renovate a bathroom without replacing the toilet, tub, or vanity?
Yes — and that’s exactly what I did in this project. By keeping the major fixtures in place and focusing on paint, hardware finishes, flooring, trim, and accessories, I achieved a transformation that looks completely different from the original while spending just $1,750 in materials. The key is finding smart swaps and detail-level upgrades that shift the overall feel of the space without requiring major plumbing or structural work.
What is the cheapest way to update a bathroom?
In my experience, the cheapest high-impact moves are: painting the walls and vanity, swapping out hardware and outlet covers to a unified finish, installing new trim, and replacing the flooring with peel-and-stick or click-lock vinyl over the existing tile. These four things alone can make a bathroom look completely renovated for a few hundred dollars in materials.
How do you install vinyl plank flooring over existing tile in a bathroom?
The most important step is prep — scrape the tile surface thoroughly to remove any adhesive residue, grout haze, or debris, and make sure the floor is as level as possible. Fill any low spots or damaged areas with fast-setting cement before you start laying planks. Then install your luxury vinyl plank just as you would on any other subfloor, working around your obstacles carefully for a professional result.
How do you make builder-grade bathroom fixtures look more expensive?
The biggest trick is unifying the finish. When every hardware piece — faucet, handles, shower frame, outlet covers, towel bar — matches in the same finish (I used matte black), the room reads as designed rather than assembled. Framing an existing mirror, replacing the trim, adding a modern soap dispenser, and painting the vanity are all moves that cost very little but dramatically shift the perceived quality of the space.
Wrapping It Up
This project taught me more than I expected — not just about bathroom renovation, but about the mindset required to push through uncertainty and keep moving forward. The goal was never to show you a perfect renovation done with unlimited money. The goal was to prove that you can take the same space, change a few strategic things, and completely deliver on your style. I did this for $1,750 in materials, kept almost every major fixture in place, and came out the other side with a bathroom that looks genuinely stunning compared to where it started.
If this inspired you to take on your own space, I’d love to hear about it in the comments below. And if you want more ideas for transforming dated spaces on a budget, check out my full guide on budget-friendly home improvement DIY ideas that look expensive — it’s full of projects that prove you don’t need a big budget to make a big impact. Now get out there and start that project you’ve been putting off. You’ve got this.