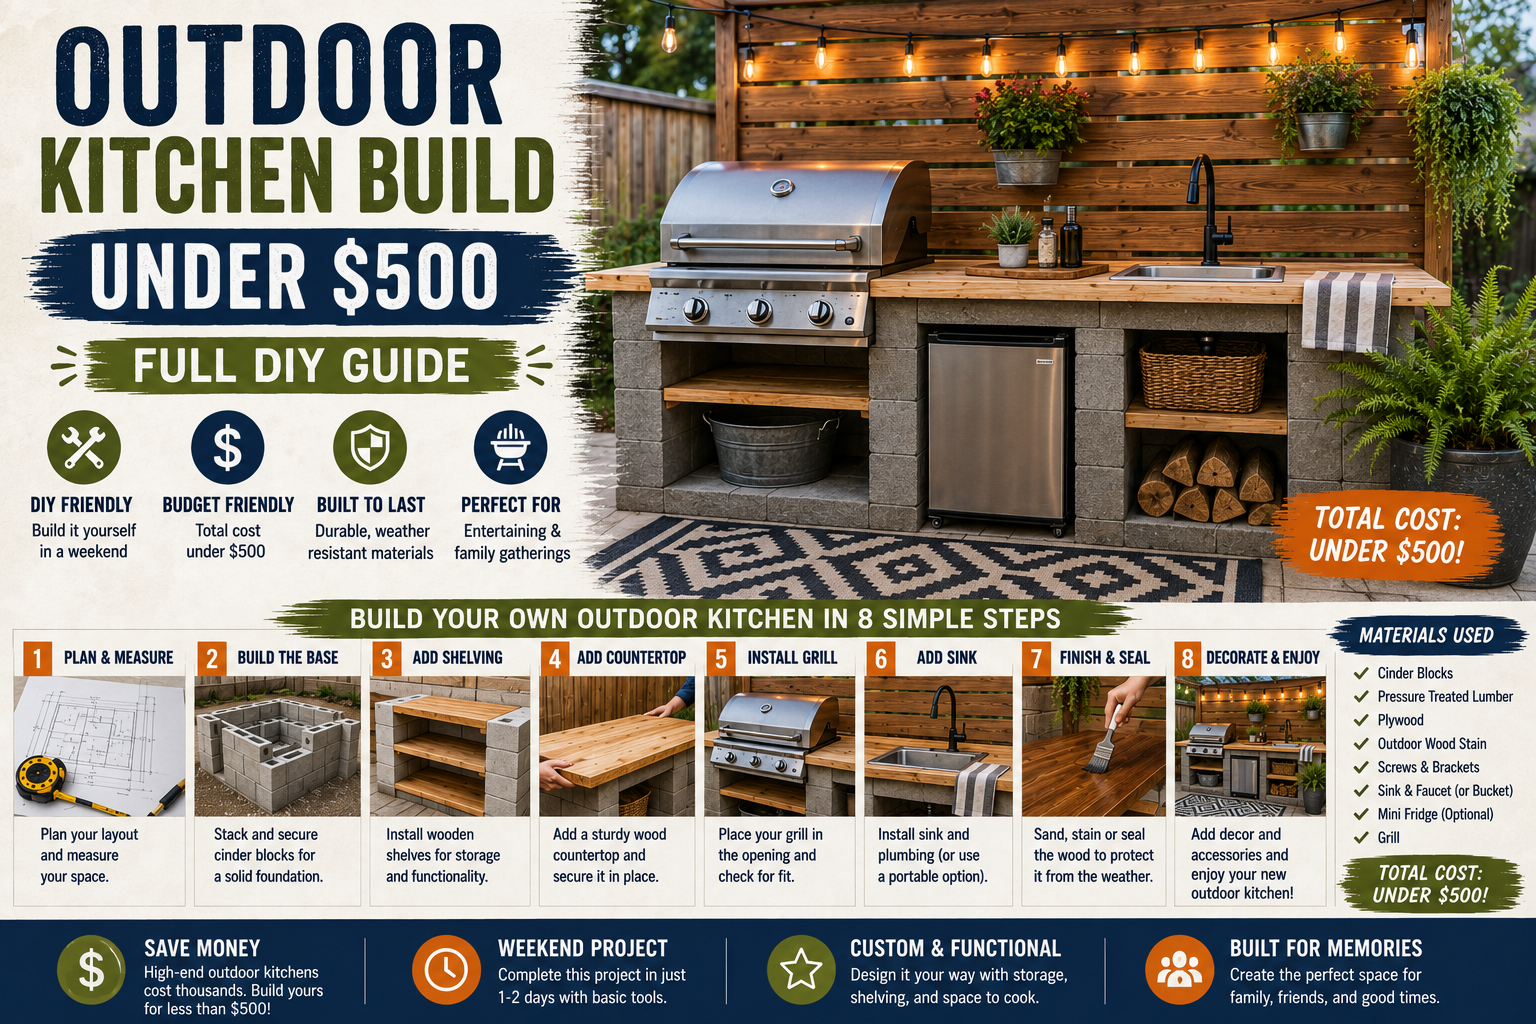
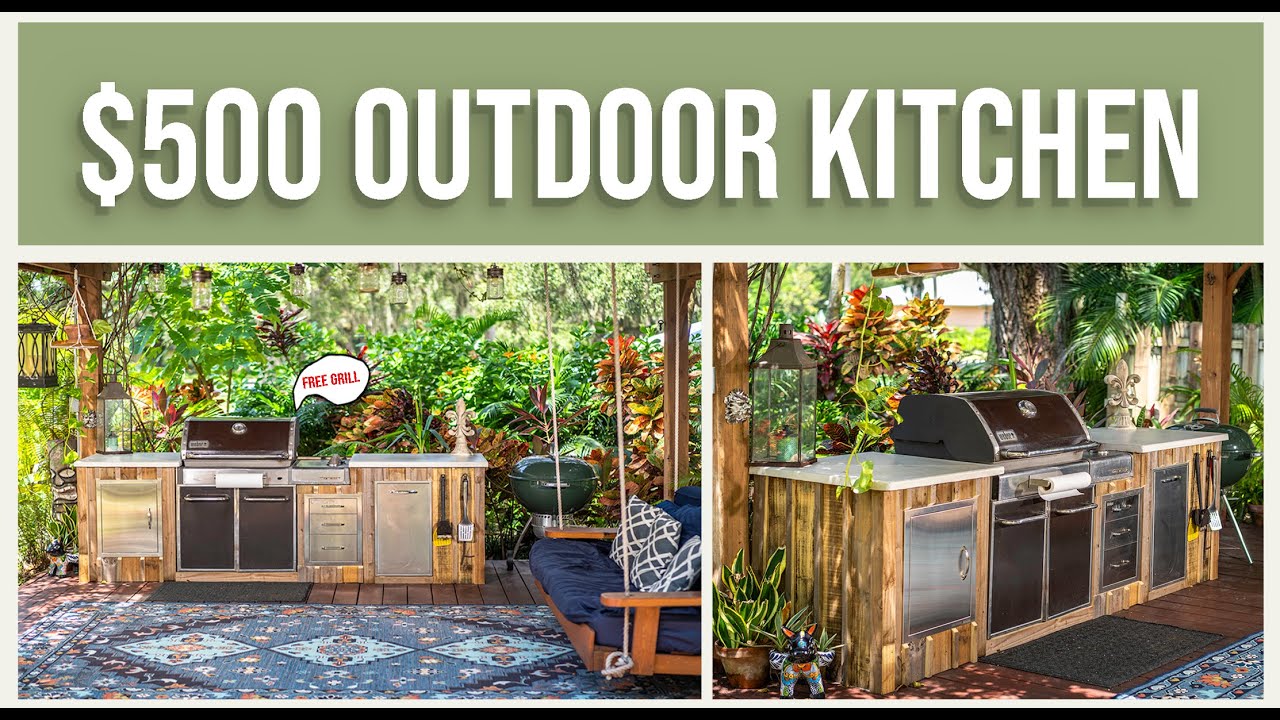
If you’ve ever priced out outdoor kitchen kits online, you already know the sticker shock is real. I’m talking $5,000 to $10,000 for something you could honestly build yourself for a fraction of the cost. That’s exactly why I decided to take on this outdoor kitchen build under $500 — and document every step along the way so you can do the same thing.
I built this kitchen inside a pergola I put up about 10 years ago, and I’ve been dreaming about filling that corner with a proper cooking setup ever since. I scored a free Weber kettle off Facebook Marketplace (yes, free — just had a busted wheel), and I had a pile of salvaged fence pickets sitting around just begging to be used. With a little planning, a few trips to Home Depot, and a healthy amount of learning on the fly, the whole thing came together beautifully. If you want more inspiration for budget outdoor builds, check out my guide on DIY backyard patio and fireplace builds that save thousands.
Below I’m walking you through every single step — from the initial SketchUp design all the way to wiring outlets and spraying the grill. I’m also including a full cost breakdown at the end. Let’s get into it.
Designing the Layout in SketchUp
Before I swung a single hammer, I spent some time messing around in SketchUp to plan out the layout. I’m still learning the software, but what I love about it is that it lets you visualize your build at full dimensional scale before you commit to cutting any wood. That alone can save you a ton of material waste and rework.
My design included a grill area, a door on one side, drawers in the middle, and a door designated for a garbage can. I also left an open section specifically to build out a future smoker station where I can store wood for the Weber kettle — that part I’m saving for a follow-up video. Having that visual plan locked in before I started building made the whole process way less stressful.
Choosing Wood Over Metal Framing (And Why)
Here’s something a lot of people push back on: I built this frame out of wood instead of metal studs. On my very first outdoor kitchen build — the one I did about ten years ago — I went full metal and cement board because everyone said that’s the “right” way to do it. You know what happened? The metal rusted completely through. On top of that, metal studs are genuinely miserable to work with. They’re hard to cut, hard to level, and hard to fasten together.
About four years ago I built another outdoor kitchen using the same Weber grill and a wood frame, and that thing is still holding up perfectly today. The key is using cement board between the grill and any wood framing — I use about 2.5 inches of separation — and the wood never even gets warm to the touch. I always keep a fire extinguisher nearby just in case, but in years of use I’ve never had an issue. Wood is easier, cheaper, and honestly more forgiving for a DIYer.
Using Salvaged Fence Pickets for the Exterior Cladding
My original plan was to go with cement board and tile all around the outside, but once I started laying things out I realized I’d end up with a bunch of awkward little tile slivers around all the doors and drawers. It just wasn’t going to look great. So I pivoted to a board and batten look using old fence pickets I had salvaged from a fence I tore down.
I pulled the pickets apart, debated whether to sand and paint them or leave them rustic, and honestly they looked pretty cool with that weathered character. The board and batten style — a flat board with a thin strip over the seam — gives a clean, intentional look and is dead simple to execute. On the interior sections near the grill, I still used cement board to keep any heat away from the wood structure. Best of both worlds.
Building the Frame with Pocket Hole Joinery
For all my joinery on this build I used a Kreg Pocket hole joinery setup with 2.5-inch outdoor screws. If you’ve never used pocket holes before, they’re a game changer for cabinet-style builds like this — fast, strong, and you don’t need a bunch of fancy equipment. I built the main cabinet box 23 inches deep, which gave me plenty of room for storage without the whole unit feeling too bulky.
One thing I want to flag for anyone doing this: get your cords out of the way before you start cutting. Learn from my mistakes on that one. Safety first, always. I also made sure to use 2×4s for the structural framing to keep everything solid and square.
Protecting the Base from Moisture with Composite Decking Scraps
One detail I’m really glad I added: I had some leftover composite decking pieces from a previous project, and I used those as a barrier layer underneath the pressure treated wood base. The idea is that the pressure treated lumber never makes direct contact with any moisture from the ground or the concrete surface below. It’s probably overkill, but if it buys me a few extra years of life on this structure it’s worth the five minutes it took.
It also raised the whole unit up about 3/4 of an inch, which actually brought the counter height to a much more comfortable working level. Happy accident, but I’ll take it.
Building a Sealed Interior Box to Keep Out Pests
This is one of those details that doesn’t look impressive in photos but makes a massive difference in real life. Inside the main cabinet I built a plywood box so that when you open the door, everything inside is fully enclosed. No gaps, no openings for bugs, rodents, or anything else to get into.
I used a scrap piece of 1/2-inch plywood I had sitting in my shed to build it out. I’ve had outdoor storage on my property before where I skipped this step and ended up dealing with rats, squirrels, and raccoons helping themselves to whatever was inside. Not doing that again. I sealed all the edges too — a little extra effort upfront saves a huge headache down the road.
Using Cement Board Inside the Drawer Area for Heat Protection
Even though I went with wood framing on the outside, I lined the inside of the drawer area with 1/2-inch cement board. The whole point here is to block any heat from the grill from ever reaching the wood. This is the same approach I used on my four-year-old kitchen that’s still going strong, so I know it works.
I used pocket holes again to get everything attached cleanly. It’s a bit fiddly to work with cement board in tighter spaces, but it’s absolutely worth doing right. Think of it as cheap insurance against any heat-related issues down the line.
Fixing and Retrofitting the Free Weber Grill
The Weber I grabbed off Facebook Marketplace was free, but it needed some love. The wheel bracket had rusted off, so I just screwed it down into the base for now — functional fix, not pretty, but it works. I also discovered the side burner wasn’t lighting, so I ended up abandoning the side burner plan and leaving the gas connection in place in case I want to add a surface burner to the countertop later.
One thing I love about these Weber kettles is how affordable the replacement parts are. I picked up all new burners and flavor bars for under $50. Fresh components, clean cook surface, good to go. I also hit the exterior with some Rustoleum high-temp grill spray paint to freshen up the look — we’ll see how it holds up over time, but it looked sharp right out of the can.
Pouring Pre-Cast Concrete Countertops
This was my favorite part of the whole build and honestly the section where I learned the most. Instead of doing pour-in-place countertops (which I’ve done before with mixed results — uneven spots, water pooling, mold issues), I went with pre-cast concrete using melamine forms. The finish you get with pre-cast is so much nicer, and the forms can be reused after you scrape off the silicone.
I used 100% silicone to seal the form edges, WD-40 on the interior surfaces so the concrete wouldn’t stick, and I added both a set control additive (to slow the cure time) and a flow control additive (to help it flow into the cast without voids). A few lessons I learned the hard way: mix those additives in after your concrete is fully wet, not while it’s still powdery or they’ll clump up. And mix them separately before combining — I think mixing them together at the same time caused some white staining on my surface.
I needed about 1.5 cubic feet total for both counter sections, which worked out to three 55-lb bags. In 100-degree heat, this stuff starts setting up fast — I’m talking hard in about 10 minutes and radiating heat within 20. I kept misting the counters every 15 minutes for the first couple of hours to slow the cure and reduce cracking. I did get one hairline crack and a few small bubbles, but overall the finish was stunning — smooth, detailed, and way better than anything I’d done with pour-in-place forms. I’ve been following Michael Builds on YouTube for inspiration on pre-cast concrete work — great content if you want to go deep on this technique.
Making the Forms Level and Getting the Pour Right
Before pouring, I took my time making sure the melamine forms were level in both directions. This is non-negotiable — any tilt and you’ll end up with a countertop that’s thick on one side and thin on the other, plus water will pool in the low spots forever. I used a laser level to double-check everything before I mixed a single bag.
I also tapped the forms repeatedly during the pour to work out air bubbles — ideally you’d use a vibrating tool for this, but tapping worked reasonably well. You need to move fast once you start mixing because the working window is short, especially in the heat. Have everything staged and ready before you open the first bag.
Adding an Outdoor Electrical Outlet and Light Switch
One of the upgrades that really makes this kitchen functional is the wiring I ran for an outdoor outlet and a toggle switches for the lights. Having power out there means I can plug in small appliances, run a radio, or charge my phone while I’m cooking — all the things that make an outdoor kitchen actually enjoyable to use.
If you’re not comfortable with electrical work, this is one area where calling in a professional is worth considering. But if you’ve got some experience with basic wiring and you’re working in a low-voltage outdoor setup, it’s very manageable as a DIY project. Make sure you’re using weatherproof boxes and covers rated for outdoor use. For more on adding electrical to outdoor structures, my post on shed electrical wiring for beginners covers a lot of the same principles.
Finishing Details: Trim, Mitered Corners, and Hardware
The finish work is what separates a project that looks homemade from one that looks intentional and polished. For the corners, I mitered the fence picket boards so they wrap cleanly without showing a raw edge. I also knocked down the miter slightly with a pass or two so the transition reads as one continuous piece rather than two boards meeting at a joint. Small detail, big visual difference.
I added a magnetic paper towel holder I found on Amazon — practical little addition that I really appreciate when I’m out there cooking. For the hardware, I splurged a bit on quality stainless outdoor door hardware including doors and drawers. My reasoning: the hardware is what keeps the bugs and rodents out of your storage, and it’s what you’re touching every single time you use the kitchen. This isn’t the place to cheap out. Between all the hardware, doors, and drawers I spent close to $300, but they’re completely sealed and built to last.
Planning a Future Smoker Station
I intentionally left one section of the build open — no doors, no drawers, just open space. The plan for that area is a dedicated smoker station where I can store wood chunks and charcoal for the Weber kettle and have everything organized and within arm’s reach when I’m doing a low-and-slow cook. I’m saving that part for a follow-up video, but designing for it from the beginning means I won’t have to retrofit anything weird later.
This is good general advice for any outdoor kitchen build: think about what you want the space to do in two or three years, not just right now. Leaving flexible space costs almost nothing upfront and saves a lot of headache later.
Total Cost Breakdown: How I Stayed Under $500
Here’s how the numbers actually shook out on this build. The hardware — doors, drawers, and all the outdoor-rated stainless components — ran me close to $300. The pre-cast concrete countertops cost about $100 in materials (bags of concrete mix plus the additives). Lumber for the framing came in at around $100. Everything else — the cement board, the silicone, the caulk, the spray paint — I either had on hand or picked up cheaply.
The grill itself was free off Facebook Marketplace, the fence picket cladding was salvaged from a fence teardown, and the composite decking scraps came from a previous project. If you’re buying everything new, your number will be higher — but the point is that with a little creativity and some patience watching Marketplace, an outdoor kitchen build under $500 is absolutely achievable. Compare that to $5,000–$10,000 for a kit and the math is pretty clear. For more ideas on stretching your DIY budget, take a look at my post on budget home improvement DIY ideas that save thousands.
Tips and Best Practices for Your Own Outdoor Kitchen Build
Use SketchUp to plan before you build. Even a rough model helps you catch layout problems before they become expensive mistakes. It’s free and the learning curve is manageable for simple builds.
Consider wood framing with proper heat shielding. Don’t let the “you have to use metal” crowd scare you off wood. Use 2.5 inches of cement board between the grill and any wood, and you’ll be fine. Metal rusts, and it’s genuinely harder to work with.
Seal everything against pests. Build interior boxes inside your cabinets, seal all edges, and don’t leave any gaps. Rodents and bugs will find any opening you leave them.
For pre-cast concrete countertops: Level your forms perfectly, use WD-40 as a release agent, add your flow control and set control additives after the mix is fully wet (not during), and keep the surface misted in hot weather. Tap out the bubbles fast — you’ve got a short working window.
Splurge on hardware, save on cladding. The doors and drawers are what keep your kitchen functional and pest-free. The exterior cladding is a great place to use salvaged or budget materials.
Use a laser level for the countertop forms. Seriously. Don’t eyeball it.
Shop Facebook Marketplace for appliances. A free or deeply discounted grill with a minor issue can save you hundreds of dollars, and replacement parts for popular brands like Weber are cheap and widely available.
Frequently Asked Questions
Is it safe to build an outdoor kitchen with a wood frame?
Yes, absolutely — as long as you take the right precautions. The key is using cement board between your grill and any wood framing, maintaining proper spacing (I use about 2.5 inches), and keeping a fire extinguisher nearby. I’ve had a wood-framed outdoor kitchen going strong for four years with zero issues. My first kitchen used metal studs and it rusted out completely. Wood is actually the better choice for most DIYers when done correctly.
How do I keep bugs and rodents out of my outdoor kitchen cabinets?
Build a sealed plywood box inside each cabinet so there are no gaps or openings. Use quality stainless outdoor-rated door hardware that seals tightly when closed. Caulk any seams on the exterior with 100% silicone caulk. This extra effort upfront is the single best thing you can do to keep your storage usable long-term.
What’s the best countertop option for a budget outdoor kitchen?
Pre-cast concrete is my top recommendation after trying multiple methods. The finish is beautiful, the forms are reusable, and the material cost is very reasonable — about $100 for both my counter sections. Pour-in-place concrete is harder to get level and tends to develop water-collecting dips and mold over time. Pre-cast lets you control the finish in a more forgiving environment before setting the counters in place.
Can I really build an outdoor kitchen for under $500?
I did it, and you can too — especially if you’re willing to source salvaged materials and shop smart. My biggest cost items were the hardware (doors, drawers, outdoor-rated stainless — about $300), the concrete countertop materials (~$100), and lumber (~$100). The grill was free, the cladding was salvaged fence pickets, and the composite decking underlayment was leftover from another project. If you’re buying everything new, budget a bit more, but $500 is very achievable with some resourcefulness.
Ready to Build Your Own Outdoor Kitchen?
An outdoor kitchen build under $500 isn’t just possible — it’s one of the most rewarding projects you can take on as a DIYer. You get a genuinely functional outdoor cooking space, you learn skills that carry over to dozens of future projects, and you do it all for about 5–10% of what a kit would cost you. The key takeaways from my build: plan it out in SketchUp first, seal everything against pests, don’t be afraid of wood framing with proper heat shielding, and splurge on the hardware because that’s what makes the kitchen functional day in and day out.
If you’re hungry for more outdoor project ideas after this one, check out my full guide on 10 outdoor DIY backyard project ideas — there’s something in there for every skill level and budget. Drop your questions in the comments below, let me know if you want to see the smoker station follow-up video, and if this helped you out, share it with someone who’s been dreaming about their own backyard kitchen setup. You’ve got this.