If you’ve been putting off home improvements because you think they have to be massive, expensive, or time-consuming — I’m here to tell you they don’t. Some of the most powerful transformations I’ve made in my home came from small to medium projects that cost almost nothing and took just an afternoon. It really is all in the details. Those little things you keep ignoring? They’re quietly cheapening the look and feel of your entire space, and fixing them is easier than you think.
In this post, I’m walking you through every tip and project I covered recently — from right-sizing furniture to deep cleaning blinds you forgot existed. These are the kinds of budget home improvement DIY ideas that save thousands when you handle them yourself instead of calling someone in. Whether you’re prepping to sell, trying to love your home more, or just craving a refresh, these are the moves that actually make a difference. Let’s get into it.
I’ve been on a serious kick lately of going room by room and tackling all those nagging little things I’d been tuning out. The result? My house feels brand new — and I barely spent anything. If you want even more ideas to work with, check out my post on budget home design ideas on a dime that make big impact. But for now, here’s everything I did and every tip I can share.
Tip 1: Choose Furniture That Actually Fits the Space
This is the one that started everything. I moved my husband Chase’s desk into his office and it was just too small for the room — and it showed. A piece that’s the wrong size for a space, whether too big or too small, immediately cheapens the entire feel of the room. Getting the scale right is one of the highest-impact home improvement projects you can do, and it doesn’t always require buying new.
Before you buy anything, measure what you currently have and then use a tape measure to map out how large the new piece can be. If it helps, lay down painter’s tape on the floor to mark the footprint, or use sofa cushions and TV trays to simulate the size. Always account for walkthrough space — Chase needed to be able to push his chair back without hitting the wall, so I factored that in before I ever started shopping.
Here’s a money-saving tip I learned the hard way: always shop around before you commit. I found Chase’s new desk on Wayfair for $800 before tax and shipping, with a five-to-six week wait. After a bit more googling, I found the exact same desk at our local Office Depot for $400 — available the next day — with a $100 off coupon. That’s a huge difference. And whenever possible, buy used. Something from Craigslist is already assembled, which can save you several hours of frustration.
Tip 2: Shop Your Own Home First
My office is a space I’m not fully committed to yet. I haven’t decided on a style — part of me wants to go Scandinavian like the rest of the house, part of me wants something more glam. So instead of rushing into decorating decisions I might regret, I’m just pulling in pieces I already own. I grabbed some pillows from the master bedroom, threw in a few blankets, and rearranged what was already on the desk. Zero dollars spent, and the space already feels so much cozier.
I’m honestly guilty of rushing into a design just because I want a space to feel done. But when you do that, you end up decorating in a style you’re not 100% sold on — and then you’re redoing it six months later. If you’re in that limbo phase with a room, just shop your house. Move things around. Declutter. Rearrange. It costs nothing and it buys you time to figure out what you actually want.
If you’re not sure what your style is yet, get on Pinterest or Instagram and start saving images. Then go back later and look at what they all have in common. Maybe they’re all bright and airy — so you just need new light bulbs or white walls. Maybe it’s a certain texture or color that keeps showing up. That exercise alone can save you from a lot of expensive decorating mistakes. If you love budget-friendly ideas like this, my post on affordable home improvement projects under $100 is worth a read too.
Tip 3: Swap Out One Key Piece to Refresh an Entire Room
Sometimes you don’t need to overhaul a whole room — you just need to change one thing. For my living room, that one thing was the rug. I swapped it out and suddenly the entire room felt fresh again. It tied in the black accents I’ve been using throughout the house, pulled together the design direction I’m going for, and honestly? My house felt like it smelled cleaner. That’s the power of one well-chosen piece.
It doesn’t have to be a rug, either. Maybe for your space it’s new throw pillows, a different lamp, updated lamp shades, or even just switching from warm bulbs to brighter daylight ones. Figure out what that one piece is for your room, and make that swap. The impact is almost always bigger than you expect.
When it comes to rug sizing specifically, here’s what I do: use painter’s tape to mark the area on the floor where you want the rug to go. In a living room, you ideally want at least the front legs of all your furniture on the rug — that’s what makes the room feel larger and more intentional. If budget is a constraint and you can’t quite get to that size, go as close as you can, and always err on the side of larger rather than smaller. Shopping by size first on rug sites is a game changer — it saves you from falling in love with something that doesn’t come in your dimensions.
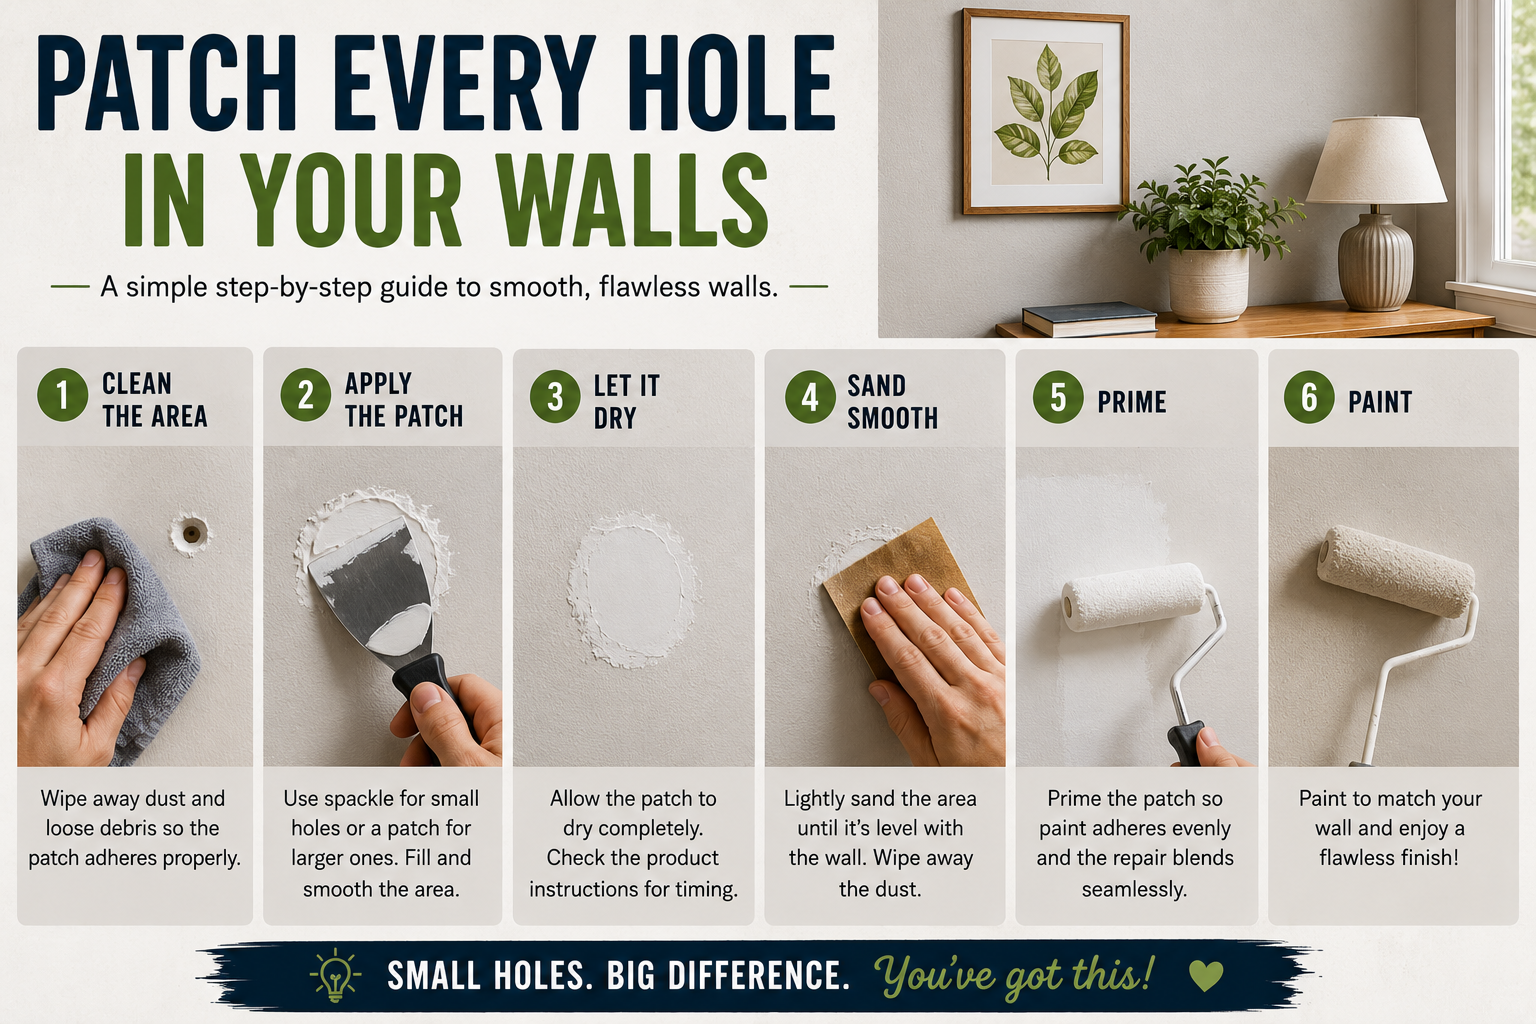
Tip 4: Patch Every Hole in Your Walls
After all that furniture rearranging and wall decor shuffling, I was left with nail holes all over the place. I know it’s tempting to just tune them out — trust me, I do it too — but filling them in makes such a dramatic difference. Your walls will look brand new, and it’s one of those home improvement projects that takes under an hour from start to finish.
Grab some spackle (it goes on pink and dries white, so you’ll know when it’s ready to sand), fill every hole you can find, let it dry, sand it smooth, and paint over it. And here’s the move I always make: before I put the supplies away, I walk through my entire house and find every other hole I’ve been ignoring. I even have Chase do a walk-through because I always miss some. Get the kids involved too — they love hunting for holes and they’ll find ones you’ve completely overlooked. Do it all at once so you’re not dragging out the supplies again next weekend.
If you have really large holes, use a netting tape over the opening first — otherwise the spackle just sinks in. And if your walls are textured, they also make spray-on drywall texture so your patched areas don’t stick out as a flat spot. For typical nail and screw holes though, basic spackle and a finger-sand is all you need. One fun hack I’ve seen floating around: toothpaste apparently works in a pinch, though I haven’t tried it myself.
Tip 5: Do Paint Touch-Ups Throughout Your Entire Home in One Session
While I had my black paint out for one touch-up, I made myself do a full walk-through and hit every single spot in the house that had that same color. Scuffs, dings, areas where furniture had bumped the wall — all of it. I even caught a spot on the fireplace mantel where a TV had stuck to the paint and lifted some off. I had completely forgotten about it because it had been buried under Christmas decor. A quick sand and a thin coat of paint and it looked brand new.
The key here is efficiency: whenever you pull out a paint color, don’t just fix the one spot that prompted you to open the can. Walk the entire house and knock out every touch-up that needs that color. Same goes for every color you use. It saves you from doing four separate sessions when you could do it all in one, and the compounding effect of all those little fixes is massive — your whole home feels cared for and fresh.
One thing to keep in mind if you’re using a fresh can of the same color: feather the edges out and keep the brush slightly on the dry side so it blends into the surrounding wall. You don’t want a perfect patch that looks like a patch. Blend it in, and no one will ever know.
Tip 6: Sand and Repaint Dingy Windowsills
This one surprised me. I was rearranging furniture in the guest bedroom — Chase’s old office — and when I looked at the windowsill up close, I was shocked at how bad it looked. From a distance you’d never notice, but once you’re up close, it was obvious. All it took was wiping it down, sanding it lightly, and giving it a fresh coat of paint. It went from looking hideous to looking brand new in about 30 minutes.
The lesson here is that some of the best home improvement projects that make a big impact are hiding in plain sight — literally. Things you walk past every day that your eye has learned to ignore. Windowsills, door frames, baseboards, the trim around light switches. Take a slow walk through your home at eye level and then at a low angle and really look. You’ll find things you didn’t know needed attention.
Tip 7: Deep Clean the Things You’ve Been Ignoring
While I was working on that windowsill, I noticed the blinds in the same room were genuinely disgusting. Not in a hoarding-show way — just in a “no one has wiped these down in a while” way. I grabbed a microfiber cloth and some cleaner and went to town. That’s it. No project, no tools, no budget — just a deep clean that made the whole window area look completely different.
Sometimes a home improvement project isn’t a project at all. It’s just cleaning things you’ve been avoiding. Microfiber cloth and a good cleaner can transform blinds, cabinet faces, light switch plates, baseboards, and a dozen other surfaces that quietly collect grime. If you’re getting ready to sell, this kind of deep clean is non-negotiable. But even if you’re staying, it matters — you’ll feel better in a clean, cared-for home.
Think about the areas you genuinely never clean. The tops of door frames. The kick plates under your cabinets. The window tracks. The grout between tiles. I’m not saying you have to do it all today, but put it on a list and chip away at it. Each one is a small win that adds up to a home that feels noticeably fresher.
Tips and Best Practices for Home Improvement Projects That Make a Big Impact
After going through all of these projects in one motivated push, here are the big-picture takeaways I keep coming back to:
Work in batches by material. Whenever you have paint out, a paintbrush dirty, or spackle mixed, use that momentum to hit every spot in your home that needs that same material. Don’t put it away after one fix.
Use visual tools to size furniture before you buy. Painter’s tape, sofa cushions, even cardboard boxes — anything that lets you see a footprint in the room before you commit to a purchase. A tape measure is your best friend here.
Buy used whenever possible. It’s already assembled, it’s cheaper, and you can often find high-quality pieces that would cost twice as much new. Check Craigslist, Facebook Marketplace, and local estate sales before you order anything online.
Don’t rush your design decisions. Shop your home, use what you have, and let yourself sit with a space before committing to a style. Rushing leads to decorating regret and unnecessary spending.
Treat your home like you’d treat a car before selling it. Keep it looking fresh and cared for all the time — not just when you’re listing it. You’ll enjoy living in it more, and you’ll get a better return when you eventually do sell.
Frequently Asked Questions
How do I know what size furniture to get for a room?
The easiest method is to measure your current furniture, then use a tape measure to mark out the max dimensions on the floor — or use painter’s tape to outline the footprint. Make sure you’re accounting for walkthrough space, chair pullout room, and how you’ll actually move around the piece day to day. When in doubt, err slightly larger rather than smaller, as undersized furniture makes rooms feel smaller and cheaper.
What’s the fastest way to make a room look better without spending money?
Shop your own home. Pull pieces from other rooms — throw pillows, blankets, decorative objects — and rearrange what you already have. Declutter, deep clean with a microfiber cloth, and move furniture into a better layout. These zero-budget moves can completely change how a space feels in under an hour.
How do I patch nail holes in walls the right way?
Apply spackle to the hole (it goes on pink and dries white so you know when it’s ready), let it dry fully, then lightly sand it smooth. Follow up with a touch of the matching wall paint, feathered out at the edges so it blends in. Walk the entire house before putting supplies away so you handle every hole in one session. For larger holes, apply netting tape first to give the spackle something to hold onto.
Is it worth doing small touch-ups if I’m not selling my home?
Absolutely — maybe even more so. When you keep your home looking fresh and cared for all the time, you genuinely enjoy living in it more. It’s the same principle as keeping your car clean — once it looks great, you want to take care of it. Small touch-ups like paint scuffs, dingy windowsills, and dirty blinds are the kinds of things your eye adjusts to over time, but once fixed, the difference is immediately obvious and feels amazing.
Final Thoughts
These home improvement projects that make a big impact aren’t flashy or complicated — but they work. Getting furniture to the right scale, shopping your own home before spending money, swapping one key piece, patching holes, doing paint touch-ups in batches, refreshing windowsills, and deep cleaning neglected surfaces. Each one on its own is a small win. Together, they completely transform how your home looks and feels.
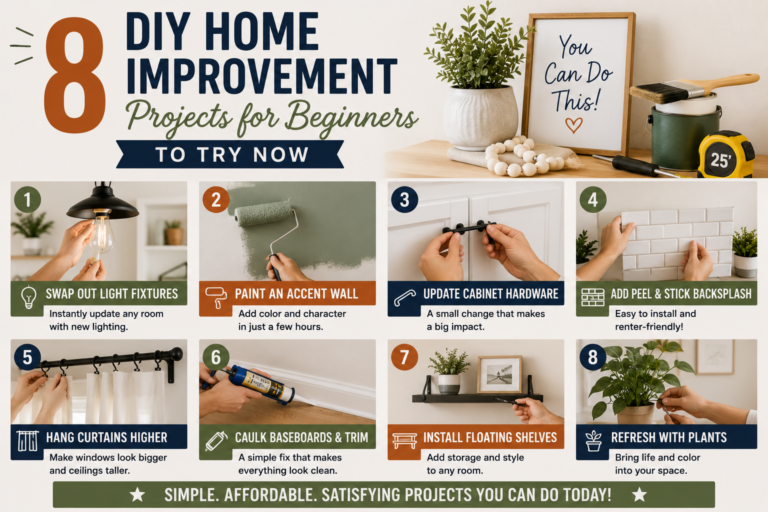
I hope this gave you some ideas and the motivation to tackle a few of these this weekend. If you want to keep the momentum going, check out my guide to 8 DIY home improvement projects on a budget that transform your space — there are even more ideas in there to keep you busy. Drop a comment and let me know which tip you’re trying first. I’d love to hear how it goes!