Is it really possible to pull off a budget kitchen renovation under $5000? That was the exact question we set out to answer at the Ditto House — our 100-year-old project property where nothing is level, nothing is square, and nothing ever goes according to plan. The average kitchen renovation runs somewhere between $25,000 and $50,000, and we’d already done one for under $10,000 (which people still said was too expensive). So this time, we pushed even harder. We wanted the absolute cheapest kitchen we could get away with — one that was still functional, attractive, and completely usable — without spending a single unnecessary penny.
Spoiler alert: we didn’t quite hit $5,000. We landed just over $6,000 once appliances were factored in. But here’s the thing — this kitchen started with literally no cabinets, no countertops, and no usable space. What we built is something we’re genuinely proud of, and every decision along the way was made to stretch the budget as far as humanly possible. Whether you’re flipping a house or just trying to refresh your own kitchen without going broke, every strategy in this post applies directly to you.
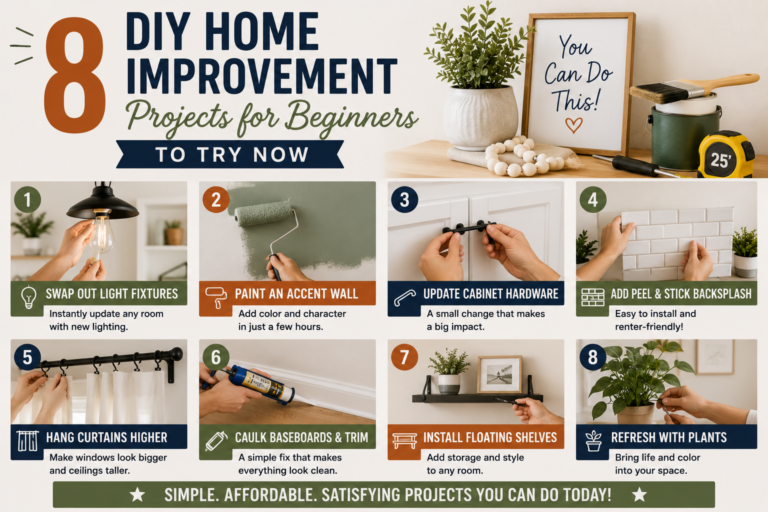
Let’s walk through every single step of this renovation — the demo, the cabinets, the countertops, the backsplash, the flooring, the lighting, and yes, the appliances — along with the real numbers behind each one. If you love budget DIY projects like this, you’ll also want to check out our post on 8 DIY Home Improvement Projects on a Budget That Transform Your Space for even more inspiration.
Step 1: Demo — Clear the Space and Find Your Vision
Before you can build anything, you have to tear out the old stuff, and this kitchen gave us plenty to tear out. The original space had nothing going for it — a couple of shelves bolted to the wall passing as “cabinets,” a cramped layout, and a vibe that was more creepy than cozy. The demo itself didn’t cost a single dime, which is always a great way to start a renovation.
In our case, the demo got complicated fast. We discovered we needed to move the kitchen entirely — knocking it into an adjacent bedroom space — to free up room for two bathrooms, which is a huge selling point on a flip. Then we hit the real curveball: a fully bricked-up 100-year-old fireplace hidden inside the walls we needed to remove. That meant taking it out brick by brick. Not a fun surprise, but after the dust settled, we had a brand-new blank canvas and hadn’t spent much beyond a few hundred dollars in materials for the electrical, plumbing, and insulation work.
Step 2: Cabinets — Score Clearance Deals at the Big Box Stores
Cabinets are typically one of the most expensive parts of any kitchen renovation. We’re talking thousands of dollars before you even get to countertops or appliances. When we started googling “inexpensive cabinets,” most of what came up was still way out of our price range. So we did what any smart budget renovator does — we headed to Home Depot and checked what they had sitting right on the shelf.
The big home improvement stores almost always carry ready-to-grab cabinet styles at lower price points, but the real gold is in the clearance section. We found several base cabinets on clearance and snagged every one we needed. For the upper cabinets, we needed 42-inch tall units to take advantage of the 9-foot ceilings, so we ordered those since the clearance selection didn’t have them. All in, we got every cabinet this kitchen needed for under $2,500. Yes, that’s half the entire budget — but it’s still a fraction of what cabinets typically cost.
Step 3: Cabinet Installation — DIY It and Save Big
Buying cabinets cheap only saves you money if you install them yourself, and honestly, it’s not as scary as it sounds. The process is straightforward: start with the uppers, use a ledger board, mark your studs, keep everything level, screw the cabinets into the studs, and then screw the boxes together. Having a couple of friends help — ideally ones you don’t have to pay — makes a huge difference.
For the lower cabinets, the key is finding the high spot in your floor first. Old houses are never perfectly level, and you need to account for that before your cabinets go in. Mark the high spot on the wall, transfer that measurement all the way around the room, and shim the cabinets up to that line. It’s much easier than trying to cut the bottoms of the cabinets. We also recommend taking the doors off before you start — it makes clamping and screwing the boxes together significantly easier, and you won’t be fumbling around door hinges the whole time.
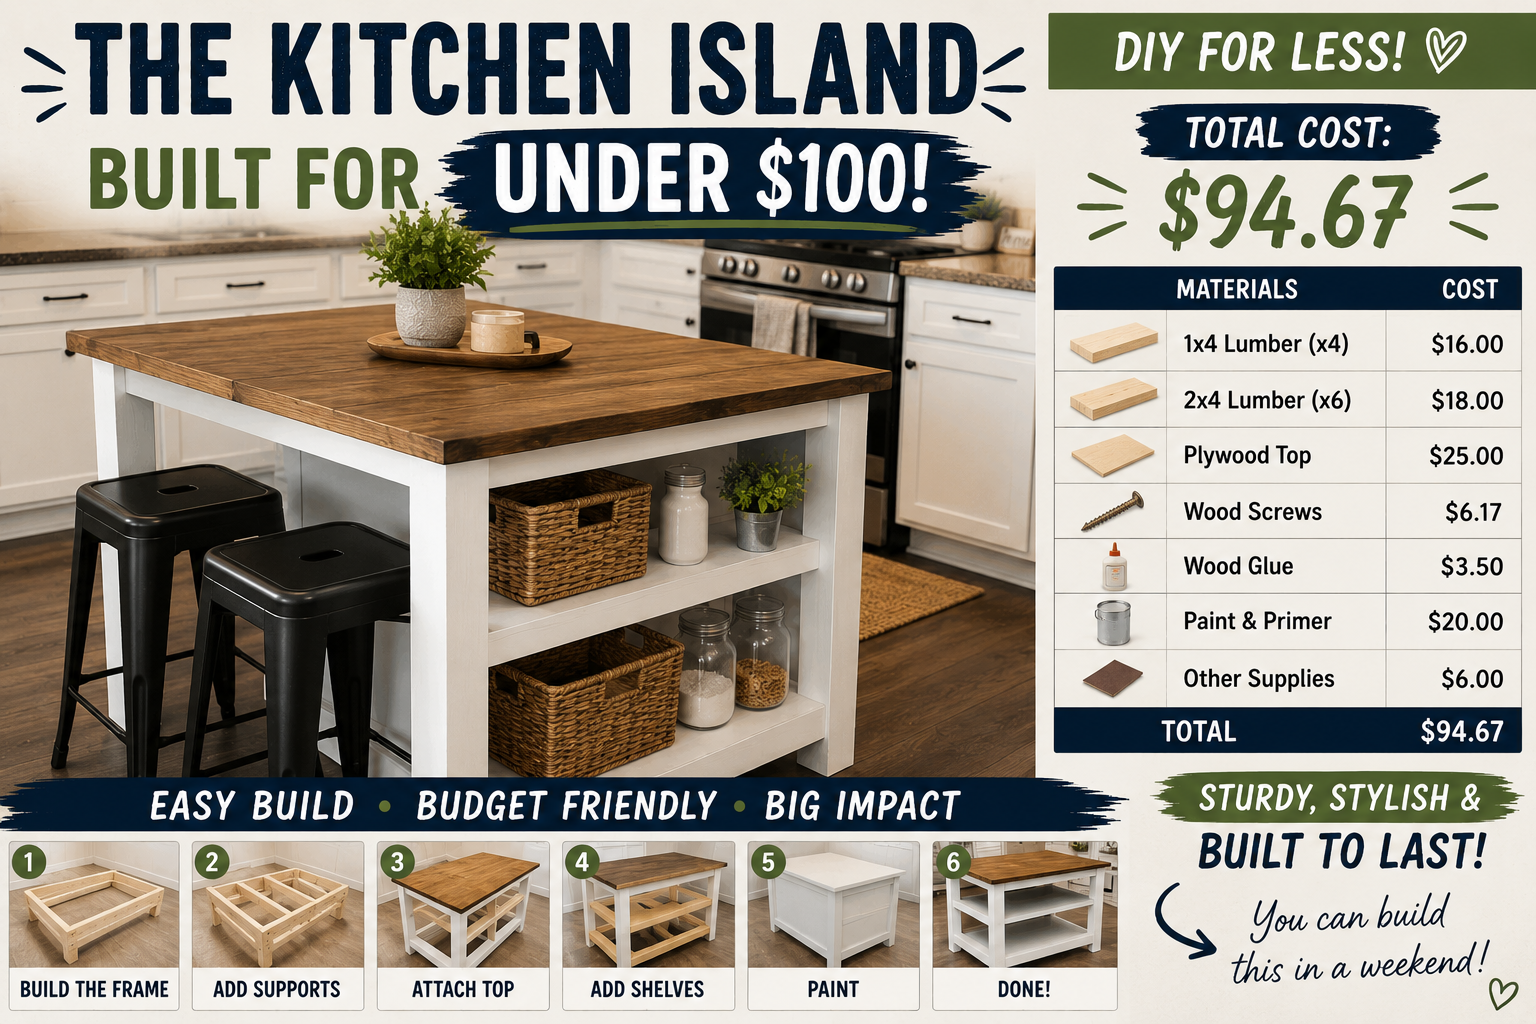
Step 4: The Kitchen Island — Built for Under $100
Every kitchen benefits from an island, but in our open kitchen-living room combo, it was essential for defining the space and adding prep surface and seating. The challenge, of course, was doing it without blowing the budget. Our solution? A beat-up cabinet we picked up for just $20.
It didn’t matter that it was damaged, because we were going to reinforce and build around it anyway. We framed out a full island structure around that $20 cabinet base, wrapped the exterior in shiplap for a finished look, and painted it in Evergreen Fog by Sherwin Williams — a gorgeous, trendy green that adds a pop of color without feeling out of place. The whole island came in at under $100, and it looks like something you’d see in a much more expensive renovation. It also has room for bar stools, making it a functional seating area in addition to extra prep space.
Step 5: Countertops — Butcher Block on Clearance Beats Laminate Every Time
If you’re doing a budget kitchen renovation under $5000, marble and quartz countertops are out. We knew going in that we’d likely end up with laminate, which we weren’t thrilled about — it gets the job done, but it’s not exactly inspiring. Then we spotted something unexpected: butcher block countertops on clearance.
Butcher block is usually more expensive than laminate, so we weren’t even looking at it. But the clearance pricing flipped the script entirely — we found enough pieces to cover the entire kitchen, and it came out cheaper than the laminate. Butcher block is also one of the more DIY-friendly countertop materials as long as you’re comfortable with basic carpentry. You can cut it, fit it, and install it yourself without needing to hire anyone. We got all the countertops we needed for under $600, and the warm wood tone looks far more expensive than the price tag suggests.
Step 6: Sink and Faucet — Affordable but Not the Cheapest Option
When it comes to the sink and faucet, we didn’t go with the absolute cheapest option available, and here’s why: you use your sink constantly, and buying something that looks or feels flimsy is going to annoy you every single day. We grabbed an affordable sink and faucet combo from Amazon that still looked great and felt solid. The whole combo came in at just over $300, which is very reasonable for a complete sink and faucet setup.
The lesson here is that budget doesn’t always mean “cheapest price possible.” Sometimes spending a little more on a high-use item is the smarter long-term call — especially on a flip where the goal is to impress buyers, not cut corners they’ll immediately notice.
Step 7: Tile Backsplash — Worth Every Penny
With about $1,300 left in the budget at this point and still a lot left to cover, a tile backsplash felt like a luxury we probably shouldn’t afford. We almost skipped it. But a backsplash does something really powerful for a kitchen — it makes the whole thing look intentional and finished, not like a budget renovation at all. So we went for it.
We chose a simple square tile, laid it out with spacers to plan the cuts (we only needed to make one cut, hidden under the upper cabinet), and installed it ourselves. The result made the kitchen look noticeably more premium, and the entire backsplash came in at just over $200. That’s one of the best returns on investment in this whole project. If you’re on the fence about including a backsplash in your budget kitchen renovation, this is your sign to do it.
Step 8: Lighting — Cheap Fixtures That Still Look Good
Lighting can transform a space, and it doesn’t have to cost a fortune. We grabbed a couple of affordable light fixtures from Lowe’s for the main kitchen lighting. Combined with the under-cabinet lights we’d already wired in during the cabinet installation phase, the total for all lighting in the kitchen came in at around $170.
The under-cabinet lights were admittedly a bit of an indulgence given how tight the budget was, but they do something really valuable — they make inexpensive cabinets look like they cost twice as much. That soft glow along the countertop elevates the whole kitchen. When you’re working with budget materials, strategic lighting is one of your best tools for making everything look more polished.
Step 9: Flooring — LVP Is Your Best Friend on a Budget
For flooring, we went with LVP — luxury vinyl plank. If you haven’t worked with it before, LVP is genuinely the floor of the future for budget renovations. It’s waterproof, lightweight, incredibly durable, and you can cut it with nothing more than a box knife. No saw required, which means no special equipment rental and no extra setup time.
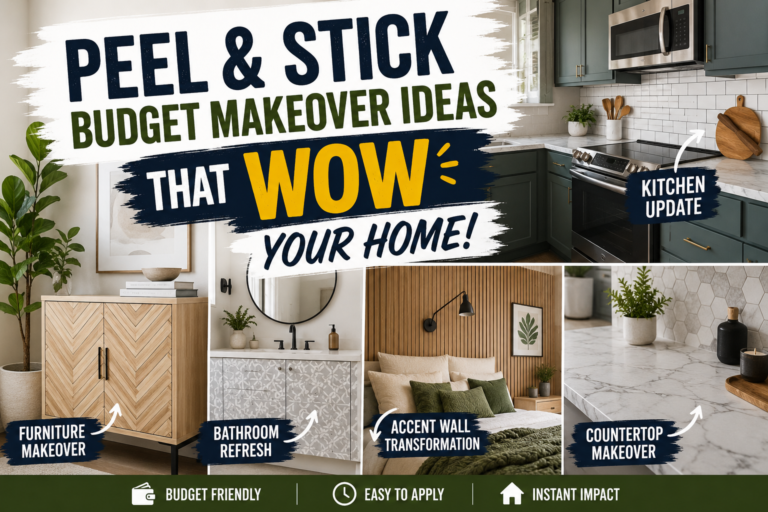
Is vinyl plank the most glamorous flooring option? No. But it’s practical, it holds up well in a kitchen environment, it installs fast, and it looks clean and modern. We got enough LVP to cover the entire kitchen space for around $300. At that price, it’s hard to argue with. If you’re interested in other flooring and finishing ideas that punch above their weight, our Peel & Stick Budget Makeover Ideas That WOW Your Home post has some great options worth exploring.
Step 10: Appliances — The Budget Buster (and How to Handle It)
Here’s where things get real. Appliances are expensive, full stop, and there’s really no way around it. Our strategy was to go straight for scratch-and-dent, returns, and special order units at places like Lowe’s, Best Buy, and Home Depot. These are brand-new appliances with cosmetic damage or minor issues that the store can’t sell at full price, and the savings can be massive — often around 50% off.
We always go with stainless steel because it looks sharp and nobody notices if you mix and match brands. We also learned that you can sometimes ask a manager for an additional discount on top of the marked-down price — and occasionally they’ll say yes. The trade-offs are real though: no free installation, no warranty in most cases, no free delivery, and all sales are final. You need to be sure the appliance works for your space before you drive away with it. We got our full suite of appliances — fridge, stove, microwave, dishwasher — for $1,750, which is genuinely an impressive price. It did push us over the $5,000 mark, landing us at just over $6,000 total, but for everything this kitchen included, that’s still remarkable.
Bonus: Solving the HVAC Problem With a Dummy Cabinet
Not every renovation problem has a perfect solution, but sometimes a clever workaround is just as good. In our case, there was an HVAC return vent in the floor right where we needed cabinet and counter space. Rather than lose the counter space or do expensive HVAC rerouting, we built a dummy cabinet — a cabinet frame with no interior storage — and put a countertop on top of it. The vent still functions, we didn’t lose counter space, and from the outside it looks like just another cabinet in the run.
It’s not ideal, but it’s smart. And that’s really what budget renovation is all about: creative problem-solving that keeps the project moving without throwing money at every obstacle. For more clever workarounds and ideas on a tight budget, check out our guide on 20 Budget Home Improvement Ideas You Can Do in 30 Minutes.
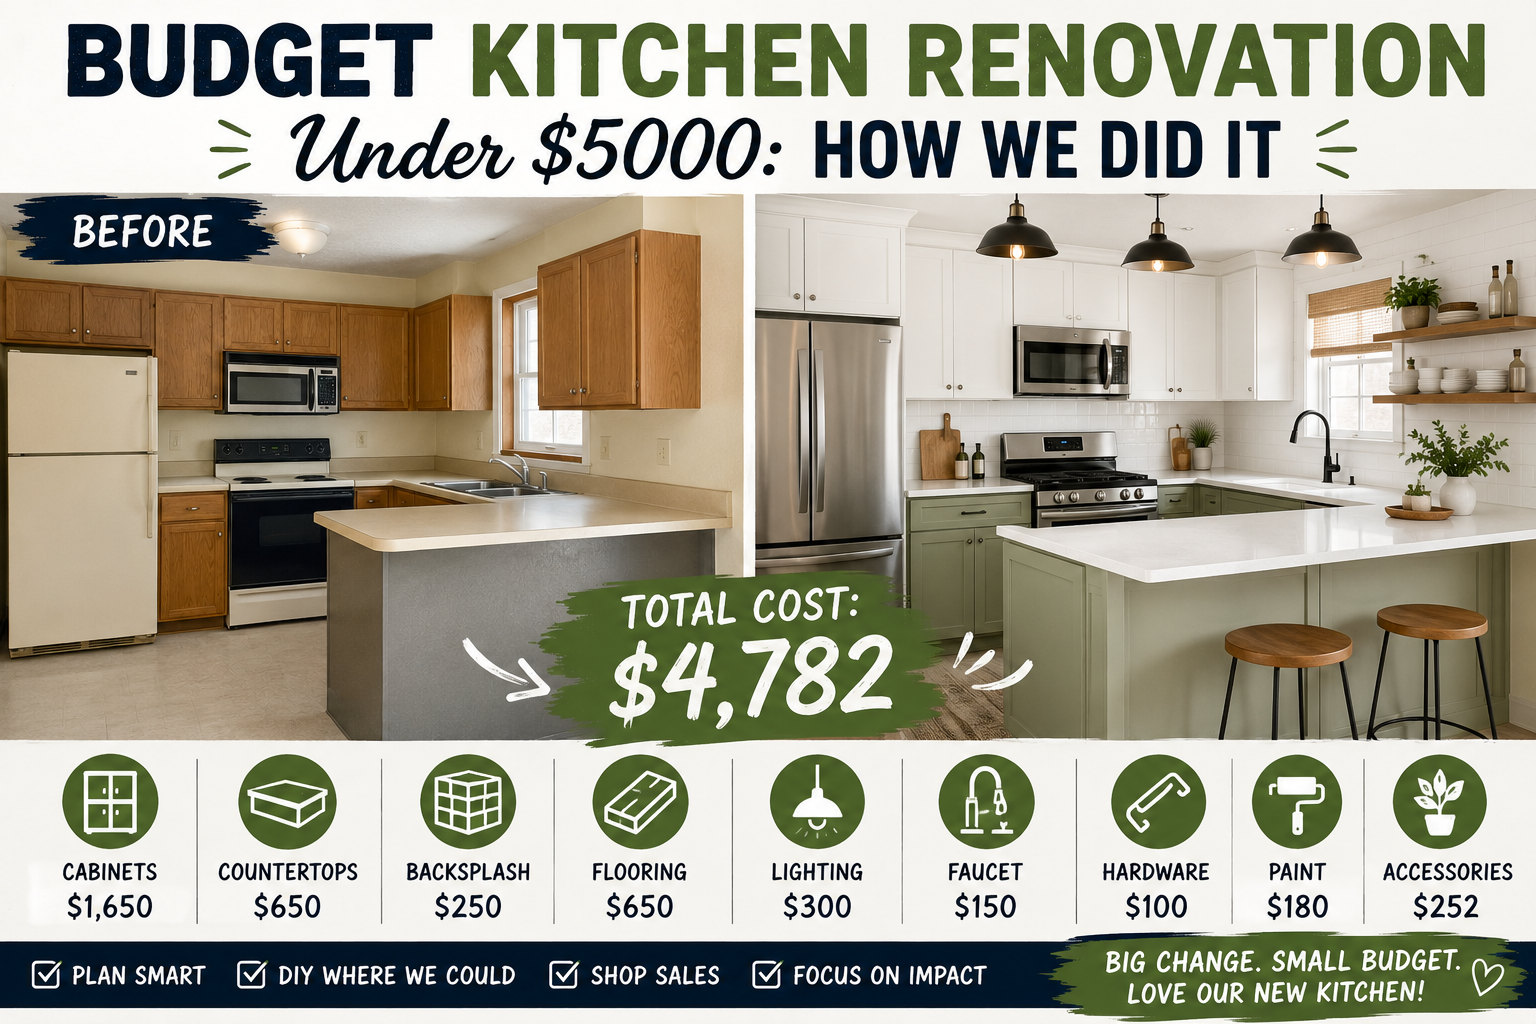
Full Cost Breakdown
Here’s exactly where the money went on this budget kitchen renovation:
- Cabinets (base + upper): Under $2,500
- Kitchen Island (materials + $20 base cabinet): Under $100
- Butcher Block Countertops: Under $600
- Sink and Faucet: ~$300
- Tile Backsplash: ~$200
- Lighting (fixtures + under-cabinet): ~$170
- LVP Flooring: ~$300
- Appliances (scratch and dent): $1,750
- Total (with appliances): ~$6,000+
- Total (without appliances): ~$4,480
Without appliances, this kitchen came in at under $4,500 — well within the $5,000 target. It was the appliances that pushed it over, and honestly, $1,750 for a full stainless steel appliance suite is already an extraordinary deal.
Tips and Best Practices for a Budget Kitchen Renovation
Always check clearance sections first. The best deals in this entire renovation — butcher block countertops cheaper than laminate, base cabinets at a fraction of retail — came from clearance. Make this your first stop every single time.
Install everything yourself whenever possible. Labor is one of the biggest costs in any renovation. Cabinet installation, countertop fitting, backsplash tiling, flooring, and even basic lighting can all be DIYed with some research and patience. The savings add up fast.
Scratch-and-dent appliances are a legitimate strategy. Don’t be afraid to shop the damaged and return sections at appliance retailers. The “damage” is often invisible, and the discount is very real. Ask managers for additional discounts — the worst they can say is no.
Strategic upgrades make budget materials look expensive. Under-cabinet lighting, a tile backsplash, and a painted shiplap island are all relatively low-cost additions that dramatically elevate the perceived quality of the space. Prioritize upgrades that are highly visible and impactful.
Solve problems creatively before spending money. The dummy cabinet over the HVAC return is a perfect example. Before you call a contractor or order a special solution, ask yourself if there’s a workaround that costs next to nothing. Often there is.
Frequently Asked Questions
Can you really renovate a kitchen for under $5,000?
Yes — with the right strategy, it’s absolutely possible, especially if you’re doing the labor yourself. In our case, the kitchen build itself (cabinets, countertops, sink, backsplash, lighting, flooring, and island) came in at just under $4,500. It was the appliances that pushed the total to just over $6,000. If you already have appliances or find an even better scratch-and-dent deal, staying under $5,000 is very achievable.
What are the biggest ways to save money on a kitchen renovation?
The three biggest levers are: doing your own labor (installation, demo, painting), shopping clearance and scratch-and-dent for cabinets and appliances, and choosing budget-friendly materials like LVP flooring and butcher block over premium options like quartz or hardwood. Prioritizing these three areas can cut your total cost by 50% or more compared to hiring everything out.
Is butcher block a good countertop choice for a budget kitchen?
Butcher block is one of the best budget countertop options available, especially when you can find it on clearance. It’s DIY-friendly, it looks warm and high-end, and it’s significantly easier to work with than stone surfaces. The main maintenance consideration is that it needs to be sealed and occasionally oiled, but that’s a minor trade-off for the cost savings and visual appeal.
What’s the best way to find cheap appliances for a kitchen renovation?
Head to Lowe’s, Home Depot, and Best Buy and ask specifically about scratch-and-dent, special order returns, and floor models. These units are often 30–50% off retail price. Go with stainless steel since it looks cohesive even when you mix brands, and don’t be afraid to politely ask a manager if they can increase the discount — sometimes they will. Just know that most of these sales are final, so inspect carefully before you commit.
The Bottom Line: A Real Kitchen for Real People on a Real Budget
We didn’t hit $5,000 — we’re going to be honest about that. But what we did build is a genuinely beautiful, fully functional kitchen that nobody walking through would ever peg as a budget renovation. Cabinets, butcher block countertops, a shiplap island painted in a gorgeous green, a tile backsplash, LVP flooring, quality lighting, and a full stainless appliance suite — all for around $6,000 in a house that previously had no working kitchen at all. That’s something to be proud of.
The strategies here work whether you’re flipping a house or renovating your own home. Shop clearance, DIY the labor, be creative with materials, and don’t be afraid to ask for a better deal. Your dream kitchen doesn’t have to cost $50,000 — it doesn’t even have to cost $10,000. And if you want to keep the budget DIY momentum going, our Affordable Home Improvement Projects Under $100 post is a great next read.
Have questions about your own budget kitchen renovation? Drop them in the comments below — we read every one. And if you found this helpful, share it with someone who’s been putting off their kitchen makeover because they think they can’t afford it. Because now you both know: you can.