If you’ve ever walked into a beautifully designed room and thought, “I could never afford that,” this post is going to change your mind. The truth is, some of the most high-impact design choices out there cost very little — they just require a little creativity, some elbow grease, and knowing which moves actually move the needle. These budget home design ideas on a dime are the real deal, pulled straight from years of hands-on makeovers and design projects.
The 10 tips below cover everything from a $30 painters tape trick that looks like wallpaper to a $50 Facebook Marketplace plant that completely transforms a room. Whether you’re refreshing a bedroom, sprucing up a hallway, or finally tackling that boring living room, there’s something here you can start on today. And if you love quick wins, be sure to check out these 20 Budget Home Improvement Ideas You Can Do in 30 Minutes for even more inspiration.
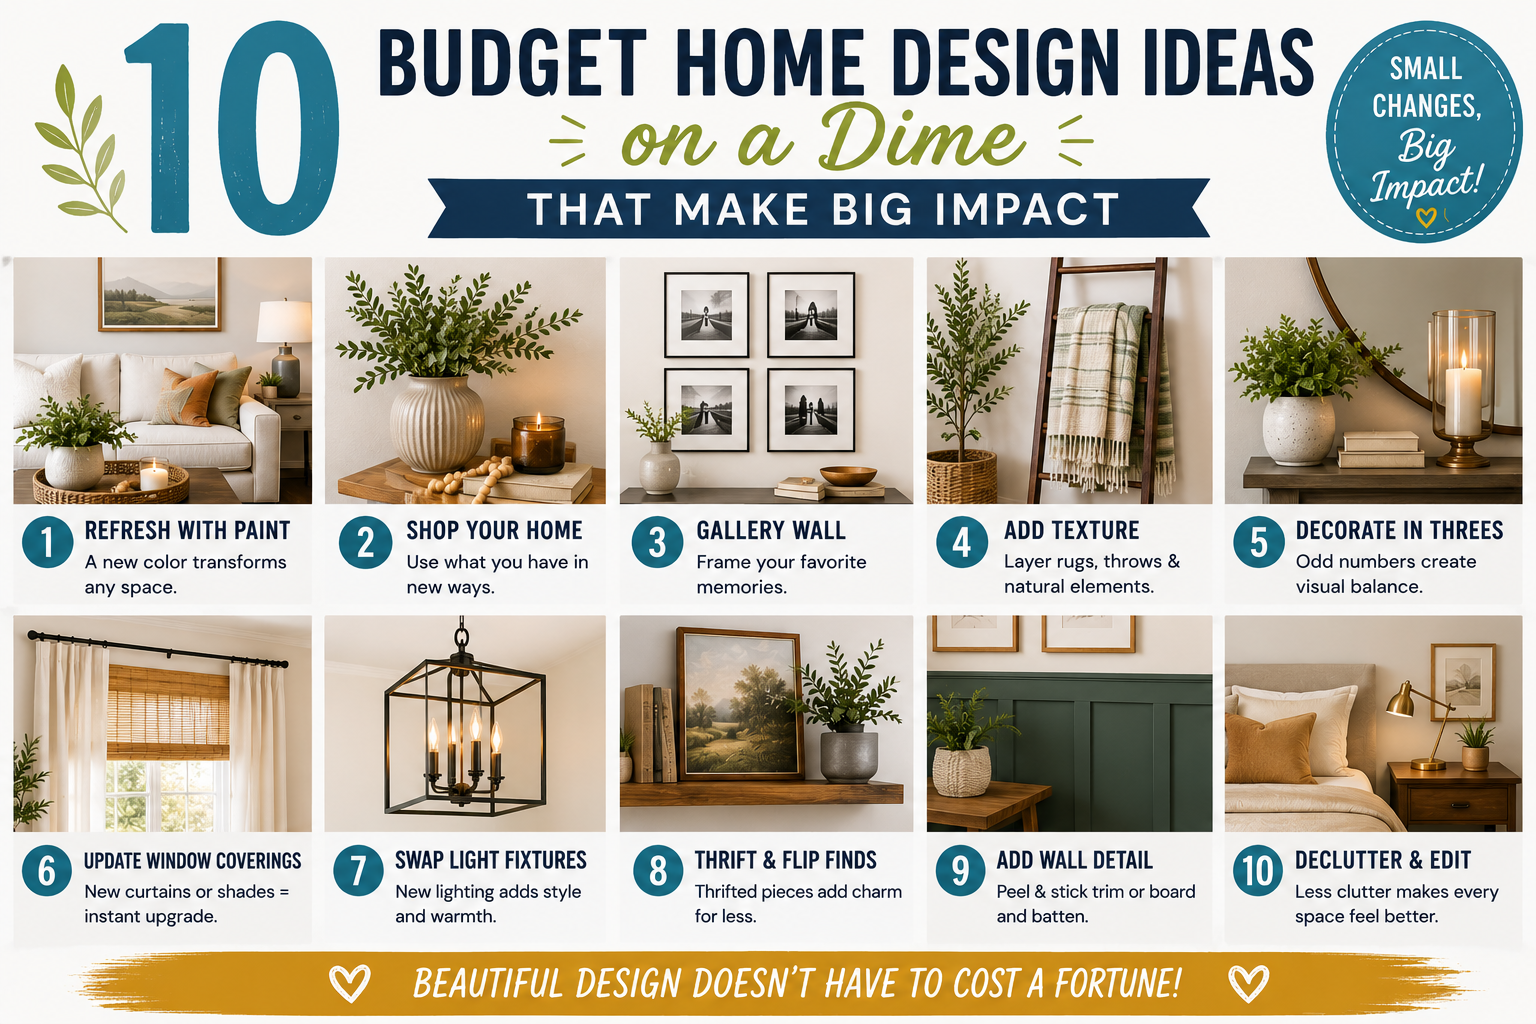
Let’s dive into all 10 tips — count them, because every single one is worth your attention.
1. Paint Your Interior Doors an Accent Color
This tip came straight from a hallway makeover, and the transformation was genuinely jaw-dropping for how little it costs. If you have a hallway or transition space that feels bland and uninspired — you know, the kind of space that’s just a corridor between rooms — painting your doors an accent color is one of the fastest ways to breathe life into it. Doors are large surface areas, which means the color contrast you create has a big visual impact without requiring much paint at all.
Think about it: you don’t need to repaint the whole room. You just pick a color that pops against your wall tone — a moody navy, a rich forest green, a warm terracotta — and apply it to the door. That’s it. The result is a space that suddenly feels curated and intentional. It’s one of those budget home design ideas on a dime that people will actually comment on when they visit your home. Paint is one of your most powerful tools, and this is a perfect example of using it strategically.
2. Add an Accent Ceiling
Accent ceilings are having a major moment, and honestly, they deserve every bit of the hype. The idea is simple: instead of leaving your ceiling that standard flat white, you paint it a different color — maybe something rich and warm, or a bold contrasting hue — to add an unexpected layer of design to the room. In a bedroom makeover, a golden mustard ceiling paired with a creamy wall color and a navy stripe border along the underside created an incredibly designer-looking space for the cost of a few cans of paint.
One of the best tricks with an accent ceiling is to bring the ceiling color a few inches down the wall. This creates the illusion of taller ceilings — a little optical magic that costs nothing extra. Paint is genuinely one of the most budget-friendly transformation tools available to you, and the ceiling is an underused canvas. Don’t be afraid to go bold up there; it pays off in a big way.
3. Stack Baseboards to Elevate Trim
Here’s a tip that sounds almost too simple, but once you see it, you can’t unsee it. A lot of older homes — and even plenty of newer builds — have baseboards that are just kind of sad. Thin, flat, uninspiring. Replacing them entirely can get expensive fast, but there’s a clever workaround: just stack another piece of molding or trim right on top of your existing baseboard, caulk the seam if needed, and paint it all the same color. Nobody will know it’s two pieces. It looks completely custom.
This technique was actually spotted on a Magnolia Network show called Homework, and it’s been a go-to ever since. You can even layer multiple pieces of trim to build up a really substantial, chunky baseboard profile. The cost is minimal — you’re just buying additional trim pieces from your local hardware store — and the result is a room that feels noticeably more finished and elevated. It’s one of those details that quietly makes everything else in the room look better too.
4. Use Molding Creatively on Walls and Built-Ins
If you think molding is just for crown and baseboards, you’re leaving a lot of design potential on the table. Hardware stores carry a surprisingly wide variety of molding profiles — corner pieces, rosettes, panel molding, decorative trim — and when you start combining them creatively, you can achieve a genuinely custom, high-end look for very little money. The classic French panel molding is a fan favorite that’s been used on walls across countless makeovers, but don’t stop there.
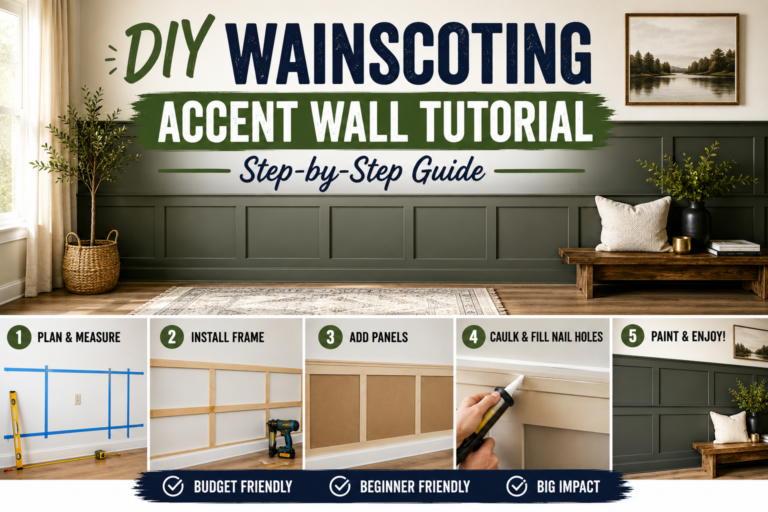
One particularly creative application: lining the top of built-in bookshelves with small decorative rosettes. Once everything gets painted the same color, it looks like the kind of custom millwork you’d find in a much older, more expensive home. Molding has a way of making spaces feel architectural and intentional — like they were thoughtfully designed rather than just assembled. If you’re looking for a project that delivers serious visual weight, check out this guide on DIY Wainscoting Accent Wall Tutorial for a deep dive into molding on walls.
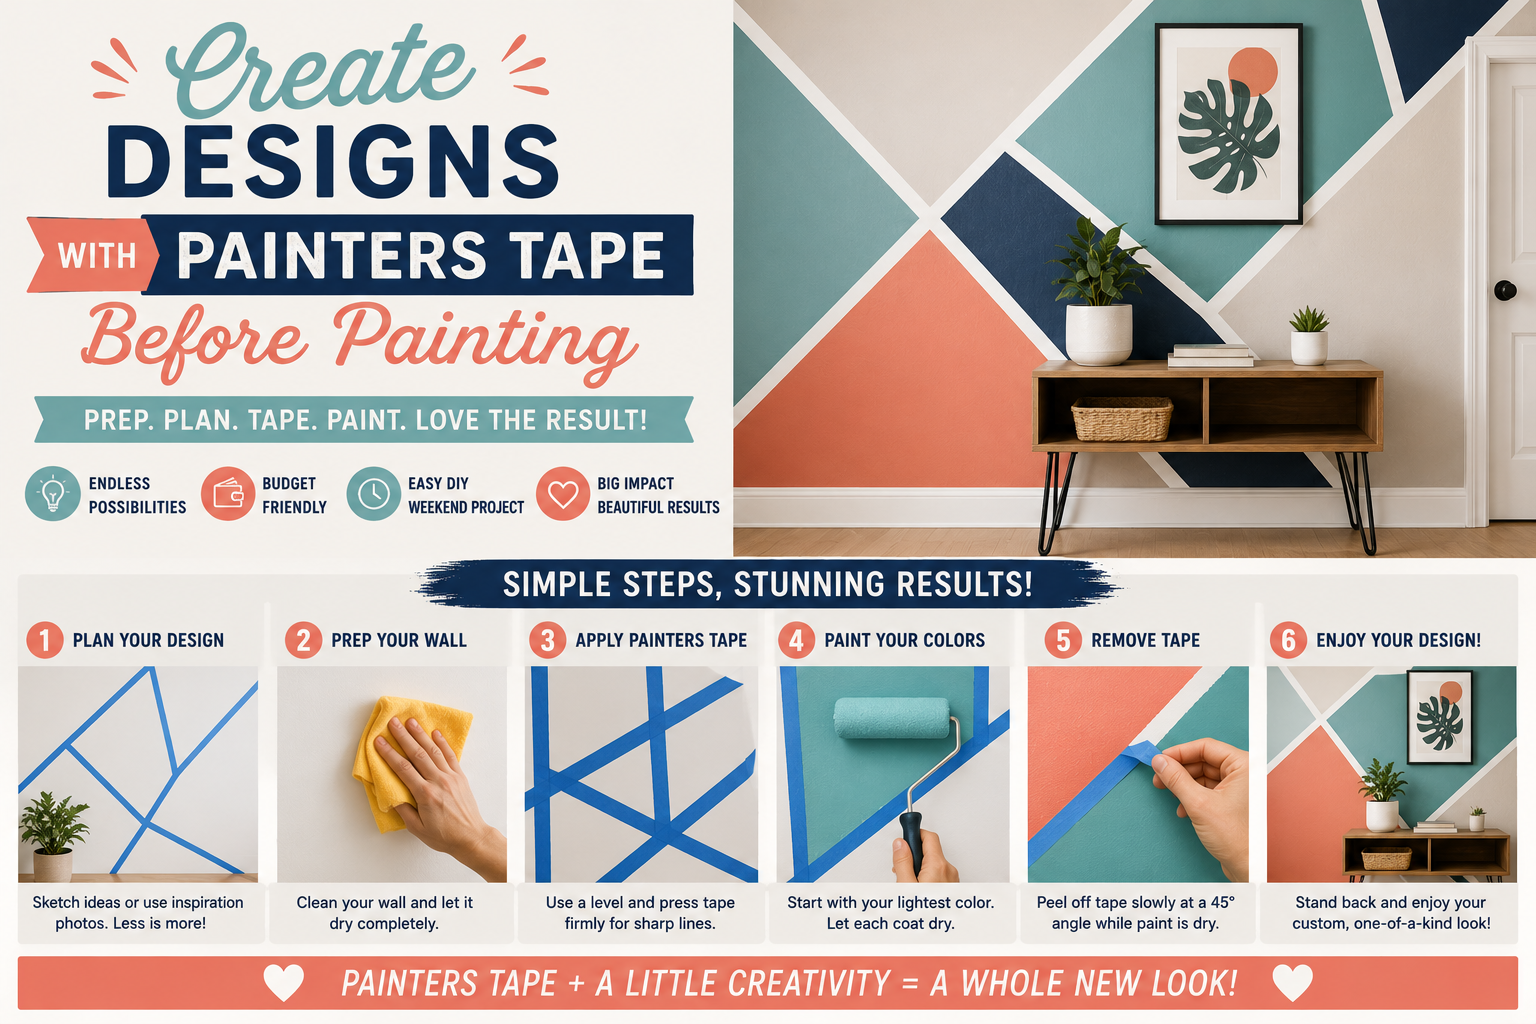
5. Create Designs With Painters Tape Before Painting
This one might be the most underrated trick on the entire list. Painters tape isn’t just for protecting trim — it’s actually a design tool in its own right. By taping off a pattern on your wall before painting, you can create stripes, geometric designs, or even an intricate border effect that, once the tape is removed, looks almost exactly like wallpaper. The best part? It costs almost nothing. A breakfast nook makeover done entirely with diagonal stripes came out to about $70 total — $30 for the tape and $40 for paint — and the result looked like a professionally designed space.
You don’t have to go diagonal either. Vertical stripes, horizontal bands, or even a simple striped border under an arch all work beautifully. Stripes are a timeless pattern that never goes out of style, and the technique works especially well in accent walls, kids’ rooms, or small spaces where you want a lot of personality without a big price tag. It does take patience to tape everything off properly, but the payoff is absolutely worth it. If you’re hungry for more peel-and-paint style inspiration, this roundup of Peel & Stick Budget Makeover Ideas That WOW Your Home is a great companion read.
6. Layer Your Lighting
One overhead light in a room is functional. Multiple light sources at varying heights and intensities? That’s a mood. Layering your lighting means adding in additional sources — sconces, table lamps, floor lamps, plug-in pendants — so you have the flexibility to set different atmospheres at different times of day. In a bedroom, swapping out the single ceiling light for two bedside sconces can make the room feel like a boutique hotel. The room just transforms at night when you’re working with warm, low, ambient light instead of a single bright overhead.
The cost can vary: hardwiring sconces might run you a few hundred dollars for an electrician, but you can offset that by sourcing the actual fixtures on Facebook Marketplace. A large iron chandelier found on Marketplace for $150 completely transformed a dining room, for example. And if hardwiring isn’t in the budget at all, a well-placed floor lamp or table lamp plugged into a smart outlet on a timer can achieve a very similar effect. Layered lighting is one of the highest-impact changes you can make to any room, and it doesn’t have to cost a fortune to do it right.
7. Create Your Own Large-Scale DIY Artwork
Large art is expensive. Like, really expensive — the kind of large-scale canvas that fills a living room focal wall can easily run into the thousands at a gallery or art store. But here’s the thing: a lot of expensive-looking art is actually pretty simple to recreate yourself. Grab a large canvas from Blick or Amazon, pick up some paint, and spend an afternoon creating your own piece. Frame it out with simple 1×2 pieces of wood and it looks polished, intentional, and genuinely impressive.
A real-world example: two large DIY canvas pieces covered an entire living room focal wall for about $150 total — canvas, wood, and paint included. The impact was enormous, and the cost was a fraction of what comparable art would have run. Abstract, textural, and gestural styles are particularly forgiving and look great at scale. This is one of those budget home design ideas on a dime where the “homemade” quality actually adds to the charm rather than taking away from it. Don’t let the idea of making art intimidate you — the bolder and simpler, often the better.
8. Source Large Plants From Facebook Marketplace
If you’ve ever wondered what that “finishing touch” is that makes a well-styled room feel alive, it’s almost always a plant. A large, sculptural plant in a corner brings organic texture, movement, and a breath of fresh air to any space — and no amount of furniture or decor can quite replicate what it does for a room. The problem is that big, beautiful plants from garden centers can cost a lot. The solution? Facebook Marketplace.
People give away or sell large houseplants all the time — they’re moving, they’ve outgrown their space, they just don’t want to care for them anymore. A gorgeous fiddle-leaf fig or ficus that would cost $150+ at a nursery can often be found for $50 or less on Marketplace, and it’s already grown and established. One such ficus bought for $50 off Marketplace turned a “lobby” space into something sculptural and alive in an instant. Check your local listings regularly, because the good ones go fast. A big plant is one of the easiest and most rewarding design moves you can make.
9. Refinish and Repaint Furniture
Before you get rid of an old piece of furniture, consider what it could look like with a little love. Refinishing furniture — whether that means painting it, bleaching it back to a natural wood tone, or stripping it for a more primitive aged look — is one of the most budget-conscious design moves out there. Instead of spending hundreds on new furniture, you can completely transform a thrifted or handed-down piece into something that looks custom and intentional.
One particularly creative technique is painting furniture to mimic the look of real wood grain — no stripping required. The result can be surprisingly convincing and adds a warm, natural feel to a piece that might have otherwise looked dated or worn. If you enjoy transforming spaces room by room on a budget, you might also love reading about this Florida Home Makeover: Renovating a Dated House on a Budget for full-room transformation ideas. Furniture refinishing takes some patience, but the before-and-after results are always satisfying.
10. Swap Out Light Fixtures (Especially From Marketplace)
A light fixture is the jewelry of a room. It’s often the first thing your eye goes to when you walk in, and it sets the tone for everything around it. Swapping a builder-grade or dated fixture for something with real character — an iron chandelier, a sculptural pendant, a vintage-style sconce — can completely redefine how a room feels. And you don’t have to spend a lot to do it, especially if you’re willing to shop Facebook Marketplace.
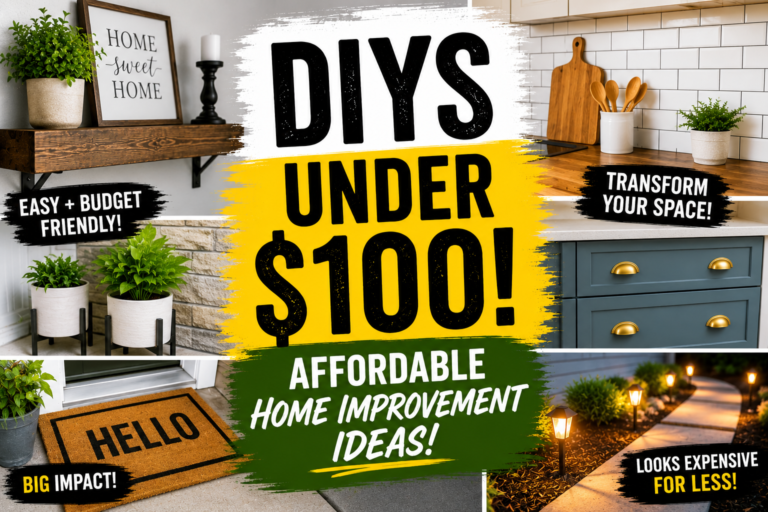
A large, dramatic iron chandelier found on Marketplace for $150 transformed a dining room in a way that no other single change could have matched. The old fixture was forgettable; the new one became a focal point. Light fixtures are one area where it’s worth stretching your budget just a little, because the return on investment — in terms of visual impact — is enormous. Combined with the layered lighting strategies from tip six, upgrading your fixtures can make a home feel like an entirely different place. For more projects in this price range, browse these Affordable Home Improvement Projects Under $100.
Tips and Best Practices for Budget Home Design
Now that you have all 10 ideas in hand, here are a few guiding principles to keep in mind as you start putting them into action. First, paint is always your best friend. It’s the most affordable material with the widest range of impact — from accent ceilings to painted doors to taped stripe designs, paint does the heavy lifting on almost every tip in this list. Always buy a quality paint, because cheap paint often means more coats and more frustration.
Second, shop secondhand before you shop retail. Facebook Marketplace, local thrift stores, and estate sales are goldmines for light fixtures, plants, furniture, and art — all at a fraction of the retail price. Third, think about what the “jewelry” of each room is. Is it the light fixture? A large piece of art? A statement plant? Identify that focal element first and build around it. Finally, don’t overlook the finishing details: trim, molding, and baseboards quietly elevate every room they’re in, and they’re far cheaper than most people assume.
Frequently Asked Questions
What are the easiest budget home design ideas on a dime to start with?
Painting interior doors an accent color and adding a large plant sourced from Facebook Marketplace are two of the easiest starting points. Both can be done in a weekend with minimal tools, and the visual payoff is immediate. If you want something even faster, swapping out a light fixture or adding a table lamp for layered lighting can be done in a single afternoon.
How much does it actually cost to create a high-impact room makeover on a budget?
It really depends on the scope, but many of the tips in this post cost well under $100 individually. The painters tape stripe design came in at around $70. A large plant was $50. A Facebook Marketplace chandelier was $150. When you combine several of these strategies in one room, you can achieve a dramatic transformation for a few hundred dollars rather than a few thousand.
Can I really make my own artwork and have it look good?
Absolutely. Abstract and gestural art styles are surprisingly approachable for beginners, and at large scale they look bold and intentional rather than amateur. The key is sizing up — a large canvas commands attention and looks gallery-worthy almost regardless of the technique. Pick up a canvas from Blick or Amazon, choose a color palette that works with your room, and don’t overthink it. Frame it out with simple 1×2 wood trim and you’ve got something special.
Is it worth paying an electrician to layer lighting in a bedroom?
If it’s in the budget, yes — hardwired sconces can make a bedroom feel genuinely luxurious, and the cost can often be offset by sourcing the actual fixtures secondhand. That said, you can achieve a very similar layered lighting effect with plug-in sconces, smart table lamps, or floor lamps on a timer. Start with what you can afford and work up from there. The impact of layered lighting is noticeable regardless of how you get there.
Conclusion
There you have it — 10 genuinely impactful, genuinely affordable design moves you can start making in your home right now. From painting your doors a bold accent color to stacking baseboards for a custom trim look, to sourcing a stunning plant on Facebook Marketplace for $50, these budget home design ideas on a dime prove that a beautiful home is much more about creativity and intention than it is about a big budget. You don’t need to spend thousands to make a space feel designed — you just need to know which moves matter most.
Pick one tip that resonates with you and start there. Maybe it’s taping off a stripe design in your bedroom, or finally swapping out that sad builder-grade light fixture. Small moves compound into big transformations, and every step forward counts. Drop a comment below letting us know which tip is your favorite — or if you have a budget design trick of your own that belongs on this list, we’d love to hear it. Happy designing!