When my parents moved into their Florida home, the kitchen had good bones — a spacious, open layout that any cook would love — but it had that unmistakable “hasn’t been touched in decades” look. You know the one. Dated details everywhere, worn hardware, and a few awkward spaces that just didn’t make sense anymore. So while I was visiting from central Pennsylvania, I decided to roll up my sleeves and give this kitchen a real facelift, all on a tight budget. Florida home makeover dated house renovation is here!
The best part? We kept the total spend under $100 for the entire transformation. No contractors, no gut renovation, no stress. Just smart product choices, a little patience, and some DIY tricks I’ve picked up over the years. Whether your kitchen needs a similar refresh or you’re just looking for ideas, you’re going to want to read every single tip here — because every single project made a noticeable difference.
Let’s walk through everything we did, step by step, so you can take these ideas and run with them in your own home.
Assessing the Space and Planning the Projects
Before grabbing a single paintbrush, it’s worth slowing down and really looking at the space. In this kitchen, I noticed a few things right away: the area above the stove looked cluttered and dated, there was a strange built-in desk nook that wasn’t serving anyone, the cabinet hardware was beat-up and scratched, and there were little decorative rail pieces on the cabinets that screamed early 2000s.
One huge relief in this particular kitchen was that someone had already painted the cabinet interiors in recent years, which meant I only needed to focus on the exterior surfaces. Even better, the hinges were interior hinges — meaning they’re hidden inside the cabinet doors and don’t stick out on the face. That meant I could paint the doors right on their hinges without removing them, which saved an enormous amount of time and effort. If your cabinets have the same setup, take advantage of it!
Removing Old Hardware and Decorative Trim Pieces
The first hands-on task was stripping off everything that was making this kitchen look tired. That meant taking off all the old cabinet knobs, which were discolored, scratched, and just plain worn out. It also meant removing those little decorative mini-railing pieces that were tacked onto the cabinet faces — the kind of detail that looked stylish once upon a time but now just dates a space instantly.
Removing the trim pieces was easier than it sounds. A small hammer and a little prying was all it took, since they were just held on with tiny trim nails. Once everything was stripped away, the cabinets already looked cleaner and more modern, even before a drop of paint hit them. It’s amazing how much visual clutter those little details create.
A big job needs the right tools. Here is our list of the 20 Must-Have DeWalt Tools to make your job easier to complete.
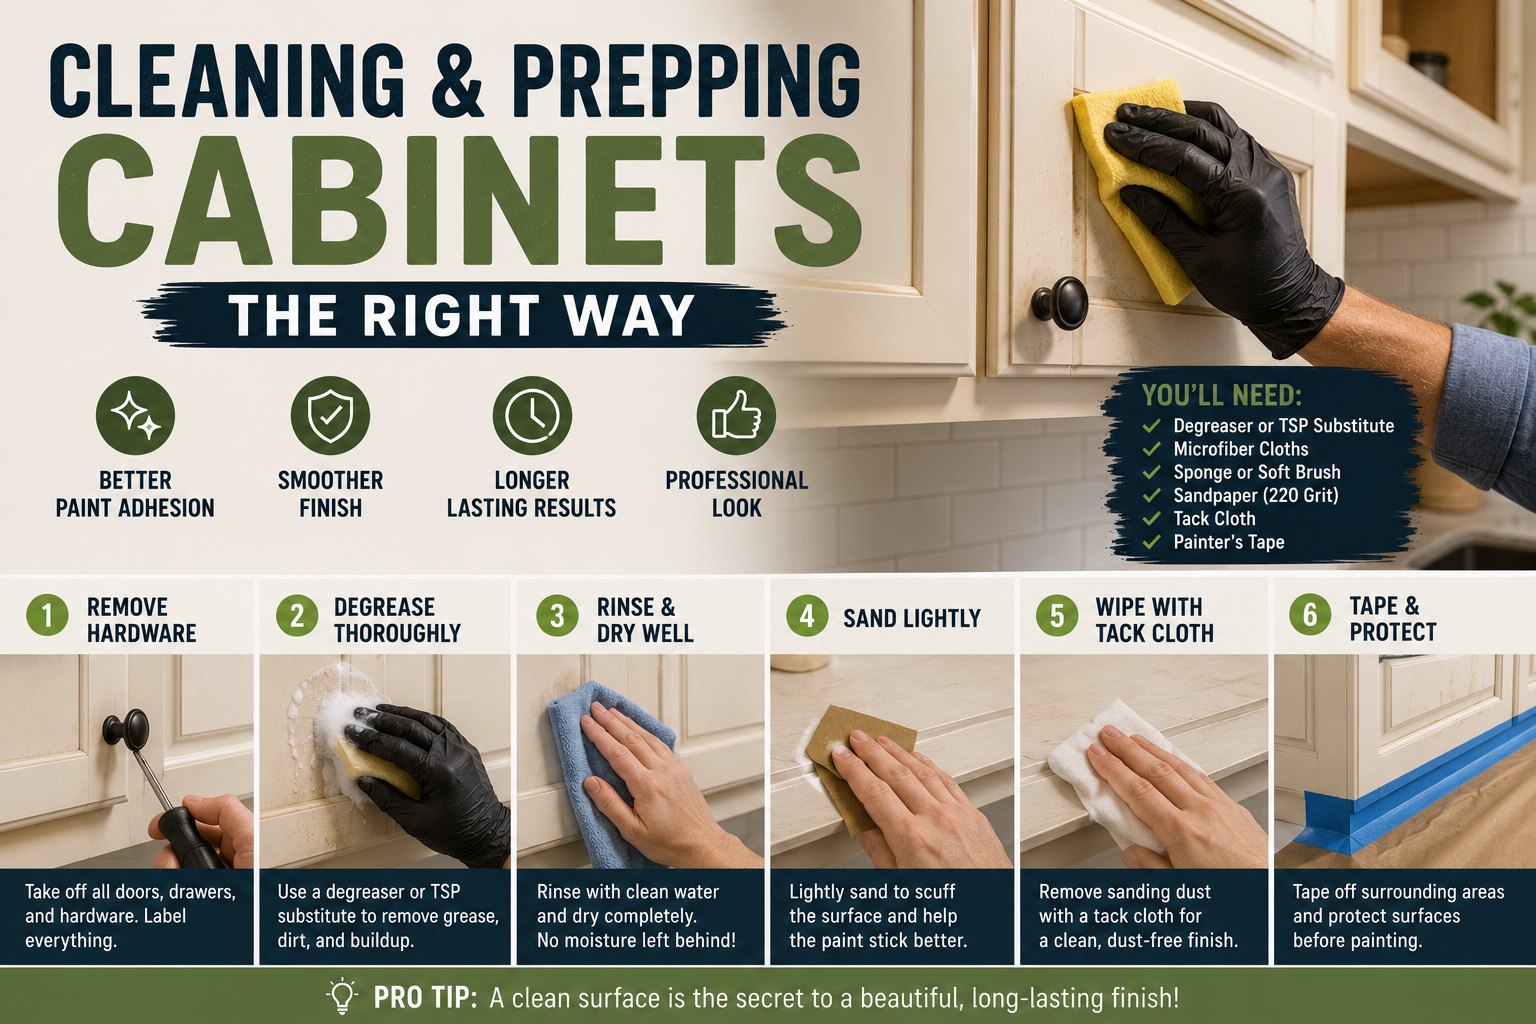
Cleaning and Prepping Cabinets the Right Way
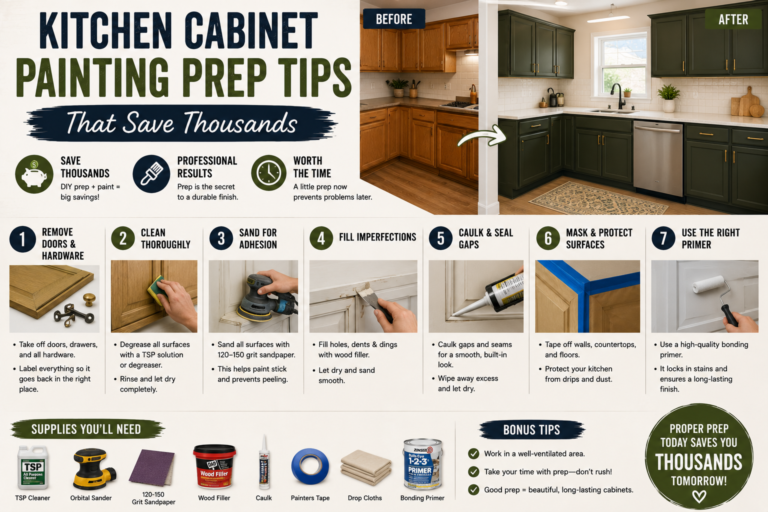
Here’s a step that people skip all the time, and it’s the one that causes the most problems down the road: cleaning the cabinets before you prime or paint. Kitchen cabinets collect grease over time — even if they look clean, there’s a film there. If you paint over grease, your paint won’t adhere and you’ll end up with peeling, chipping, or a gummy mess.
I wiped everything down with dish soap and a scrubby pad, specifically because dish soap is designed to cut through grease. Once they were clean, I took a sanding block and lightly scuffed the areas that see the most wear — around where the handles go. Since these cabinets aren’t real wood, you’re not sanding down to anything; you’re just roughing up the coating so the primer has something to grip. A little prep goes a very long way here.
Choosing the Right Primer for Non-Wood Cabinets
If there’s one product that made this whole project shine, it’s the primer. I used Valspar’s stain-blocking bonding primer and sealer, which you can find at Lowe’s, and I cannot say enough good things about it. It’s described as a high-bind primer, which means it essentially acts like a glue — it grips whatever surface you put it on, whether that’s laminate cabinets, metal, concrete, or more. One coat of this stuff covered these dark cabinets with a whiteness that most primers need two coats to achieve.
My dad has been a contractor my entire life, and even he was thoroughly impressed. I’ve used pricier primers from Sherwin-Williams before and this Valspar option genuinely outperformed them. It also has a surprisingly low odor for how powerful it is, which makes working indoors much more comfortable. If you’re painting cabinets that aren’t real wood, this is the primer to use — full stop.
Painting the Cabinets and Walls White
After the primer cured — and I do mean cured, not just dried; I gave it a full day or two — I moved on to paint. I used Valspar 2000 interior paint in a high-hide white, which was the same color for both the cabinets and the walls. Keeping them the same color was a deliberate choice: it creates a cohesive, airy feel and makes the space look larger and brighter.
One important thing I did between priming and painting was go around with paintable caulk to fill in all the small cracks and gaps that became visible once the cabinets were white. Old cabinets always have these little imperfections, and caulk is the cheapest, easiest way to make them disappear before you lay down your final paint coats. Once the caulk dried, I applied the paint and the results were stunning — clean, crisp, and completely transformed.
You might like some of the Peel & Stick Budget Makeover Ideas we wrote about.
Painting the Range Hood
The range hood above the stove was looking pretty rough — the kind of thing your eye keeps getting snagged on when you walk into the room. Since the Valspar bonding primer is rated for metal surfaces, my dad suggested we just go ahead and paint the range hood along with the cabinets, and it worked out perfectly.
The key here, just like with the cabinets, was giving the primer plenty of time to cure on the metal before adding any paint on top. Metal can be tricky because paint can peel off it if the bond isn’t fully set. Waiting a day or two before adding topcoats might feel impatient-making, but it’s the difference between a finish that lasts and one that chips away in six months.
Building a Cover Panel Above the Stove
That area above the stove had a little shelf-like structure that was making the whole kitchen look extra dated. To fix it, we headed over to a workshop and cut a piece of lauan — a very thin, lightweight plywood — to cover the space. We also cut some small 1×2 wood blocks to act as supports inside the opening so the lauan panel wouldn’t bow or flex.
Assembly was simple: a stapler to tack it all together, caulk to fill in the staple holes and edges, and then the same primer and white paint over the top. Because lauan is porous, it normally soaks up primer and needs multiple coats to cover well — but that high-bind Valspar primer covered it beautifully in one go. The difference this one panel made to the whole kitchen was remarkable. A detail that used to draw the eye for all the wrong reasons just… disappeared into the clean white backdrop.
Spray Painting the Bar Stools Black
The kitchen came with two bar stools that had been left by the previous owners. They were perfectly functional but didn’t match the updated look we were going for. My mom had the brilliant idea to spray paint them black to bring in a modern farmhouse feel, and honestly it was one of the best calls of the whole project.
I covered the seats with a trash bag, lined the base of the spindles with painter’s tape, and used a satin black spray paint that doubles as primer and paint in one. The trick with spray paint is to do thin coats and give each coat time to dry before going back for another pass. If you lay it on too thick, you’ll get drips running down the legs, and those are a pain to fix. A few light coats, some patience, and then letting the chairs air out in a shed overnight (spray paint fumes can linger!) gave us a result we were thrilled with.
Installing New Cabinet Hardware
New hardware is honestly one of the highest-impact, lowest-effort updates you can make to a kitchen. This entire kitchen had knobs rather than handles, which made things even simpler — one large multi-pack from Amazon covered everything. We paid somewhere between $20 and $30 for around 25 knobs, which is a fraction of what you’d spend buying them individually at Lowe’s, Walmart, or Hobby Lobby.
The new hardware went on quickly once the cabinets were fully painted and cured, and just like that, the cabinets looked purposeful and polished. Don’t underestimate this swap — it’s the jewelry of the kitchen, and the right hardware pulls the whole look together.
Transforming the Old Desk Nook into a Coffee Bar
There was a built-in desk area in the kitchen that wasn’t working for anyone. My mom loves to cook and host, so she doesn’t need a desk in the middle of her kitchen — she needs counter space and a place to make drinks for guests. We turned this nook into a coffee and tea station, and it’s now one of the coziest corners of the whole kitchen.
We added a small rolling cart underneath for storing all her coffee-making essentials, filled the top with a gorgeous long trailing pothos plant, some terracotta accents, and woven basket-style containers. Cute little tin boxes from IKEA hold her loose-leaf tea and tea bags. The terracotta tones tie in beautifully with the existing tile backsplash, and the whole vibe feels warm and very “Florida meets Southwest.” Her guests now have a dedicated spot to make their own hot drinks — which is such a thoughtful hosting touch.
Hanging Art with the Super Glue Command Strip Trick
We found a beautiful piece of art at Hobby Lobby at 40% off for the little inset area near the coffee nook, and I needed a way to hang it securely without damaging the walls. Command strips are the obvious choice, but if you’ve ever had something fall off the wall in the middle of the night, you know the frustration. Here’s the trick I’ve figured out: super glue the command strip to the back of the frame.
Command strips fail most often not because they don’t stick to the wall, but because they don’t stick well to the frame, especially if the frame has a porous wooden back or a brown paper backing. By super gluing that side of the strip firmly to the frame, you eliminate the weak link. The wall side stays removable as designed — just pull the tab down to release — so you’re not damaging anything. This one hack has saved me so many broken frames, and I wish I’d figured it out years ago.
Removing the Window Blind to Add Natural Light
One small but impactful finishing touch was simply taking down the old blind covering the kitchen window above the sink. We thought about replacing it with tea towel curtains or something decorative, but the window looks out onto a large tree that provides natural privacy — so we left it bare.
The result is a flood of natural light into the kitchen that makes the white cabinets and walls practically glow. Sometimes the best design decision is subtraction rather than addition, and this was a perfect example of that. If your kitchen has a window that’s covered by something that’s blocking light, it’s worth asking whether you really need it there.
Tips and Best Practices for Your Own Budget Kitchen Makeover
A few things I’d want you to take away from this whole project before you dive into your own:
Always let primer and paint cure fully before adding the next coat or installing hardware. Rushing this step leads to gummy, scratched, or peeling finishes — and it’s the number one mistake DIYers make. A day between coats is always worth it. Also, clean before you prime, no matter what. Grease is the enemy of adhesion, and dish soap is your best friend. And when you’re buying hardware or supplies in bulk, check Amazon before the hardware store — the savings on something like a 25-pack of knobs are real and significant.
Finally, don’t underestimate the power of plants and decor to finish a space. Paint and hardware do the heavy lifting, but a trailing pothos, a few terracotta pots, and some thoughtful storage containers are what make a kitchen feel like a home rather than just a renovation project.
Frequently Asked Questions
Can I paint laminate or fake-wood cabinets without sanding?
Yes, with the right primer. A high-bind bonding primer like the Valspar stain-blocking version is designed to adhere to smooth, non-porous surfaces. Light scuffing around high-wear areas (like where handles go) is helpful, but you don’t need to sand the entire cabinet surface. The primer does the work of creating adhesion.
How much does a budget kitchen makeover like this actually cost?
This entire Florida kitchen makeover came in under $100 when you account for the white paint (~$30 from Lowe’s), primer, black spray paint for the chairs, and the hardware pack from Amazon. The art piece from Hobby Lobby was purchased at 40% off. It’s one of the most dramatic transformations you can achieve for so little money.
What’s the best way to spray paint furniture without drips?
Apply several thin coats rather than one heavy coat, and allow drying time between each pass. Move your spray can in smooth, even strokes and keep it a consistent distance from the surface. If you lay paint on too thick in one go, drips are almost inevitable — patience is the real trick here.
How do I stop Command strips from failing on picture frames?
Super glue the command strip to the back of the frame instead of relying on the adhesive alone. The strip’s adhesive often struggles to bond to porous or rough surfaces like wood or paper-backed frames. Super gluing it creates a permanent, secure connection on the frame side, while the wall side still releases cleanly when you pull the tab.
What should I do with an unused desk nook in my kitchen?
Think about how you actually use your kitchen. A coffee bar or tea station is a popular and very functional option — especially for people who love to host. You could also use the space as a baking station, a homework/charging station for kids, or a home for small appliances. The key is making it serve your real daily habits rather than what the space was originally designed for.
Ready to Give Your Kitchen Its Own Makeover?
This Florida home makeover proved that a dated house renovation doesn’t have to drain your savings account or take months to complete. With a great bonding primer, a weekend or two of effort, and some intentional choices about hardware and decor, you can completely transform how a kitchen looks and feels. We did it for under $100, and the result is a space my mom genuinely loves spending time in.
If you try any of these projects at home, I’d love to hear how it goes — drop a comment below and tell me which update made the biggest difference in your space. And if you’re just getting started on your own DIY journey, be sure to subscribe so you don’t miss the next project. There’s always something fun in the works around here!