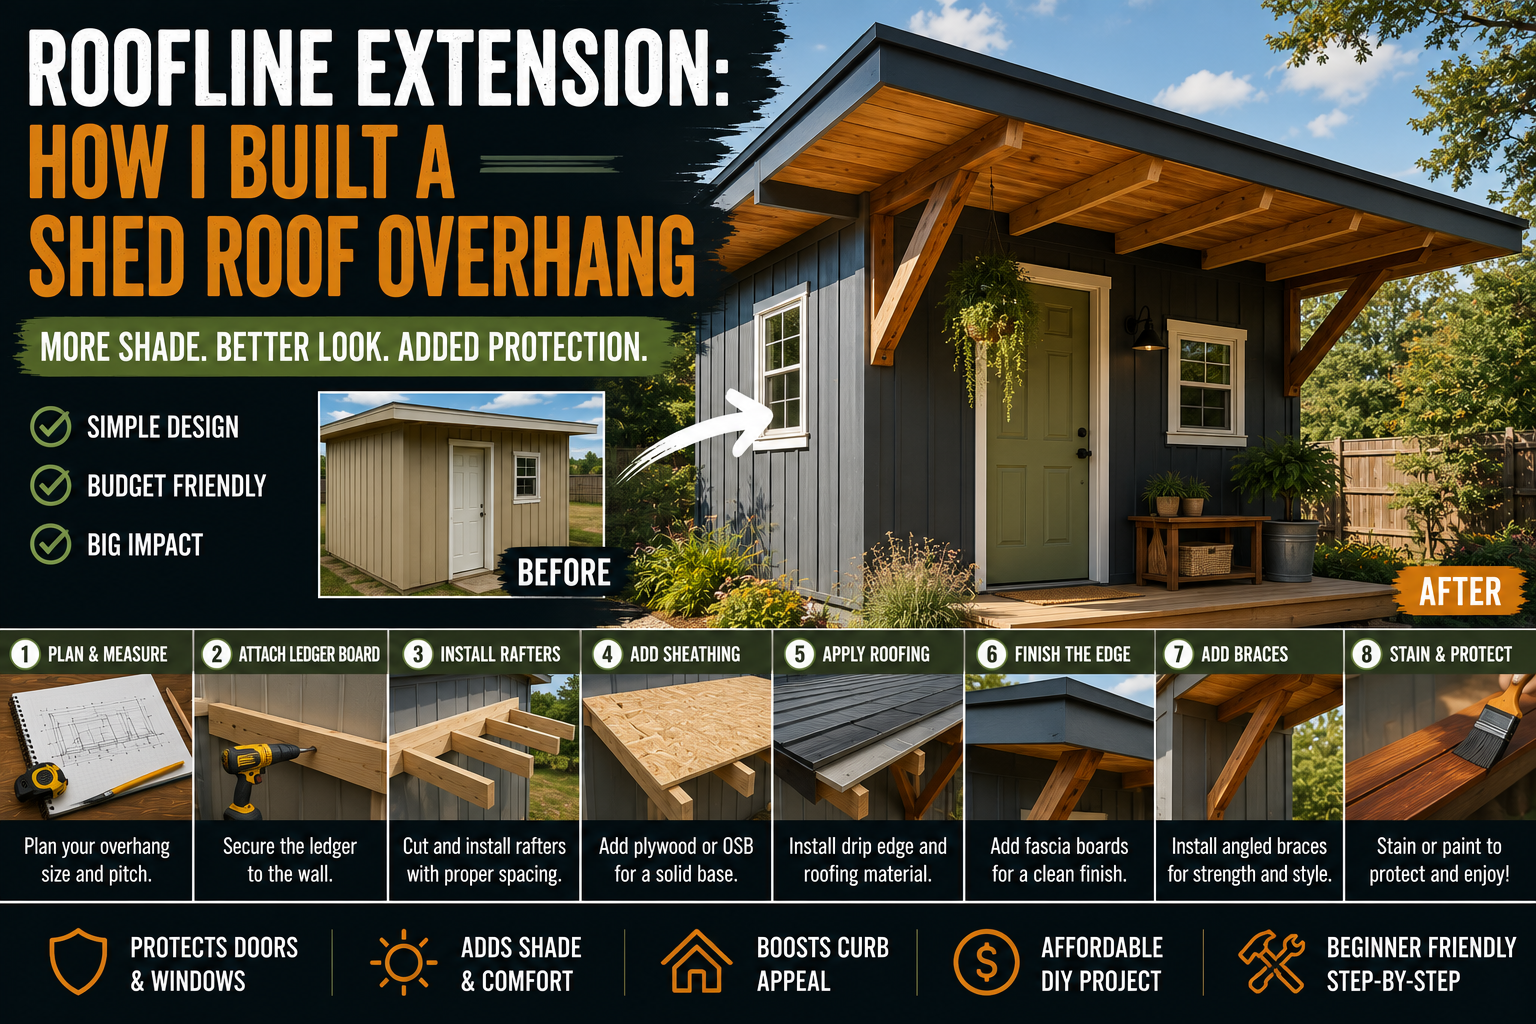
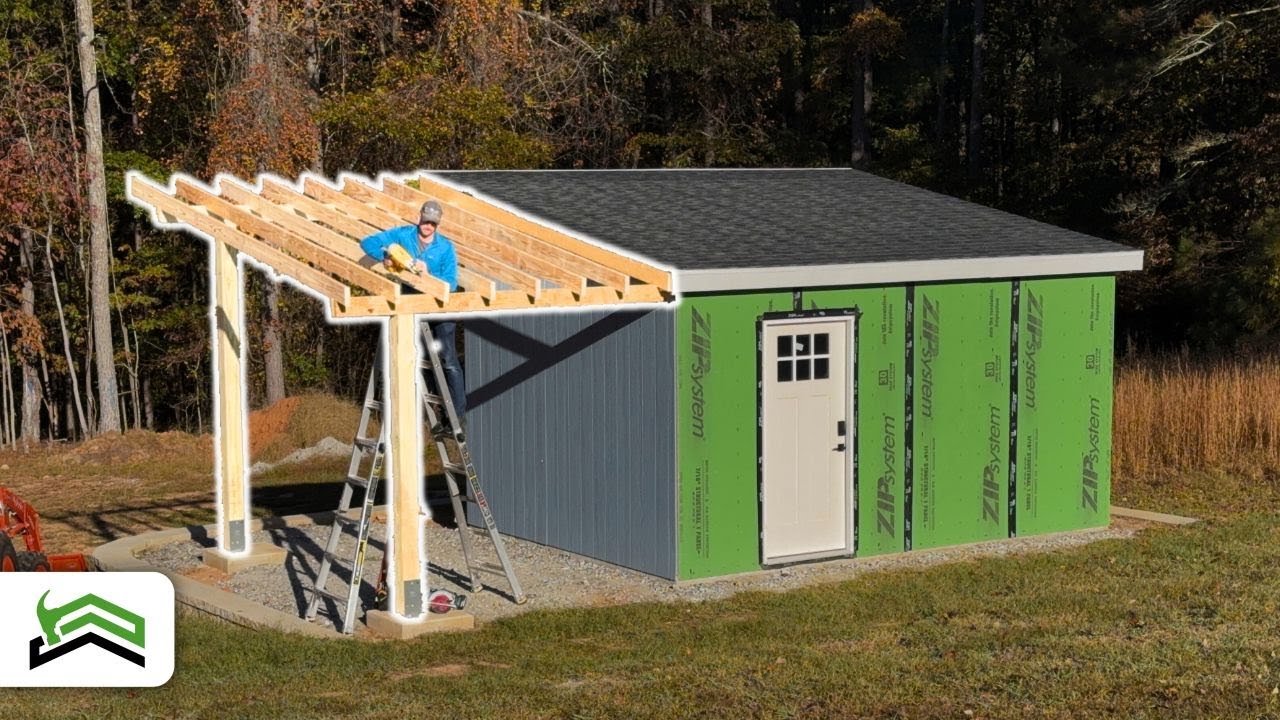
If you’ve been following my shed build series, you know I’ve been converting a 12×16 modern storage shed into what I’m calling the Solar Shed 2.0 — a fully off-grid home office setup. But before I could get solar panels on the roof or park my tractor out of the rain, I needed to tackle one big structural project first: a roofline extension shed roof overhang that adds about 10 feet of covered space to the existing structure. This is one of those projects that sounds intimidating but is actually very manageable for a dedicated DIYer.
The goal was to extend the single-slope lean-to roofline so I’d have enough clearance to back my 25-horsepower Kubota tractor underneath — specifically, I needed at least 91 inches of headroom on the low side to clear the rollover protection bar. I also wanted to keep the entire roof on one clean slope so I could eventually line it with solar panels without any awkward angles or valleys getting in the way. If you’ve ever thought about adding a covered area to your shed or outbuilding, this guide walks you through exactly how I did it.
This project is part of a larger mega-build that started with a retaining wall, a concrete pad pour, and a full shed construction series. If you’re curious about the off-grid electrical side of things, I’ve covered shed electrical wiring for beginners in a separate post. For now, let’s dig into the roofline extension itself — from building the headers to nailing down the last shingle.
Understanding the Existing Shed Structure Before You Start
Before cutting into anything, I spent time understanding how the existing shed was built. My 12×16 modern shed has 8-foot walls on the back side and 10-foot walls on the front, with four transom windows across the front face. The original roofline was a clean single-slope design — perfect for extending outward without adding complexity.
The siding on the original shed is LP Smart Side panels, which is a great choice for outbuildings. Where I’m converting the shed into a heated and cooled office space, I also used Zip Board sheathing, which serves double duty as both structural sheathing and a water barrier. That detail matters later when I get to the decking phase. The key thing to understand going in is that you’re tying a new roof structure into an existing wall — so you need to expose and work with the existing framing carefully.
Removing the Soffit and Cutting the Header Openings
The first real demolition step was taking off the 8-inch soffit on the existing shed. I left the roofing deck itself in place — you don’t want to disturb that — and focused on opening up the back and front walls to accept the new doubled 2×6 headers. I used an oscillating tool with a demo blade capable of cutting through both wood and nails. This is the cleanest way to make precise cuts without tearing up the surrounding framing.
I cut openings in both the back wall and the front wall to the exact dimensions of my 2×6 header. Getting these cuts right is critical because the header needs to slide in snugly and tie into the existing structure properly. Take your time here — a sloppy cut makes everything downstream harder to get level and plumb.
Building the Doubled 2×6 Headers (Beams)
The headers that carry the new roof load are built from two pieces of 2×4-style lumber — in this case 2x6s — sandwiched around a layer of half-inch sheathing. I ripped 5¼-inch wide strips from a sheet of Zip Board (any half-inch OSB or plywood works fine) to fill the space between the two 2x6s so the final assembly is exactly the right width.
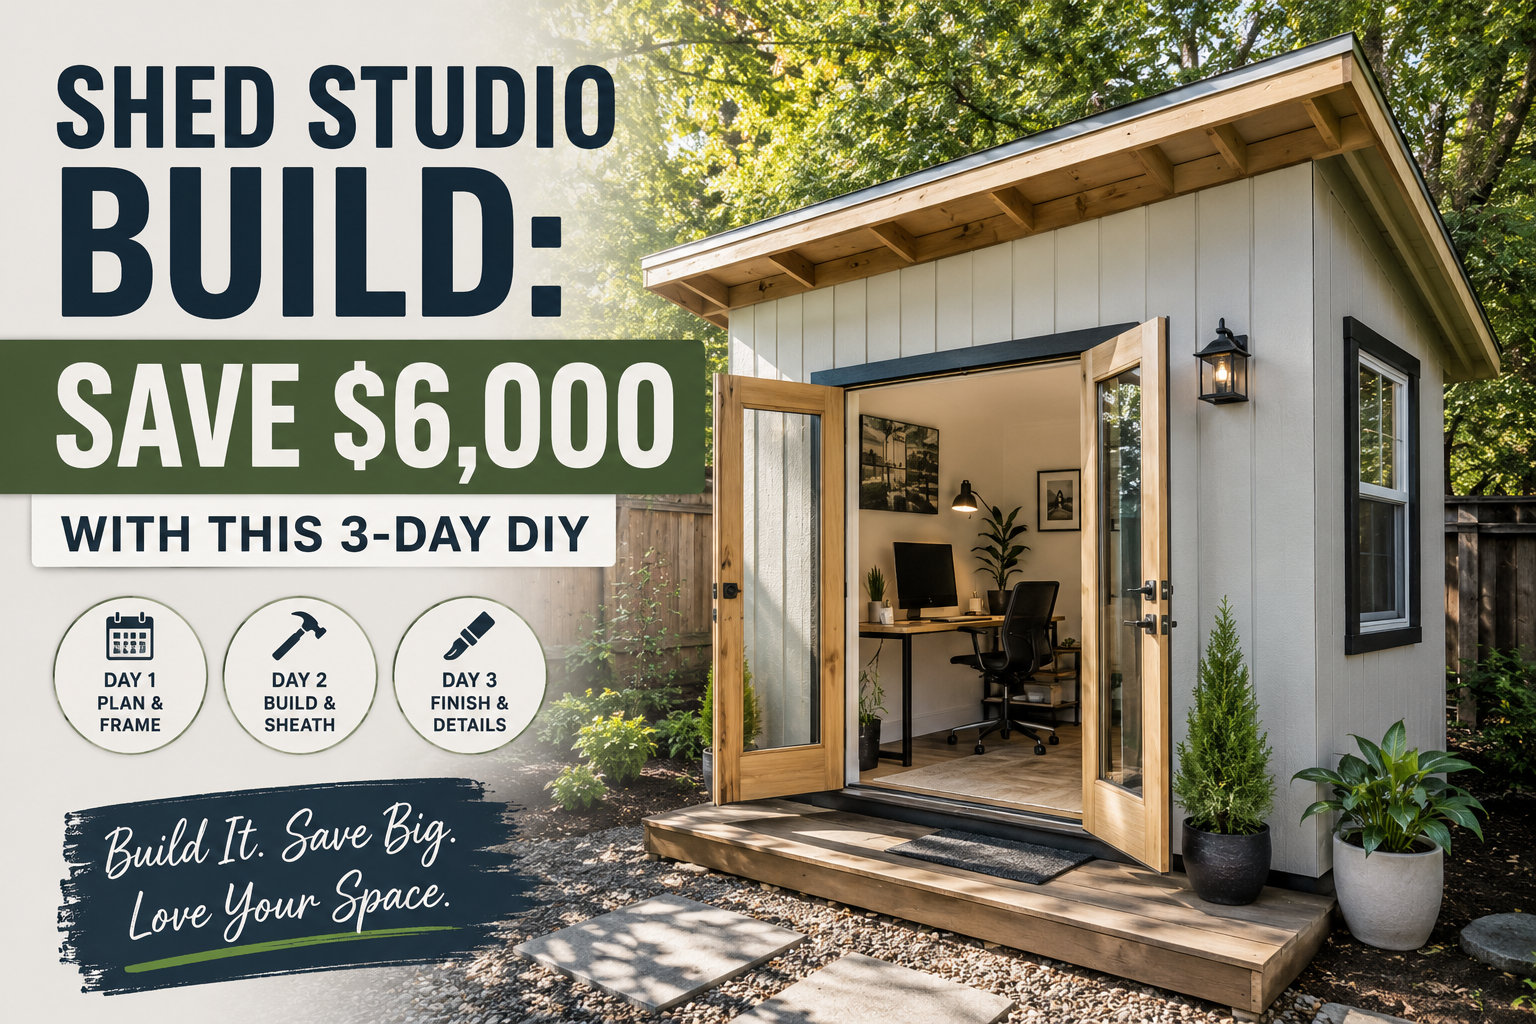
One important tip: even if you buy 10-foot boards, always measure and trim them to exact length. A “10-foot” board from the lumber yard is often an inch short or long. I lined everything up, cinched it together, and drove 3-inch nails through to bond the assembly. You can add construction adhesive in the middle for extra strength, though I was confident in the nailed connection for my application. The result is two solid 10-foot beams that will carry the roof load from the shed wall out to the new 6×6 posts. If you want to go further with your shed build, check out my guide on how I turned a shed into a studio and saved $6,000 — a lot of the same structural principles apply.
Setting the Concrete Footings and Installing the Post Brackets
I was lucky here — I had some existing concrete footings poured a few months earlier for a solar tracker project. These big chunks of concrete were perfectly positioned about 8 feet from the shed wall, giving me enough room for the 10-foot headers to extend with a slight overhang past the posts. Always check your local frost line before relying on existing footings — mine is only about 12 inches deep, so these were well within safe territory.
For the post brackets, I drilled 3/8-inch holes into the footings, blew them out, and drove Simpson Strong-Tie Titan HD half-inch anchors into each location. I used concrete screws to secure the bracket hardware and drove four anchors per location. This gives you a solid, code-appropriate connection between the footing and the post bracket before any weight goes on the structure.
Installing the 6×6 Pressure-Treated Posts
Fair warning: 6×6 pressure-treated posts are heavy, especially when they still have moisture in them. My back-side post is about 8 feet tall and the front post is roughly 10 feet to account for the slope of the roof. I used a torpedo level to check plumb during installation — though I’d recommend a 4-foot level if you have one for better accuracy across the full height of the post.
I secured each post to its bracket temporarily with lag screws, not the final carriage bolts — this just holds everything in position while I get the beams set and confirm all my heights. The carriage bolts go in later once everything is dialed in. Using temporary fasteners here gives you flexibility to make small adjustments before committing to the final connection.
Notching the Posts and Setting the Beams
This is one of the most important structural details of the whole build: notching the 6×6 posts to accept the beam rather than just lag-screwing the beam to the side of the post. When you notch the post, the beam load transfers directly down through the wood fiber of the post — a far stronger connection than one relying purely on fasteners.
I started with the low side, carefully placing the beam into the shed wall and lifting the other end up to the post. I used a 4-foot bubble level to find exact level, then marked the cut line on the 6×6 with a carpenter’s pencil and used a speed square to complete the layout lines. The notch is cut to the depth of the beam (3½ inches for a 2×6 header). I made the cuts with a circular saw and finished them off with a reciprocating saw for clean corners. Once the beam was seated in the notch, I secured the shed side with Simpson hurricane screws — 6-inch long — which are rated for exactly this kind of structural connection. I repeated this process on the taller front-side post for the high end of the roof slope.
Cutting and Installing the Rafters with Bird’s Mouth Cuts
With both beams in place, it was time to install the rafters. I used one of the original rafters from the removed soffit as a template — it was already cut to the right length, which saved me layout time. The critical detail here is the bird’s mouth cut at each end of the rafter. This is a notch that lets the rafter sit flat on the top of the beam rather than balancing on a single point, which dramatically increases the bearing surface and the strength of the connection.
I laid the template rafter across both beams, marked where the bird’s mouths needed to be cut on both the low-side beam and the high-side beam, then cut them with a circular saw and cleaned up the corners with a jigsaw. I used that first rafter as a template for all the remaining ones. Rafters go in at 16 inches on center, and I toenailed three 3-inch nails at each beam connection. Once the decking goes on, I double-checked the spacing to account for any slight warp in individual rafters.
Installing the Fascia Boards on Low and High Sides
Fascia boards go on both the low and high ends of the roof before you start decking. I used 2×6 lumber to match the rafter depth and clamped each board in place as a temporary third hand while I tacked it and confirmed level. I drove three nails per rafter through the fascia board for a solid connection.
The fascia not only finishes off the look but also gives you a nailing surface for the aluminum fascia cover that goes on later. A clamp is genuinely your best friend for this step — trying to hold a 10-foot board at height while also nailing and checking level solo is a recipe for frustration. Work safely and take your time, especially on the ladder at the high side.
Decking the Roof with Zip Board
For the roof decking, I went with Zip Board again. The reason I love the Zip system for this application is that it combines structural sheathing with a built-in water-resistant barrier — so I don’t need to add a separate layer of roof underlayment or tar paper underneath the shingles. The seam tape seals all the joints and creates a continuous weatherproof surface.
After laying the decking, I went back over every seam with Zip tape, including going underneath the old roofline edge to make sure the transition was completely watertight. Clean up the deck surface before taping so the tape adheres properly. Once everything was taped up, the roof was ready for drip edge and shingles.
Installing Drip Edge and Starting Strip
Drip edge installation order matters. On a lean-to style roof like this, the drip edge on the lower side goes on first, before the shingles. The drip edge on the upper (high) side goes on last — on top of the shingles — and gets sealed with 100% silicone. Don’t mix up this order or you’ll create a water infiltration point.
I cut the drip edge with tin snips and turned the corners with a continuous piece to keep water management clean. For the starter strip, I slipped it underneath the existing architectural shingles on the old roof section to avoid stacked seams where water could potentially migrate through. Rolling out the starter strip all the way across and cutting it flush with the drip edge sets you up for a clean first course of shingles.
Splicing In and Nailing the Shingles
This is the most tedious part of a roofline extension, and I want to give you a realistic picture of what’s involved. Because the new roof ties into the existing shingles on the old shed, you can’t just butt new shingles up against the old ones. You have to carefully work up the existing courses — about five at a time — using a flat bar to loosen the tar seal and lift the old shingles without damaging them, then slide new shingles in underneath to maintain proper staggering and waterproofing.
For nailing, I used four to six nails per shingle depending on position. If you’re in a high-wind region, lean toward six. The key placement rule: nail within the manufacturer’s nailing strip — avoid nailing too high or you’ll catch the course below incorrectly. A five-nail pattern works well, with one nail centered and the others spaced evenly. I completed the whole roof with four bundles of shingles. A single-slope lean-to like this is genuinely a great first roofing project — no valleys, no complex angles, just clean straight courses across the deck. After finishing, I went over all exposed nail heads — including any on the ridge cap or top drip edge — with high-quality silicone to seal against future leaks.
Finishing with Aluminum Fascia
The finishing touch on the roofline is aluminum fascia — I used 6-inch wide aluminum, which pairs perfectly with a 2×6 fascia board. One thing to know: don’t push the aluminum fascia all the way up tight to the bottom of the rafter tails. These pieces are designed with a channel that assumes soffit material will be installed below, so leave a small gap. If you’re like me and leaving the rafters open without soffit, you’ll have a slight gap — and that’s perfectly fine.
Installation order matters here too: put the bottom piece on first and let the top piece overlap it. Water always needs to shed from high to low, so the upper piece should always lap over the lower one. It’s a small detail that makes a big difference in long-term weatherproofing.
Tips and Best Practices for Your Roofline Extension
Check your frost line before trusting existing footings. What works in my mild climate may not work in yours — frozen ground can heave posts and destroy your framing over time. When in doubt, dig new footings below the local frost line. Always use a tape measure to verify every lumber length — nominal sizes from the yard are rarely exact. Use a laser level for longer spans to get a more accurate read than a bubble level alone.
Notch your posts — don’t skip it. Lag screws alone are not a substitute for a proper notched bearing surface on a structural post. Use a circular saw to rough-cut the notch and a jigsaw to clean up the corners. Seal all nail holes and exposed fastener heads with 100% silicone — especially on the top drip edge and any final ridge cap nails. For the shingle splice work, take your time with five courses at a time and re-seal the tar strip on the lifted shingles before pressing them back down onto the new courses below.
If you’re considering adding storage or workspace to the covered area you just created, the 13 cheap shed organization ideas post has some great options that work well in open-air covered bays. And if the solar side of this project has you curious, my home backup power system installation guide walks through how I approach off-grid power setups in detail.
Frequently Asked Questions
How far can I extend a shed roofline without a permit?
This varies significantly by location. In many jurisdictions, small accessory structure additions under a certain square footage threshold don’t require a permit — but “small” might mean anything from 100 to 200 square feet depending on your municipality. My 10-foot extension on a 12-foot-wide shed adds 120 square feet of covered space. Always check with your local building department before starting. The rules around sheds and outbuildings vary widely, and it’s far easier to ask first than to deal with a stop-work order later.
Do I need to use pressure-treated lumber for the posts?
Yes — absolutely. Any post that is set in or near a footing, or that could come into contact with ground moisture, should be pressure-treated. For 6×6 posts in a structural application like this, use pressure-treated lumber rated for ground contact (UC4B or UC4A depending on your region). Regular dimensional lumber will rot in a few years in this application, which creates a serious structural safety issue.
What’s the best sheathing for a DIY shed roof extension?
I used Zip Board and I’d recommend it highly for any shed that’s going to be insulated or climate-controlled, because it combines structural sheathing with a water-resistant barrier in one product. For a simple open storage shed, standard OSB with a layer of roof underlayment over it is a perfectly fine and more budget-friendly option. The Zip system shines when you want a cleaner, faster install and you’re sealing the building envelope.
How do I splice new shingles into an existing roof without leaks?
The key is working in small batches — about five courses at a time — and carefully breaking the tar seal on existing shingles with a flat bar without cracking the shingle tabs. Slide new shingles of the appropriate offset length under the lifted courses, nail them correctly within the nailing strip, then press the old shingles back down over them. Re-seal any disturbed tar strips and seal all exposed nail heads with 100% silicone. The starter strip should tuck under the lowest existing course to eliminate stacked seams at the most vulnerable point of the transition.
Wrapping Up My Shed Roof Overhang Extension
This roofline extension shed roof overhang project came together over a few focused work sessions and I’m genuinely thrilled with the result. My Kubota tractor slides right underneath with clearance to spare, the whole roof slope is ready for a full solar panel installation, and the structure is solid enough to handle whatever weather comes through. The doubled 2×6 beam construction, the notched post connections, and the properly spliced shingles all add up to something that should last decades without issues.
If you’re on the fence about tackling a project like this, I’d encourage you to go for it. A single-slope lean-to extension is genuinely one of the more forgiving structural builds you can do — the geometry is straightforward, the material list is manageable, and the skills you develop here translate directly into bigger projects down the road. Take your time on the post plumbing, don’t rush the shingle splice work, and make sure every nail hole on that finished roof gets a dab of silicone.
Drop your questions in the comments below — I read every one of them. And if you’re working on your own shed build or conversion, I’d love to hear what you’re building. Subscribe so you don’t miss the next phase of the Solar Shed 2.0 build, where I’ll be getting into the solar panel installation and the off-grid electrical system setup.