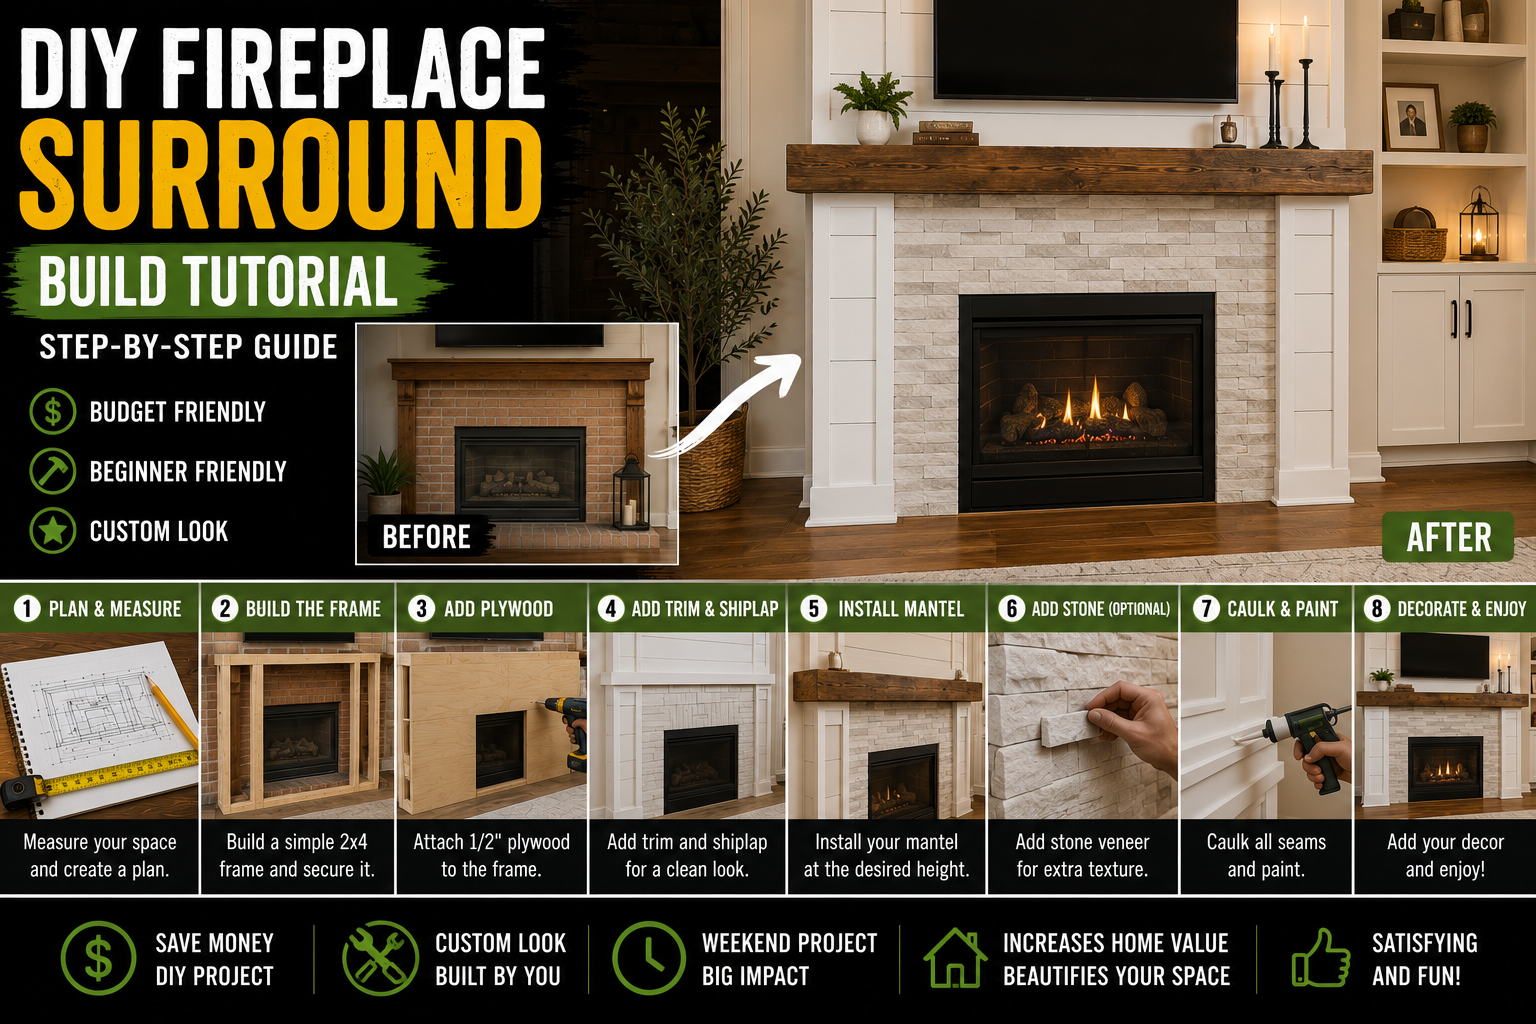
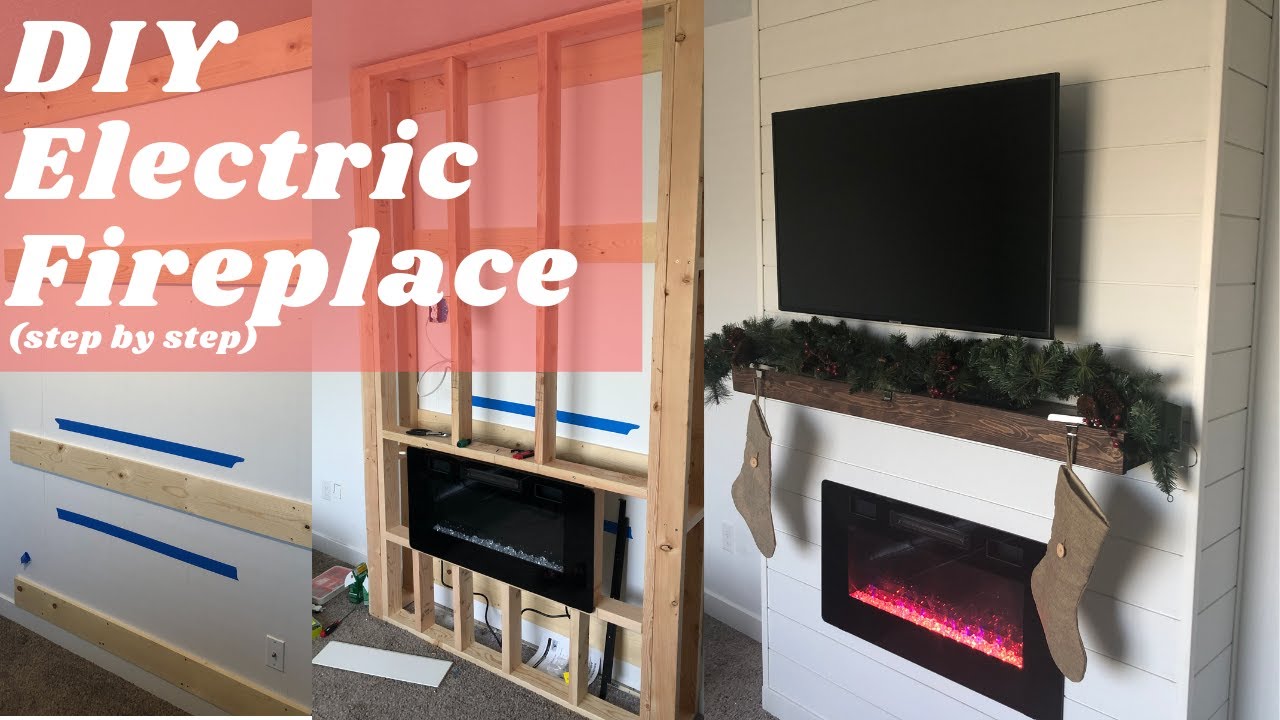
If you’ve been dreaming about adding a fireplace surround to your living room but assumed it was way out of your DIY skill range, I’m here to tell you — it’s totally doable, even if you’re working solo. I built this entire fireplace surround myself, and the result looks like something straight out of a magazine. We’re talking shiplap, a TV mount, a custom mantle, and an electric fireplace insert, all built from scratch for a fraction of what a contractor would charge.
In this DIY fireplace surround build tutorial, I’m walking you through every single step I took — from attaching the backer boards to the wall all the way to the final caulk touches that make it look truly custom. I’m not a contractor or professional — I’m just a regular person who loves taking on projects like this and sharing what I learn along the way. If you’re looking for more budget-friendly transformation ideas, check out my post on 8 DIY Home Improvement Projects on a Budget That Transform Your Space for even more inspiration.
Whether you’re a total beginner or have a few projects under your belt, this guide covers everything you need. Grab your tools, clear some space, and let’s get into it.
Step 1: Buy Your 1×6 Common Boards and Find Your Studs
The very first thing I did was head to the hardware store and pick up some 1×6 common boards. Before attaching anything to the wall, I found my studs — this is a critical step you absolutely cannot skip. These backer boards are what the entire frame attaches to, and by securing them to the studs first, I didn’t have to worry about stud placement at all when building out the frame later. It makes the whole process much more flexible and forgiving.
One thing to keep in mind: if your baseboards are thick, they might get in the way of your backer boards sitting flush against the wall. My baseboards were about half an inch thick and the common board was 1 inch thick, so it worked out fine for me — the board extended out enough that the baseboard wasn’t an issue. But depending on your situation, you may want to remove your baseboards before starting. I’d rather mention it now than have you deal with a headache mid-build.
Step 2: Attach the Backer Boards to the Wall
Since I was working completely alone on this project, I used a brad nailer to tack the backer boards to the wall first — just enough to hold them in place while I got everything positioned correctly. Then I went back and drove screws directly into the studs to make sure they were rock solid. That two-step process (brad nail first, then screw) is a game-changer when you’re flying solo.
For spacing, I put one board at the very top of the wall section, one at the bottom, and then spaced the rest in between. On my 8-foot wall, I landed around 24 inches between each board. It doesn’t have to be perfectly precise — the goal is just to have enough anchor points so your frame will be solid no matter where you need to attach it.
Step 3: Cut Your Frame Pieces with a Circular Saw
Once the backer boards were secured, it was time to start cutting the actual frame pieces. I used a circular saw for all my cuts, which worked fine. If you have a miter saw, that would honestly be better and give you cleaner, more accurate cuts — but a circular saw absolutely gets the job done. I cut my side frame blocks to 7 inches because I wanted the surround to sit about 10 inches out from the wall.
The most important thing during this step is keeping everything level and square. I used a speed square and a level throughout the entire framing process, and I cannot stress enough how much that helped. If your frame goes up even slightly off-square, it will throw off every subsequent step. Take your time here — measure twice, cut once, and check with your square constantly.
Step 4: Build the Side Frames from 2×4 Lumber
For the actual frame structure, I used standard common 2×4 lumber — nothing fancy, just what you’d pick up at any hardware store. I used clamps to hold pieces in place while I worked alone, tacked them with the brad nailer first to lock in the position, then went back and added wood screws for real strength. The clamps are honestly a lifesaver when there’s no one to hold things for you.
Keep in mind you’ll need to build two of these side frames — one for each side of the fireplace surround. I only show building one in detail, but the process is identical for both. Just repeat everything on the opposite side. Once both frames were built, I attached them directly to those backer boards I’d already mounted to the wall. I came in at an angle with my drill to get the screws into the backer boards, putting two screws per board all the way down each frame. It felt a little awkward but the result was incredibly solid — that thing wasn’t going anywhere.
Step 5: Remove the Carpet Beneath the Frame
This is an optional step, but I’m really glad I did it. I went ahead and removed the carpet in the area where the fireplace surround would sit. My reasoning was simple — I thought it would make the whole thing look more intentional and built-in, like it had always been there. And honestly, it did exactly that. It just looks cleaner and more finished without the carpet peeking out underneath the frame.
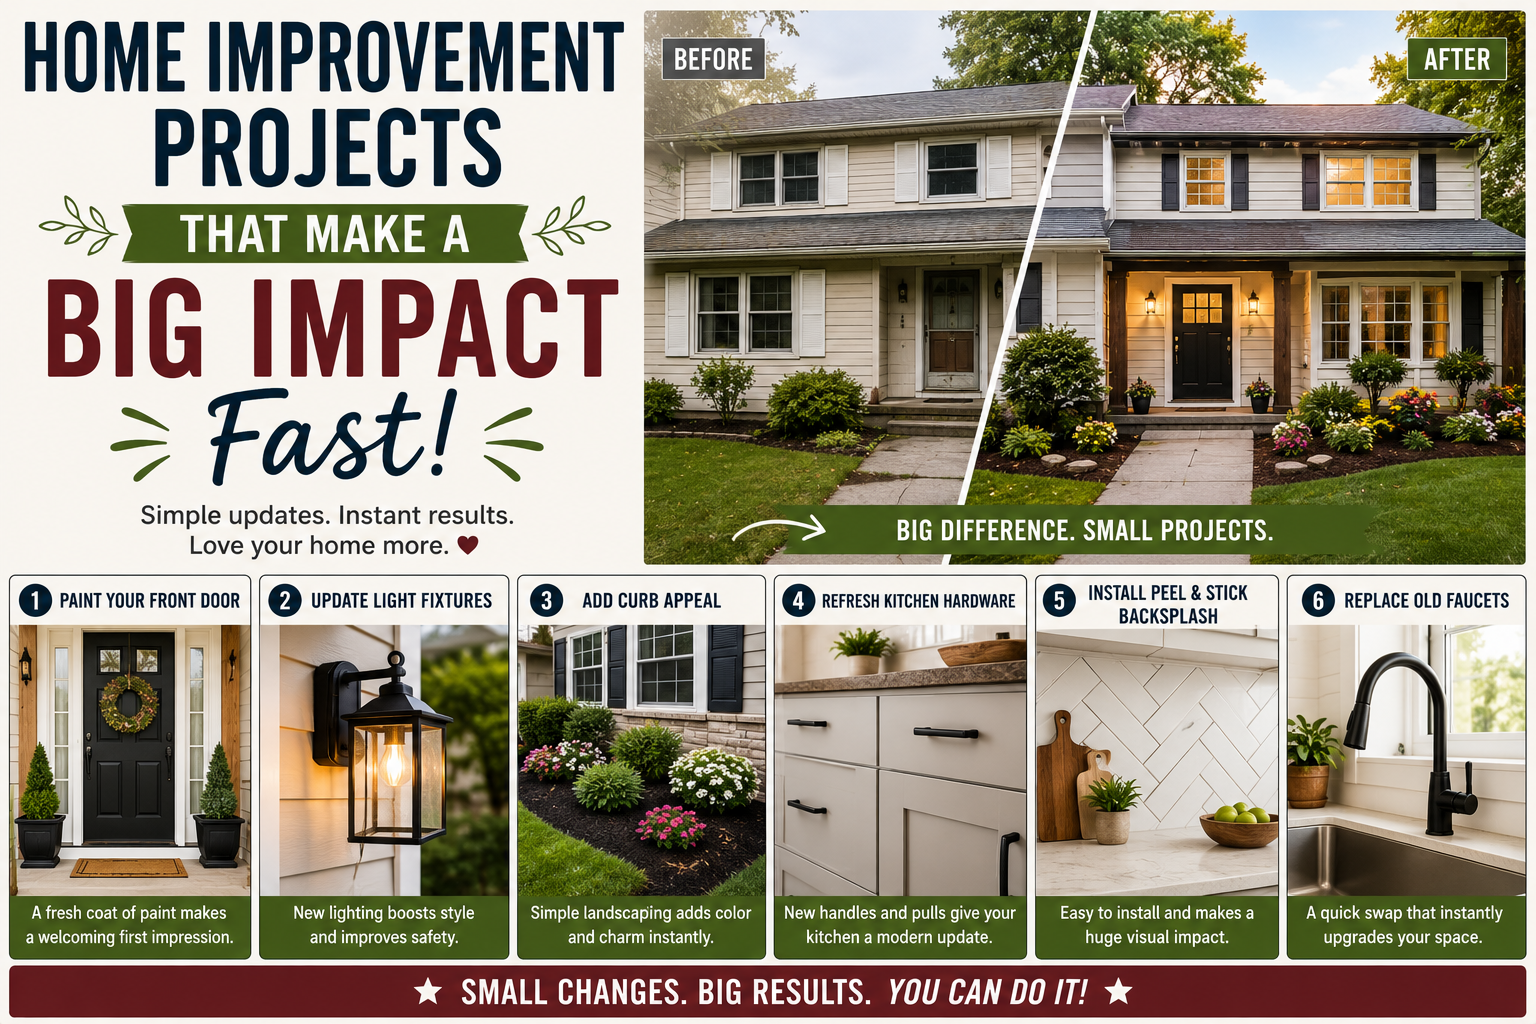
If you’re not comfortable cutting your carpet or if your floors underneath aren’t in great shape, you can absolutely skip this. But if you want that truly built-in look, I’d recommend taking the 10–15 minutes to remove the carpet in that footprint area before securing the frame down. It’s one of those small details that makes a big difference in the final reveal. For more ideas on how small changes create big visual impact, my guide on Home Improvement Projects That Make a Big Impact Fast is worth a read.
Step 6: Attach the Frames to the Backer Boards
With both side frames built and the carpet removed, I attached the frames directly onto the backer boards. The process here mirrors what I did throughout — use the brad nailer to tack things in place first, then go back with wood screws to really lock it down. When you’re drilling into the backer boards through the 2×4 frame, you may need to come in at some odd angles. It can feel a little awkward, but it’s worth it because those angled screws create an incredibly sturdy connection.
I put two screws in per backer board and worked my way all the way down each frame. After everything was secured, I gave the whole structure a good shake test — and it didn’t move at all. That’s exactly what you want. A wobbly fireplace surround is not only an eyesore, it can become a real safety issue, especially if you’re mounting a TV above it.
Step 7: Choose and Install the Electric Fireplace Insert
The electric fireplace insert I chose is 36 inches wide (including the cover), and I picked it up on Amazon for around $200. For the price, I honestly couldn’t be happier with it — it looks great, it was straightforward to install, and it gives off a really nice ambiance. The best part is that it just plugs right into a standard electrical outlet. It draws 12.5 amps, and since most home circuits are 15 amps, you’re totally fine plugging it into any standard outlet without any electrical work.
I did have to add a few small backing boards on the back side of the fireplace insert to give it something solid to attach to inside the frame — but that was a minor fix and took maybe 15 minutes. I also had an electrician friend help me run an outlet inside the surround so I could hide the TV cords cleanly behind the wall. If you have an electrician you trust, that hidden outlet is a fantastic upgrade that makes the whole build look incredibly polished.
Step 8: Plan and Dry-Fit the TV Mount
Before nailing the front frame on permanently, I planned out exactly where the TV mount would go. I marked the center point of the surround and then marked the stud locations to make sure the TV mount holes would line up properly with the framing behind it. This dry-fit step saved me a ton of frustration — you really don’t want to discover your mount doesn’t align with anything solid after you’ve already enclosed everything.
Take your time with this step and use a laser level if you have one to make sure your center marks are accurate. A slightly off-center TV above a fireplace is one of those things you’ll notice every single day, so get it right before moving on.
Step 9: Attach the Front Frame
With the TV mount position confirmed, it was time to attach the front frame of the surround. I’ll be honest — this part was a little awkward. Getting the front frame piece into position required some maneuvering, and I basically had to kick it snug into place. But once it was in there, it fit nice and tight, which was reassuring. I used the same method as before: hit it with brad nails first to hold it, then drove in as many screws as I could from the sides to really lock it down.
The front frame is what gives the surround its finished, furniture-like appearance, so take care to make sure it’s sitting flush and square. Any gaps or misalignment here will be very visible in the final product. Double-check with your level before committing to the screws.
Step 10: Add Baseboards to the Bottom of the Surround
A lot of people skip this step and just run the shiplap straight down to the floor, but I wanted a more polished, traditional look — so I added baseboards along the bottom of the surround before starting the shiplap. I used 3.5-inch primed MDF board and attached it with the brad nailer. It’s a small detail, but it really elevates the whole look and gives the surround a more custom, built-in feel.
This is totally a personal preference thing — if you love the clean modern look of shiplap going all the way to the floor, go for it. But if you want something that feels a little more like traditional millwork, adding that baseboard detail is a simple way to get there without much extra effort or cost.
Step 11: Install the Shiplap
This is the step where the whole thing really starts to come to life. I attached the shiplap to each of the studs in the frame, working to stay in the tongue and groove as much as possible to minimize the number of nail holes I’d need to fill later. Working with tongue and groove shiplap is a little slower, but the result is a much cleaner surface that needs far less patching.
When I got to the areas around the fireplace insert, I removed the fireplace cover first so I could run the shiplap right up close to the firebox opening. Then I used the cover to hide any of those edge cuts once it was reinstalled — a really smart trick that saves you from having to make perfect cuts around that opening. For any spots where I needed to cut around the outlet or the fireplace opening, I used a jigsaw to make those more intricate cuts. A jigsaw is perfect for this because it gives you the control to follow curves and irregular shapes cleanly.
Step 12: Add the MDF Crown Molding Detail at the Top
For the top of the surround, I used MDF board to create what I’d describe as a simple crown molding effect. It’s not elaborate, but it gives the top of the surround a finished, intentional look that ties the whole piece together. I cut the MDF to the right width and attached it the same way I had everything else — brad nailer to tack, then screws to secure.
If you want to go bigger with your crown molding, check out actual Crown molding profiles that can really add a dramatic, high-end look to the top of the surround. For my build I kept it simple, but there’s a lot of room to customize this detail based on the style you’re going for — modern, farmhouse, traditional, whatever fits your space.
Step 13: Install Corner Trim to Hide Shiplap Cuts
One thing I didn’t anticipate needing until I was actually in the middle of the shiplap installation was corner trim. At the outside corners of the surround, the shiplap cuts can look a little rough and unfinished. I found a corner trim product that fit perfectly over those edges and cleaned everything up beautifully. I genuinely loved how this product looked — it’s one of those finishing details that takes the build from “homemade” to “custom.”
If you’re planning your own build, make sure to account for corner trim in your materials list. It’s inexpensive and easy to install, but it makes a huge visual difference. Just cut it to length, nail it in place, and suddenly those raw edges are completely hidden.
Step 14: Mount the TV
With the shiplap installed and the front frame fully secured, it was time to mount the TV. Since I’d already dry-fitted the mount and confirmed the stud alignment earlier, this step went smoothly. I attached the mount to the framing, then hung the TV on the mount. Having that hidden outlet inside the surround meant I could route the TV’s power cord through the wall and out of sight completely — it looks incredibly clean and professional.
Make sure your mount is rated for the weight of your specific TV, and always double-check that it’s anchored into solid framing — not just the shiplap surface. The whole point of all that solid framing work is so you have something strong to anchor that mount into.
Step 15: Build and Attach the Mantle
For the mantle, I used a couple of pieces of scrap wood to build a simple shelf that sits across the top of the surround. The mantle is really the crowning detail of the whole piece — it’s where you’ll stage your decor, hang stockings at Christmas, or rest a framed photo. Even a simple mantle built from scrap lumber looks fantastic once it’s painted and styled. If you want to go the extra mile, using Butcher block for your mantle surface can give it a really warm, organic feel that pairs beautifully with shiplap.
I’m planning to release a full dedicated video just on building the mantle, so make sure you subscribe to catch that. The mantle deserves its own detailed walkthrough because there are a lot of ways to approach it depending on the style you’re going for — floating, corbel-supported, box-style — and I want to do it justice.
Step 16: Caulk All the Seams and Fill Nail Holes
The final step — and one that makes an absolutely enormous difference in how professional the finished product looks — is caulking and filling. I went through the entire surround with caulk and hit every seam, every crease where the surround meets the wall, and the top edge. Once it dried, the difference was dramatic — everything looked tighter, cleaner, and more intentional. Don’t skip this step. It takes maybe 30 minutes but it’s one of the highest-impact finishing moves you can make.
After caulking, I also went back and filled every single brad nail hole with wood filler or spackle. Once the filler dried, I sanded it smooth and those holes essentially disappeared. When you paint over everything, you’d never know they were there. It’s tedious but completely worth the effort for a truly finished look. This kind of attention to detail is what separates a DIY project that looks DIY from one that looks like it was professionally built. You can also find more finishing and painting tips in my guide on How to Paint Like a Pro: Every Skill You Need at Home.
Tips and Best Practices for Your DIY Fireplace Surround Build
Here are my top takeaways from this build that will save you time, frustration, and money on your own project:
Work alone? Use a brad nailer first. Tacking pieces with a brad nailer before driving screws is the key to solo DIY work. It holds everything in position while you switch tools and get your screws in.
Level and square everything obsessively. A speed square and a level are your best friends on this project. Check every piece before you commit to the fasteners. One slightly off piece early in the build will compound into bigger problems later.
Use clamps when working alone. Clamps are essentially a second pair of hands. They hold pieces exactly where you need them while you nail or screw, which makes a solo build far less stressful.
Remove carpet under the frame for a built-in look. It’s an optional step but one I’m really glad I did. It makes the surround look like it belongs there rather than sitting on top of the floor.
Plan your TV mount location before closing up the front frame. Dry-fit everything and mark your studs before you nail the front frame in permanently. Retrofitting a TV mount after the fact is a frustrating problem you can easily avoid.
Don’t skip the corner trim. Those outside corner cuts on shiplap look rough without trim to cover them. Corner trim is cheap, easy to install, and makes a big visual impact.
Caulk and fill nail holes — always. No matter how clean your cuts and installation are, caulk and wood filler are what make the difference between a good-looking project and a great-looking one. Don’t rush this final stage.
Frequently Asked Questions
Do I need an electrician to build a DIY fireplace surround?
Not necessarily. The electric fireplace insert I used simply plugs into a standard outlet — no electrical work required at all. However, if you want to run a hidden outlet inside the surround to conceal TV cords (which I highly recommend for a clean look), you will need an electrician for that part. I had a friend who’s a licensed electrician help me with mine. It’s worth the investment for that professional, wire-free appearance.
What tools do I need for this project?
The core tools you’ll need are a circular saw, a brad nailer, a jigsaw, a drill with bits, a speed square, a level, a tape measure, and clamps. A miter saw would be a helpful upgrade if you have access to one, but a circular saw handles every cut in this build just fine.
How much does it cost to build a DIY fireplace surround?
My total cost came in well under what you’d pay a contractor. The electric fireplace insert was around $200, and the framing lumber, shiplap, MDF, and fasteners add maybe another $150–$300 depending on your local prices and the size of your surround. All in, you’re looking at somewhere in the $400–$600 range for a build that would cost several thousand dollars to have professionally done. For more budget-friendly build ideas, check out my post on Budget Home Improvement DIY Ideas That Save Thousands.
Can I do this project completely alone?
Yes — I built almost this entire surround solo. The key is using a brad nailer to tack pieces in place before driving screws, and using clamps as a substitute for a second pair of hands. The one step where I had help was running the hidden electrical outlet inside the surround, and that was specifically because I wanted a licensed electrician to handle the wiring. Everything else is very manageable on your own with patience and the right tools.
Conclusion
Building a DIY fireplace surround is one of those projects that looks incredibly intimidating from the outside but is genuinely approachable when you break it down step by step. From securing backer boards to the studs, framing out the sides with 2×4 lumber, adding shiplap, Crown molding, and finally caulking everything to perfection — every step builds on the last and before you know it you’ve got a stunning focal point in your living room that you built with your own hands.
I’m Michael, and this is exactly the kind of project I love sharing here on The DIY Journey. If this tutorial helped you, I’d love to see how your build turns out — drop a comment below or tag me in your project photos. And if you found this guide useful, make sure to share it with a friend who’s been thinking about tackling a similar project. You’ve totally got this.