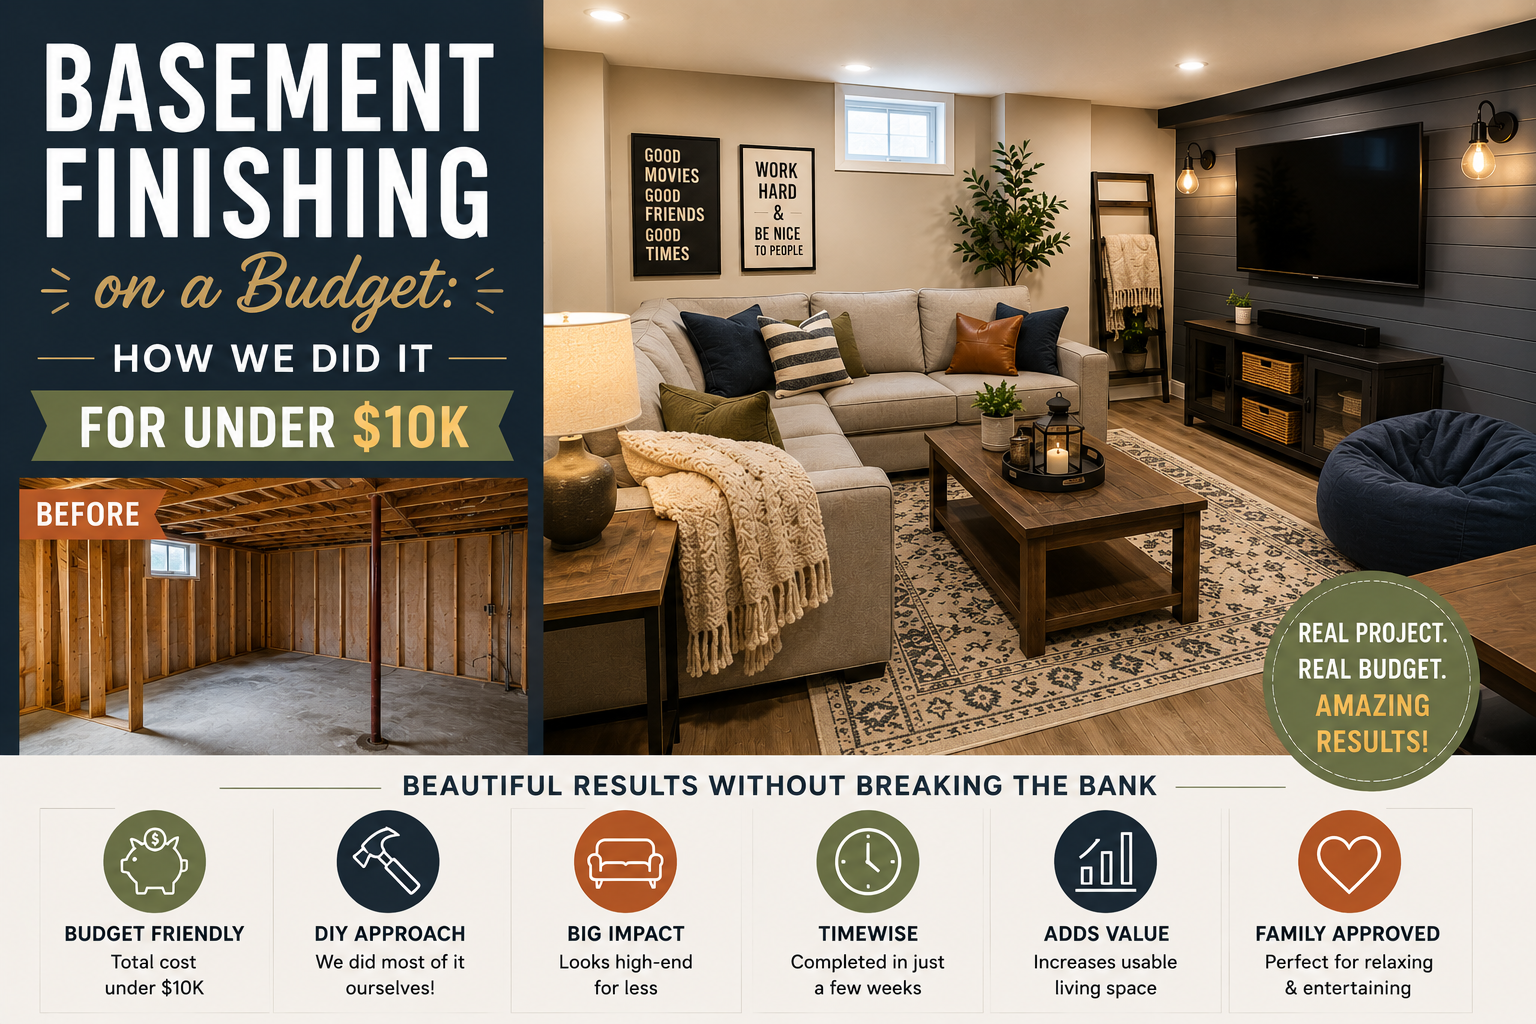
If your basement looks more like a horror movie set than a livable space, you’re not alone — and you’re in the right place. We recently tackled a basement finishing on a budget project that took our dark, damp, genuinely disgusting basement and turned it into a comfortable room we actually want to spend time in. The total bill? Under $10,000. Yes, really.
This wasn’t a quick weekend project, and it wasn’t always pretty. There were late nights mudding drywall in pajamas, a surprise snowstorm, a very sketchy concrete-cutting moment, and a date night that somehow ended at a granite fabrication shop. But the result was completely worth it, and everything we learned along the way is packed into this post.
Whether you’re planning a full basement renovation or just trying to figure out where to start, here’s a step-by-step look at exactly how we did it — every project, every decision, and every hard-won lesson.
Step 1: Tear Out the Old Stuff and Start with a Clean Slate
Before a single nail went in, we hauled everything out of the basement — all the old, moldy, gross remnants of whatever had been down there before — and took it straight to the dump. Starting fresh sounds obvious, but it’s genuinely one of the most important things you can do. You cannot build something good on top of something bad, and any hidden moisture or mold you leave behind will come back to haunt you.
We had also done some serious groundwork before this project even started: excavating the back of the foundation and installing a proper drainage system behind it. That’s what made all the difference in getting the basement dry and keeping it that way. If your basement has a moisture problem, address the root cause before you do anything else. No amount of paint or flooring will fix a water intrusion issue.
Step 2: Damp-Proof the Concrete Walls
Even with good exterior drainage in place, we weren’t taking any chances. The first task was going around every block wall and filling any voids or gaps in the mortar with concrete mortar repair caulking. It’s a messy job, but those little gaps are exactly where moisture sneaks in, and five minutes with a caulk gun can save you a huge headache later.
After sealing the gaps, we applied a coat of concrete damp-proof waterproof paint specifically formulated for basement foundations. To be clear, this stuff isn’t going to stop a flood — but it does a great job of blocking water vapor from diffusing through the concrete into the living space. Think of it as one more layer in your overall moisture defense strategy. Combined with the drainage work and the insulation we’d add later, it gave us real confidence that this basement would stay dry and comfortable.
Step 3: Insulate the Rim Joist Before You Frame
Here’s a tip we almost learned the hard way: insulate your rim joists before you build your stud walls. Once the top plate is in place, you lose your window to get insulation up into that space — and the rim joist is one of the biggest sources of heat loss in a basement. We caught this just in time and got it done before moving forward with framing.
It’s one of those “measure twice, cut once” moments that applies to the whole sequence of a basement build. Think ahead about what needs to happen before each wall or ceiling goes up, because once it’s closed in, you’re either doing it wrong or tearing it back out.
Step 4: Frame the Exterior Walls and Bathroom
With moisture protection handled, we moved into framing — first the exterior basement walls and then the bathroom. Framing a basement wall is pretty straightforward, but the bathroom added some complexity. We made the mistake of starting the bathroom framing before we had the shower instructions in hand, and we quickly realized we would have put all the studs in the wrong spots. Always check your fixture specs before you frame — especially for showers, which often have very specific rough-in measurements.
We also started roughing in electrical during this phase, getting the wiring run while the walls were still open. Doing electrical and framing together (rather than going back later) is one of the best ways to keep a budget basement project moving efficiently.
If you need some tools for the house check out our 20 Must-Have DeWalt Tools Review.
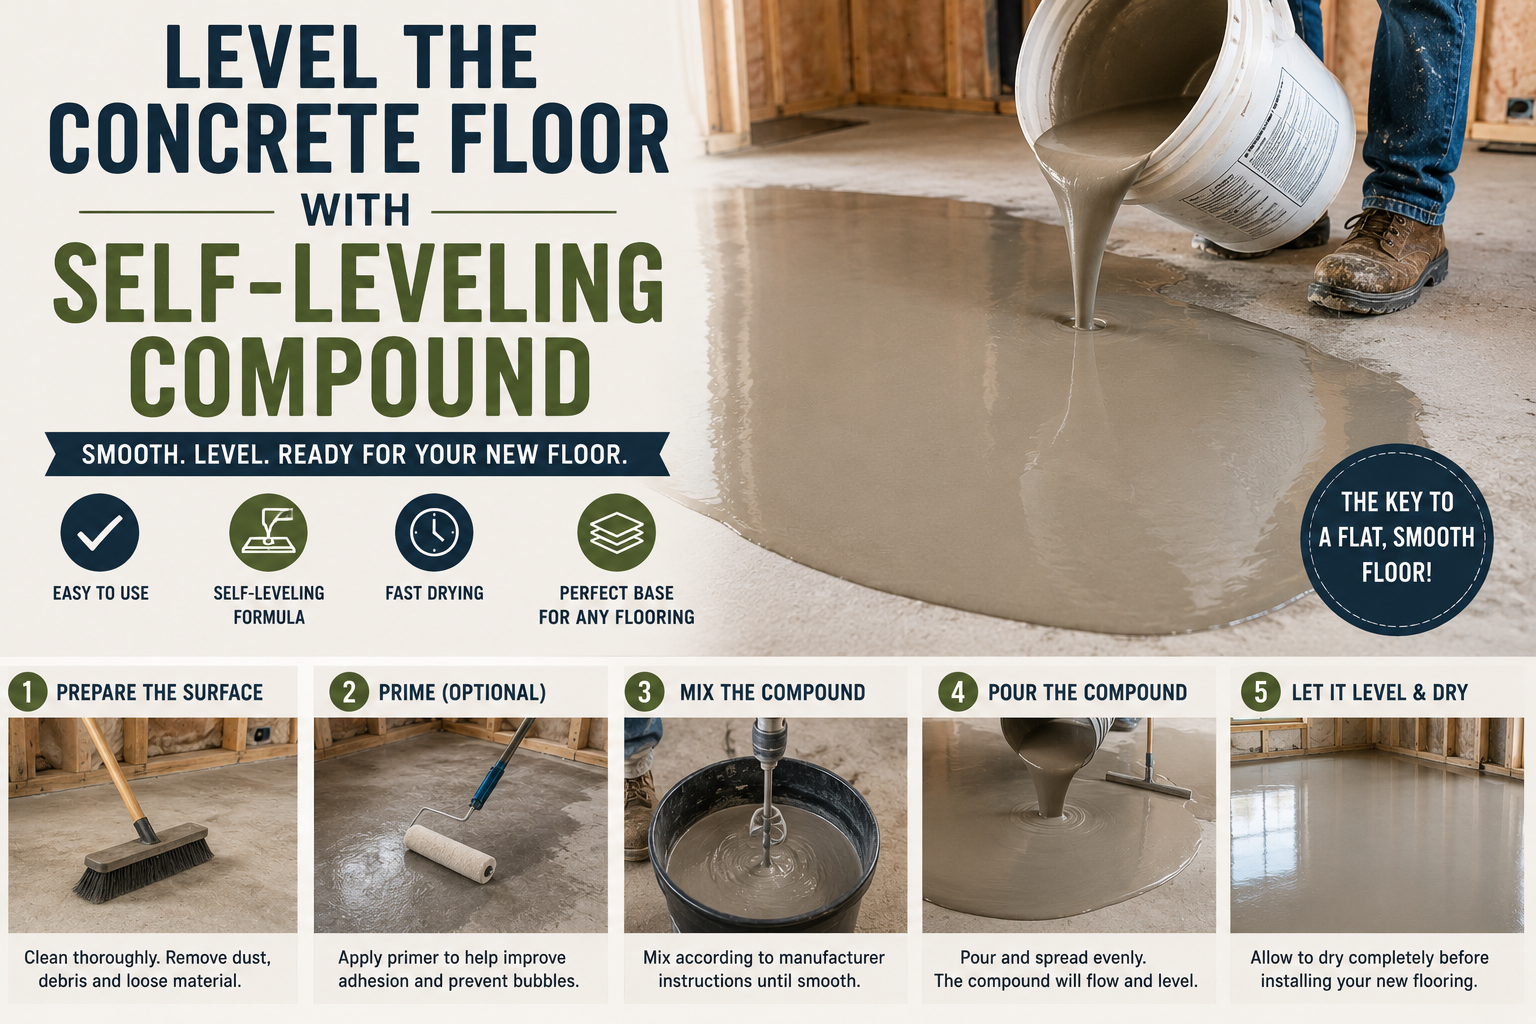
Step 5: Level the Concrete Floor with Self-Leveling Compound
Our floor situation was a bit of a mess. We had new concrete poured in one area that was fairly level, and the existing old concrete everywhere else — which was all over the place, with nearly an inch of variation in some spots. The solution: self-leveling compound. Neither of us had used it much before, but it turned out to be one of the most satisfying parts of the whole project.
The process starts with vacuuming the floor thoroughly and applying an adhesion promoter primer so the self-leveler has something to bond to. Then you mix up the compound and pour it out. The key tool that made a huge difference for us was a spiked roller, which breaks the surface tension of the compound and lets it flow naturally into the low spots. We were genuinely amazed at how well it worked. If you’ve got an uneven basement floor, don’t skip this step — it makes everything that comes after (especially flooring) so much easier.
Step 6: Tackle the Bathroom Plumbing
Adding a bathroom to a basement almost always means cutting into concrete, and ours was no exception. We had an existing toilet flange in the slab to work with, but adding a shower required locating an old cleanout and figuring out whether it could be adapted for a shower drain. Spoiler: it could, but not without some effort.
We saw-cut through about six inches of concrete — which was loud, messy, and a little terrifying — and chipped out enough material to work with the existing drain. The shower pan was then set using a trick we’d seen online: expanding spray foam underneath the pan to support it perfectly, with weight on top to hold it while the foam cures. It’s not exactly a textbook method, but it works, and we’ve used it more than once now.
Step 7: Insulate the Walls (Rigid Foam Plus Batt)
For the exterior basement walls, we went with a two-layer insulation approach: continuous rigid foam board directly against the block wall, followed by R-13 batt insulation between the studs in front of it. Together, that gets you to around R-20 or R-21, which is a significant upgrade for a basement space.
The continuous rigid foam does double duty — it adds insulation value and also acts as a vapor barrier against the concrete. The combination of that foam layer plus the damp-proofing paint we applied earlier meant we were really confident about keeping moisture out. The goal was to make the basement feel like a nice, dry, comfortable room rather than the musty dungeon it used to be.
Step 8: Score Budget Materials on Facebook Marketplace
One of the best moves we made on this entire project was hunting for deals on Facebook Marketplace instead of buying everything retail. What started as a vague “date night” to track down a cryptic listing for blowout kitchen stuff turned into one of the best finds of the build: a kitchen island with a granite waterfall edge, plus flooring — all in one trip.
It wasn’t totally smooth (the island we thought was available wasn’t, but another one worked perfectly), and getting a heavy granite island home without snapping it required building a custom frame and dolly system. But the savings were real. If you’re doing basement finishing on a budget, Marketplace and Craigslist should absolutely be part of your sourcing strategy. Check regularly, move fast when something good comes up, and be ready to improvise.
Step 9: Install a Ceiling Cassette Mini-Split for Heating and Cooling
For climate control, we went with a ceiling cassette mini-split system — specifically a DIY-friendly unit that fits between ceiling joist bays and installs almost completely flush with the ceiling. The only visible element is the louvered vent panel, which looks sharp and intentional rather than like an afterthought.
The reason we love DIY mini-split systems for a budget basement build is the quick-connect line sets — no vacuum pumps, no gauge sets, no HVAC contractor required. The fittings are different sizes so you literally can’t hook it up wrong. We also tied the basement unit into the same outdoor condenser as our upstairs forced-air heat pump, which kept the exterior of the house looking clean. If you haven’t looked into ceiling cassette mini-splits for a basement, they’re worth serious consideration.
Step 10: Hang Drywall (and Get the Right Tools)
Drywall day is a milestone moment in any basement build, and we made it a lot more fun by investing in a dedicated drywall screw gun. It’s one of those tools that sounds like overkill until you’ve used one — then you wonder how you ever did without it. The auto-depth feature means every screw goes in perfectly without blowing through the paper, and you can drive them one-handed once you get the feel for it.
One advantage of our basement was the 7.5-foot ceiling height — just tall enough to hang drywall without needing a ladder for most sheets. We also glued drywall directly to the concrete stem wall in some spots, which saved framing time and kept the walls tight. The whole room got drywalled in a single very long, very exhausting day, and we celebrated with burgers.
Step 11: Mud, Tape, Sand (Repeat Until You Want to Quit)
Taping and mudding is the part of a drywall project that nobody loves, but there’s no shortcut. We did our first coat, let it dry, came back for more coats, and yes — we mugged late at night in pajamas more than once to stay on schedule. One clever trick: dab chalk (the kind used in chalk snap lines) onto any thin or low spots before sanding so you can see exactly where you need to sand without going over the whole wall again.
Sanding drywall is dusty, miserable work. Suit up with a respirator and eye protection before you start, and don’t skip the primer coat after sanding. Primer is what gets you from “splotchy mess” to “ready for paint,” and it’s worth every penny and minute.
Once this big job is complete…you can Build a Picture Frame Floating Deck with No Concrete next.
Step 12: Paint the Walls
We used the same wall color as upstairs to keep things cohesive, which also meant we could use our leftover paint — a genuine budget win. A paint sprayer made the job dramatically faster than rolling would have, and the transformation from bare, patched drywall to smooth painted walls is genuinely one of the most satisfying moments of a basement finishing project. Everything suddenly looks like a real room.
Step 13: Install Recessed Puck Lights
For lighting, we installed 12 recessed puck lights throughout the main basement space. Lighting makes an enormous difference in how a basement feels — a dark basement feels small and depressing no matter how nicely it’s finished, while good overhead lighting makes it feel open and inviting. Wiring these up was mostly straightforward, though we did have a brief moment of panic when we discovered a wire pinched between the drywall and a joist — a good reminder to always know where your wires are before drywalling.
Step 14: Lay the Flooring
For flooring, we chose a click-and-snap floating floor with built-in underlayment, which means you just put it straight down — no separate underlayment layer, no glue. It goes fast, it looks great, and it’s very DIY-friendly. The trickiest part was the first row along a wall that wasn’t perfectly straight, but once that row was dialed in, the rest of the floor came together quickly.
One tool that made flooring day significantly better was a cordless jigsaw — great for notching around door frames and making curved cuts. We’d borrowed one from a friend twice already, so we finally just bought one. If you’re cutting flooring, a cordless jigsaw is absolutely worth having.
Tips and Best Practices for Basement Finishing on a Budget
After nine-plus days of work and every challenge this project threw at us, here’s what we’d tell anyone starting a budget basement build: address moisture before anything else — drainage, damp-proofing, and insulation are the foundation of a basement you’ll actually enjoy. Plan your sequence carefully so you’re not tearing things back out to do what you should have done first. Shop Marketplace aggressively for materials, and don’t be afraid to improvise when things don’t go exactly to plan. And get the right tools — a good drywall screw gun, a cordless jigsaw, and a spiked roller for self-leveler will pay for themselves in time and frustration saved.
Frequently Asked Questions About Finishing a Basement on a Budget
How much does it cost to finish a basement on a budget?
It varies a lot depending on size and what you’re including, but our full basement finish — including bathroom, mini-split, flooring, drywall, electrical, and plumbing — came in under $10,000. Shopping secondhand for materials like cabinets and flooring made a significant difference in keeping costs down.
Do I need to waterproof my basement before finishing it?
Absolutely. Moisture is the number one enemy of a finished basement. At minimum, seal any mortar gaps, apply damp-proofing paint to concrete walls, and make sure your exterior drainage is doing its job. If you have active water intrusion, fix that first before you do anything else.
What’s the best insulation for a basement?
A combination of rigid foam board directly against the concrete wall (for vapor control and continuous insulation) plus batt insulation between studs is a great approach. Together they can get you to R-20 or higher, which makes a real difference in comfort and energy efficiency.
Can I install a mini-split in a basement myself?
Yes — DIY mini-split systems with quick-connect line sets are specifically designed for homeowner installation. You don’t need a vacuum pump or gauge set, and the fittings are different sizes so you can’t accidentally connect them wrong. A ceiling cassette style is ideal for basements because it hides almost completely in the ceiling.
What type of flooring is best for a basement?
Floating click-and-snap flooring with built-in underlayment is an excellent budget-friendly option for basements. It’s easy to install, tolerates minor moisture vapor well, and looks great. Avoid solid hardwood in below-grade spaces, as it doesn’t handle humidity changes well.
Conclusion: Your Basement Can Be So Much More
A dark, damp basement doesn’t have to stay that way. With the right sequence, smart material sourcing, and a willingness to tackle projects one step at a time, basement finishing on a budget is absolutely achievable — even under $10,000 for a full build with a bathroom and HVAC. It takes time, it takes effort, and yes, there will be late nights and dusty sanding sessions. But the payoff is a completely new living space that adds real value and comfort to your home.
Ready to start your own basement transformation? Browse more of our DIY guides here on The DIY Journey, and drop your questions in the comments below — we’d love to help you plan your build.