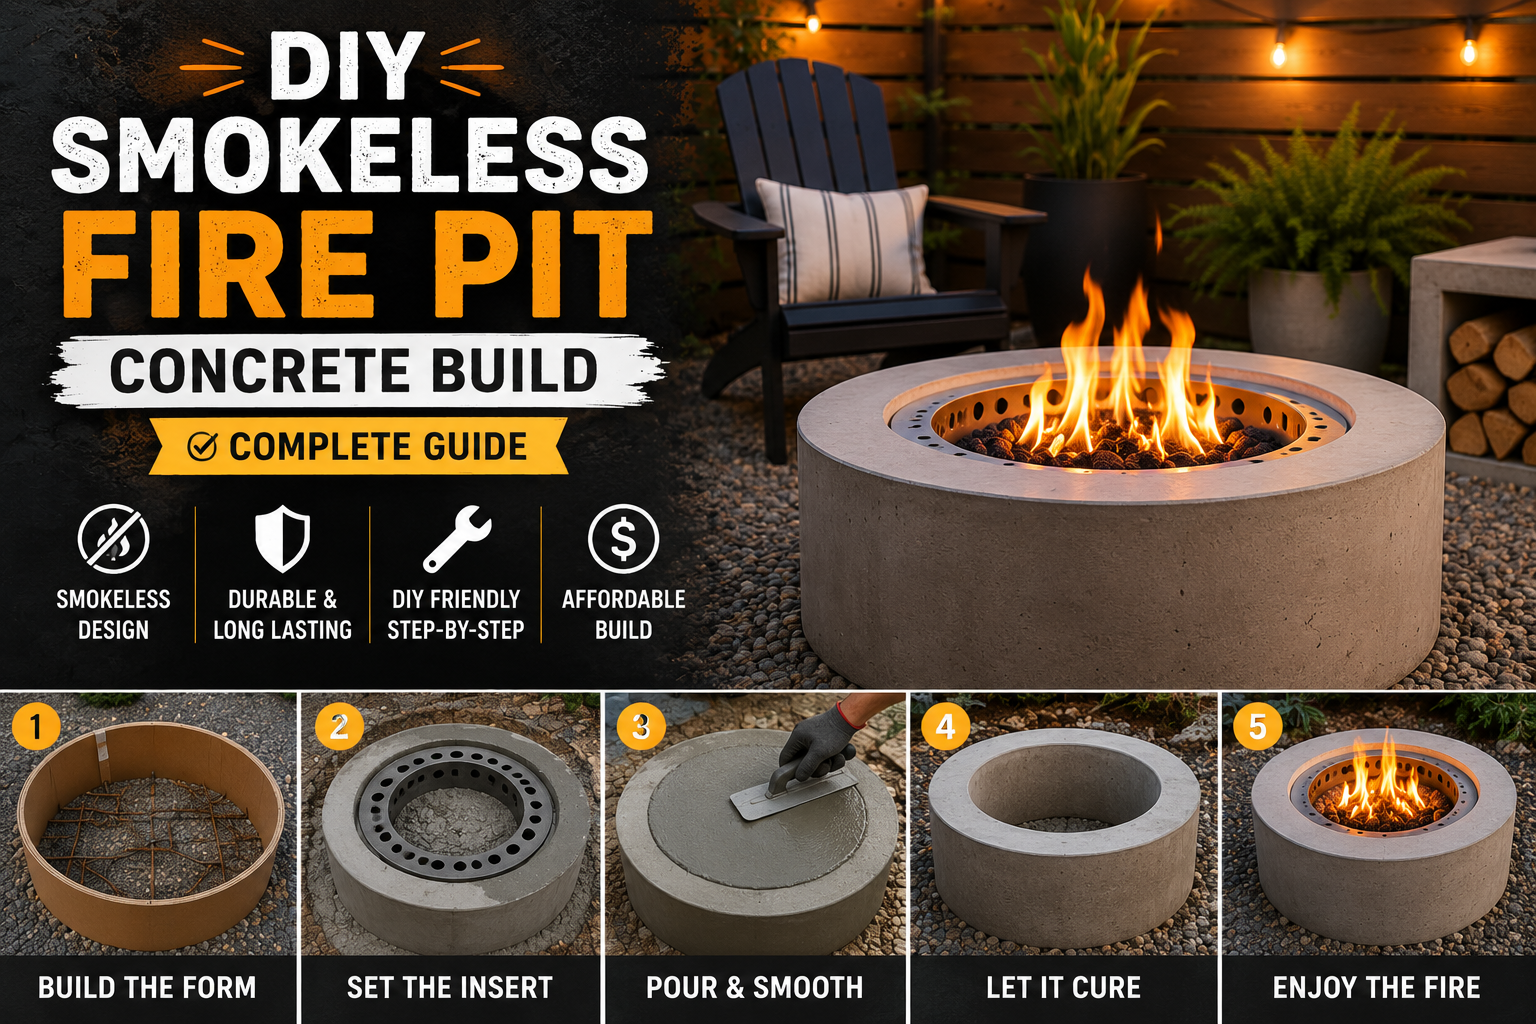
There is nothing quite like gathering around a fire pit with your family on a cool evening — until the smoke rolls your way and ruins everything. If you have ever had to constantly reposition your lawn chair to dodge a smoke cloud, you know exactly what we are talking about. The good news? A DIY smokeless fire pit concrete build can solve that problem permanently, and it looks absolutely stunning in the process.
This project was inspired by a YouTube builder who originally built the first DIY smokeless fire pit on the platform three years ago — and then decided to rebuild it entirely out of concrete, Roman-style. What followed was a gloriously honest, occasionally chaotic, and incredibly instructive build that covers everything from calculating foam forms to the science behind why smokeless fire pits work. We are going to walk you through every step, every lesson learned (including the ones learned the hard way), so your build goes as smoothly as possible.
Whether you are a seasoned DIYer or just getting started, this guide has everything you need. Let’s dig in.
Why Concrete? Choosing Your Form Material Wisely
The original plan was to build wooden forms for the concrete fire pit, which is a perfectly reasonable approach. But wood forms come with a catch: once you are done with them, you either have to store a large, awkward wooden structure indefinitely or feel guilty throwing it out. Neither option is ideal. That is why switching to XPS foam (extruded polystyrene) is such a smart move for this kind of project.
XPS foam is easy to cut, shape, and assemble, and when your pour is done, you can simply peel it away and toss it without a second thought. It is lightweight, widely available at home improvement stores, and forgiving enough for first-time concrete form builders. If you are on the fence about what material to use for your forms, foam is the way to go for a project like this.
Calculating the Right Dimensions for Your Foam Form
Before you cut a single piece of foam, you need to do a little math — and do not let that scare you. For this build, the target height is 16 inches tall with a 52-inch diameter. To find the circumference (so you know how long your foam strips need to be), you multiply the diameter by pi: 52 × 3.14 = approximately 163¼ inches. Since standard foam sheets are 96 inches long, you will need one full 96-inch piece and one additional 67¼-inch piece to wrap all the way around.
Taking the time to do this calculation upfront saves you from costly cutting mistakes later. Measure twice, cut once — you have heard it before, but it really does apply here. Sketch out your dimensions on paper before you touch the foam, and you will thank yourself during assembly.
Using the Right Adhesive on Polystyrene Foam
Here is a tip that can save your entire project: not all spray adhesives are safe for foam. Regular contact adhesive can literally dissolve XPS foam on contact, which is a nightmare when you are mid-build. The solution is to use a foam-safe adhesive like 3M 78, which is specifically formulated for use on polystyrene and bonds extremely well without eating into the material.
Just like regular contact cement, you spray both surfaces, let them become slightly tacky, and then press them together. Make sure you also remove any clear plastic sheathing from your foam sheets before applying adhesive — if you leave it on, your bond will be weak and your form could fall apart during the pour. Take an extra minute to peel that film off and you will have a much more reliable form.
Shaping the Inner Circle Using Heat
One of the trickier parts of this build is creating the smaller inner circle that sits inside the larger outer ring. Foam does not naturally want to bend into a tight circle, especially for the inner diameter. The clever solution here is heat. Using a heat gun, you can carefully warm the foam and coax it into a curved shape that actually holds once it cools.
Beyond the heat gun, ratchet straps are your best friend for holding the circle shape while everything sets. It sounds a little unconventional, but it works incredibly well. Drive rebar and wooden stakes around the perimeter to help maintain the circular shape, and use Tyvek tape or duct tape to reinforce the seams. A little creative problem-solving goes a long way in a project like this.
Understanding the Science Behind a Smokeless Fire Pit
Before you pour a single bag of concrete, it is worth understanding why a smokeless fire pit works the way it does — because getting the design right depends on it. Smoke is produced by incomplete combustion. When a fire does not get enough oxygen, it cannot fully burn the fuel, and unburnt particles escape as smoke. Think of a diesel truck blowing thick black exhaust: that is too much fuel, not enough air.
A smokeless fire pit solves this with a double-wall design. Fresh air enters through low exterior holes at the base, travels up through the outer chamber, gets superheated, and then exits through holes drilled around the upper perimeter. That superheated air creates a secondary burn that consumes the smoke before it can escape. There is also a top ring that directs airflow over the fire, which most people overlook but is absolutely critical to the design working correctly.
Choosing and Drilling Your Fire Ring
The fire ring is the metal insert that sits inside your concrete fire pit and is essential to the smokeless function. For this build, a 12-inch tall fire ring is used — taller than the common 10-inch versions you will find online, which gives you better airflow dynamics. This particular ring also features a lip around the top that helps create the upper airflow channel discussed above, and it is one of the more affordable options available.
To drill the upper ventilation holes, wrap a flexible tape measure around the fire ring and mark every 3 inches around the top perimeter. If you do not have a flexible tape, wrap blue painter’s tape around the ring, remove it, mark your measurements on it flat, then reattach it — a clever trick that works just as well. Use a Milwaukee step bit to drill 1⅛-inch holes at each mark. Step bits stay sharp longer than standard bits and make clean holes in metal, so they are well worth having in your toolbox.
Having the right tools makes every cut cleaner and faster — see our full guide to the coolest DeWalt tools available right now!
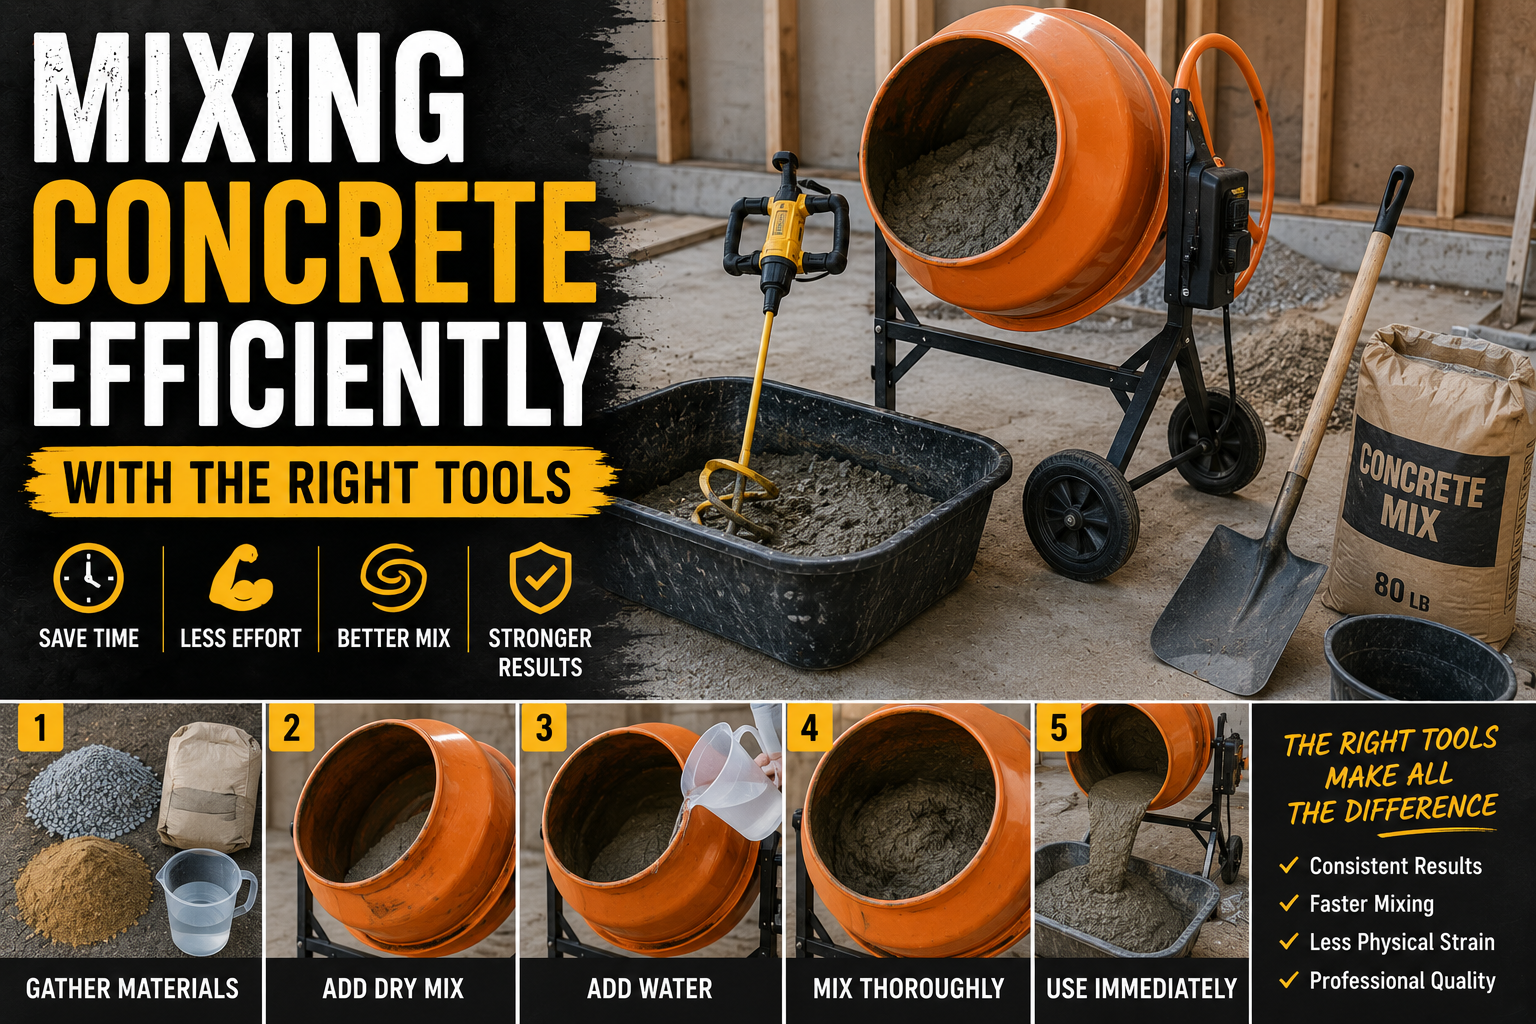
Mixing Concrete Efficiently With the Right Tools
Mixing concrete by hand for a project this size is possible, but it is slow and exhausting. A mud mixer — a powered concrete mixing machine — changes the game entirely. The one used in this build is electric, works with a battery bank for portability, and mixes concrete at roughly four times the speed of hand mixing. You simply drop the bags in the top, and it does the work for you, complete with a built-in hose for rinsing.
If you do not have access to a mud mixer, a small traditional cement mixer works too, or you can mix by hand if the project is manageable. Whatever method you use, do not add too much water to your mix. Over-watering concrete is the single most common mistake in DIY concrete projects and it dramatically weakens the finished product. Keep your mix on the drier side, but compensate by vibrating the concrete thoroughly after pouring.
Vibrating the Concrete to Prevent Voids
Once your concrete is poured into the form, you need to vibrate it to release air bubbles and ensure the mix fills every corner of the mold. A reciprocating saw (or Sawzall) pressed against the outside of the form works brilliantly for this — the vibration travels through the material and brings bubbles to the surface. This is a tried-and-true trick used in professional concrete work.
Skipping this step — or not doing it thoroughly enough — can result in voids and rough patches on the surface of your finished fire pit. As this build demonstrated firsthand, a mix that is too dry combined with insufficient vibration leads to an uneven, pitted surface. The good news is that you can patch problem areas later with a fresh concrete mix and a damp sponge, similar to how you would work with tile grout. But it is much easier to get it right the first time.
Creating the Top Ring Molds With XPS Foam
The decorative and functional top rings require their own separate molds, also made from XPS foam. To get perfect circles, build a simple compass from a straight piece of wood with a nail at one end and pencil holes drilled at your two desired radii. For this build, the outer diameter is 53½ inches (radius: 26¾ inches) and the inner diameter is 28½ inches (radius: 14¼ inches).
Use 1½-inch thick XPS foam for the base of these molds for added strength, and wrap ½-inch foam strips around the sides. Apply 3M 78 adhesive to assemble the pieces, and use quick-set caulk in the corners to prevent water from leaking out of the mold and to create slightly rounded interior edges on the finished piece. For added structural strength, bend ¼-inch all-thread rod to shape and lay it inside the mold halfway through the pour — it acts just like rebar but is easier to work with and bend at home.
Creating a Textured Aged Finish With Baking Soda
If you want your concrete fire pit to have a beautiful, aged, rustic look rather than a smooth modern finish, try this old trick from the precast concrete industry. Mix baking soda with just enough water so it clumps together but still crumbles apart. Then toss it against the inside of your mold before pouring — the goal is a light, snowy splatter, not big clumps.
When you pour the concrete on top of the baking soda, lay it down gently and smoosh it in rather than dumping it aggressively. Work it carefully into the corners. The baking soda creates a subtle texture on the finished surface that mimics weathered, aged stone. It is a small extra step that makes a big visual difference in the final look of your fire pit.
Using Vegetable Oil as a Mold Release Agent
Before you pour concrete into any mold, coat the interior surfaces with a release agent to prevent the concrete from bonding to the form. For this project, plain vegetable oil works perfectly — just fill a spray bottle and coat all interior foam surfaces before pouring. It is cheap, food-safe, and effective.
Do not skip this step. Forgetting the mold release (as happened with the top ring molds in this build) means your cured concrete can bond tightly to the foam and become extremely difficult to remove. You may end up spending a lot of extra time chipping and peeling foam off your finished piece rather than just pulling it cleanly away. Coat every surface, and coat it well.
Assembling the Fire Pit and Testing It
Once all your concrete pieces have cured — ideally at least 48 hours in the mold before demolding — you can rinse them off, peel away any remaining foam, and begin assembly. Make sure the inner fire ring sits level with the outer concrete wall as you put everything together. You do not need to be perfectly level to the ground at this stage, just ensure the components are even with each other.
When you fire it up for the first time, build a big fire. This is not a design for a tiny campfire. You need to get the walls of the fire pit hot — after about 15 to 20 minutes of a robust fire, the secondary burn kicks in and you will see the smokeless effect in action. A small, smoldering fire will not generate enough heat for the double-wall airflow system to function correctly. Go big, and enjoy the smoke-free results.
You can also add this to your DIY Backyard Patio & Fireplace Build Project.
Tips and Best Practices for Your DIY Smokeless Fire Pit Concrete Build
Use foam-safe adhesive. Always check that your spray adhesive is rated for polystyrene before applying it to your foam forms. Regular contact cement will destroy your foam immediately.
Do not over-water your concrete mix. Too much water weakens concrete significantly. Keep your mix on the drier side and compensate with thorough vibration using a reciprocating saw against the outside of the form.
Always apply your mold release before pouring. Vegetable oil in a spray bottle is all you need. Apply it generously to every interior surface of your foam mold before adding concrete.
Let concrete cure fully before demolding. Wait at least 48 hours before removing the forms from your top rings. Pulling them too early risks cracking or crumbling your pieces.
Build a hot fire. The smokeless effect only works when the fire pit walls are hot enough to superheat the incoming air. Build a robust fire and give it 15 to 20 minutes to reach operating temperature before expecting smoke-free performance.
Patch imperfections with a wet mix and damp sponge. If you have voids or rough spots on your finished concrete, mix a small batch of concrete without aggregate, rub it into the problem areas, and smooth it with a damp sponge. Once dry, it will blend in nearly seamlessly.
Frequently Asked Questions
What kind of concrete should I use for a DIY smokeless fire pit?
A standard bagged concrete mix works well for this project. If you want a smoother finish on the top rings, you can sift out some of the larger aggregate or look for a mix with finer aggregate. The most important thing is not to add too much water — keep the mix on the drier side and vibrate it well during the pour.
How big should the air holes be on a smokeless fire pit?
For the upper perimeter holes on the fire ring, 1⅛-inch holes drilled every 3 inches around the top work well. For the lower intake holes (for the air tubes), 2-inch pipe is used in this build. Getting these sizes and placements right is critical to the smokeless function, so do not skip the drilling step or reduce the number of holes.
Can I use regular duct tape instead of Tyvek tape on the foam forms?
Yes, absolutely. Duct tape works fine for holding your foam form seams together during the pour. Tyvek tape is a bit more water-resistant and tends to stick better to foam surfaces, but either will get the job done. The goal is just to keep your form from leaking or shifting while the concrete is wet.
How long should concrete cure before I use the fire pit?
You should wait at least 48 hours before demolding your concrete pieces, but for full strength, concrete continues to cure for 28 days. For a fire pit specifically, it is a good idea to wait at least a week before your first fire. Some builders also recommend doing a few small, short break-in fires before building a full blaze to allow any residual moisture to escape gradually.
Why is my smokeless fire pit still producing smoke?
The most common reason is that the fire is not hot enough. The smokeless effect requires the walls to be superheated so that incoming air is hot enough to create a secondary burn. Build a bigger fire, give it 15 to 20 minutes to heat up, and make sure your upper perimeter holes are clear and unobstructed. Also double-check that your fire ring has a lip or top ring to direct airflow correctly over the fire.
Ready to Build Your Own Smokeless Fire Pit?
Building a DIY smokeless fire pit from concrete is one of the most rewarding backyard projects you can tackle. Yes, there will be moments of “did I do that right?” at 3 a.m. — that is just part of the DIY journey. But when you light that first big fire and watch it burn clean and bright with no smoke rolling into your face, every bag of concrete and every foam cutout will have been completely worth it.
Take your time with the forms, do not skip the mold release (seriously, do not), vibrate your concrete thoroughly, and build yourself a monster fire when testing day comes. You have got this. Drop your questions in the comments below, share your finished build photos, and stay tuned for the next project — because there is a whole fire pit patio build coming that you are not going to want to miss.