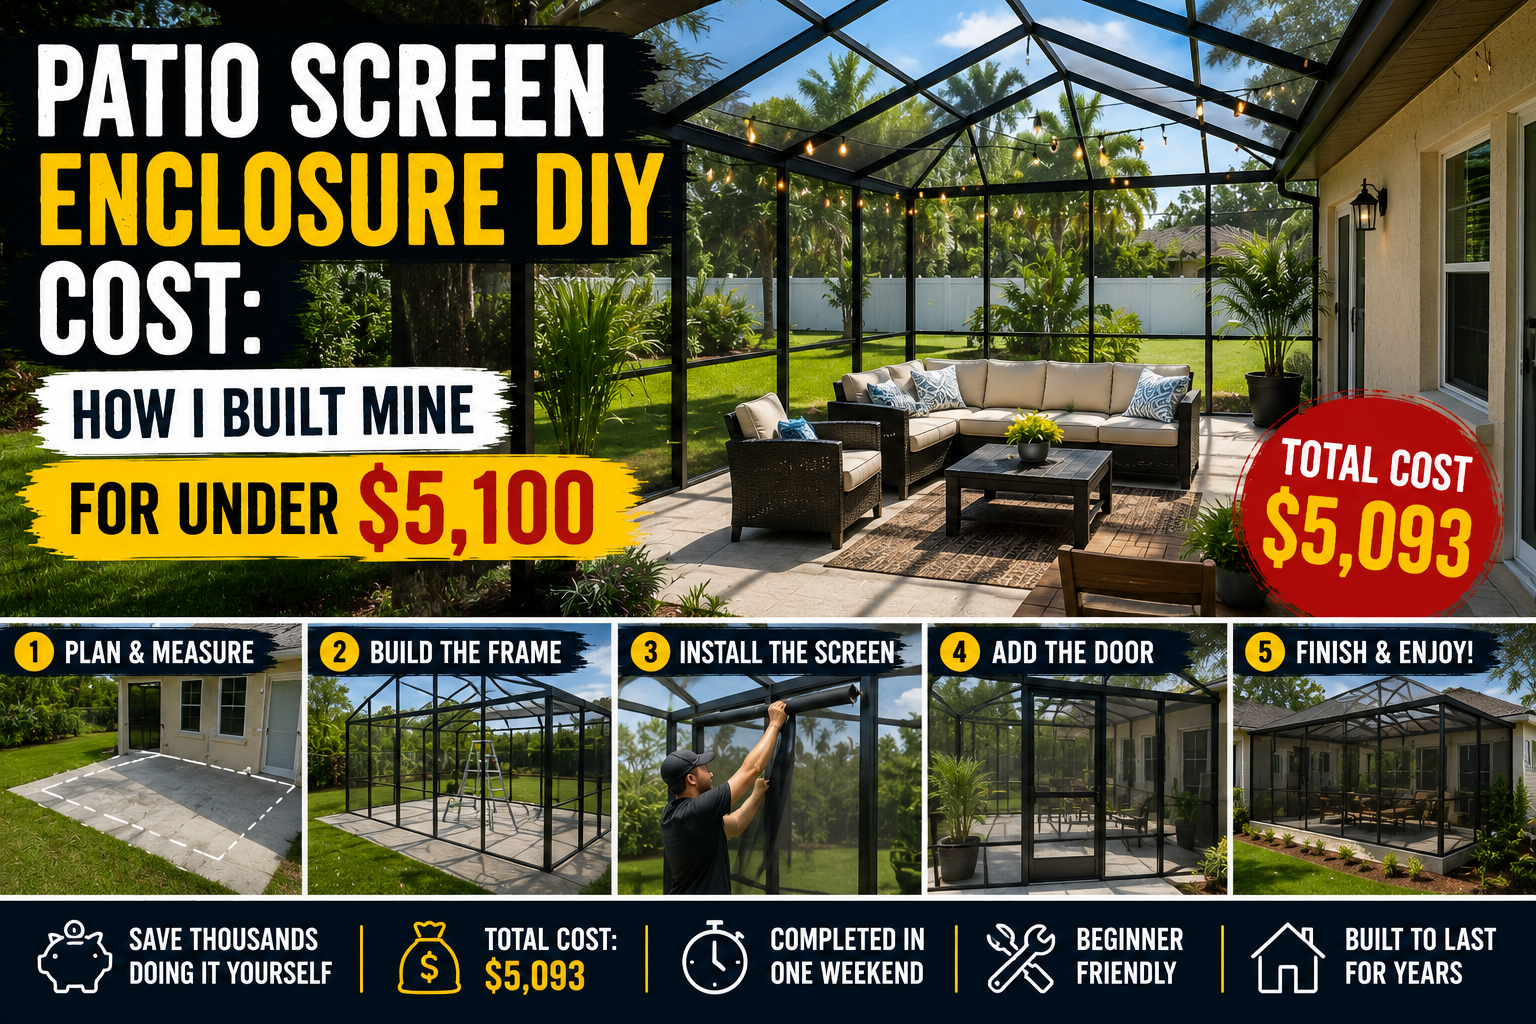
When I got a quote from a local contractor to extend my patio, screen it in, and lay some pavers, the number that came back was $22,000. And look — I get it. This kind of work is extremely labor-intensive, it takes serious time, and contractors need to make a profit. But $22,000 was just way more than I was willing to spend. So I decided to do what any self-respecting DIYer does: roll up my sleeves and build it myself.
My plan was to extend the existing patio out by 4 feet, screen it in completely, and eventually build an outdoor kitchen inside the space. What I ended up with is a full screened-in patio enclosure that came in at just over $5,100 total — a fraction of that contractor quote. In this post, I’m going to walk you through every phase of the build, every cost I incurred, and every lesson I learned along the way so you can do the same thing at your own home. If you’ve been on the fence about tackling a project like this, I hope this gives you the push you need.
Fair warning: this is a big project. It’s not a weekend build. But it’s absolutely doable for a motivated homeowner with basic tools and a willingness to learn. Let me show you exactly how I did it — and what it actually cost me at every step.
Starting the Build: Leveling the Ground and the First Materials Order ($2,588)
Before any structure goes up, the ground has to be right. I spent time leveling out the area where the new patio slab would go and tamped it down really well. Getting this step right matters — if your base isn’t level, everything built on top of it will fight you the entire way through the project.
Once the ground was prepped, I placed my first Lowe’s order, which came in at exactly $2,588. That order included 35 bags of concrete, 60 pavers, and enough lumber to build the frame for the patio structure. It’s a solid chunk of money upfront, but when you compare it against a $22,000 quote, even this first order feels like a win.
Pouring the Concrete Slab Using the Dry Pour Method
For the slab, I tried something called a dry pour — basically, you pour the dry concrete directly into the form, spread it out as level as possible, then mist it with water so it hardens on its own. The appeal is obvious: you skip mixing 35 bags of cement by hand. In theory, it sounds much easier.
In practice? It took hours and hours to get the slab flat and level. There were moments where I honestly thought it might have been faster to just mix the concrete the traditional way. But I was way too invested to turn back, so I pushed through. Once it was as level as I could get it, I grabbed the garden hose and misted the entire slab carefully, then came back every hour to spray it down again. After letting it sit and cure for a few days, I pulled the molds off and gave it one more day to fully set before moving on.
Installing Post Brackets and Setting the Frame
Since the patio was going to have an overhang, I ran a chalk line across the slab so all my post brackets would be perfectly aligned. I drilled holes at each marked point, then hammered in concrete bolts from Lowe’s — these are great because once you tighten them down, they expand at the bottom and create a rock-solid anchor point for the post brackets. I installed each bracket, tightened everything down, and repeated the process until all brackets were in place.
Next came the ledger board — I cut a 2×4 (actually a 2×6 for this application) down to size and applied window flashing tape to the back side before securing it to the house. Since it sits between the board and the house exterior, that tape is critical insurance against water intrusion over time. I secured it with 6-inch exterior lag screws, then painted it white right away since I was going for an exposed beam look and it’s always easier to paint components before they’re fully installed.
Notching the Posts and Installing the Beam
To support the roof structure, I had to notch out each 4×4 post so a 2×6 beam could sit flush inside it. This step requires patience and precision — if the notches aren’t consistent, your beam won’t sit level. Once all the notches were cut and confirmed flush, I brought each post over to its bracket, set it in place, checked for plumb with a laser level, and screwed everything in securely. The 2×6 beam then rested right into those notches and was secured with 3-inch exterior screws before getting a coat of primer.
This is one of those steps that looks impressive when it’s done but feels a little tedious in the moment. Take your time here. Getting the posts plumb and the beam level sets the tone for everything that comes after — the rafters, the roof, the walls. If this part is off, you’ll be compensating for it the entire rest of the build.
Cutting and Installing the Rafters
With the beam in place, it was time for the rafters. I measured and cut a bird mouth into each rafter so it would sit properly on the beam, then test-fit each one before committing. I installed all six rafters on 16-inch centers, then primed each one right away. Between each rafter I added blocking — this is an important detail if you’re building a screened patio, because bugs can get in through any gap, and blocking eliminates that problem entirely. Honestly, keeping mosquitoes out was my main motivation for building this thing in the first place. They were making my backyard completely unusable every summer.
After the blocking was in, I ran a bead of caulk through all the gaps and cracks. With that done, the frame was officially complete.
Sheathing, Drip Edge, and Flashing the Roof
Since I was going for an exposed beam look on the inside, I primed and painted all the OSB sheathing before installing it on the roof. I cut each piece to size, brought it up, and secured it to the rafters using 2.5-inch deck screws. Once the sheathing was on, I turned my attention to waterproofing.
To keep water from sneaking in between the house and the overhang, I installed a piece of drip edge underneath the existing siding and let it hang over the roof edge. Then I applied window flashing tape between the roof and the drip edge, continued the drip edge around the entire perimeter, and topped it all with another layer of flashing tape. Over that went ice-and-water shield — a self-adhering roof underlayment that acts as a backup waterproofing layer under the shingles. Don’t skip this step. Water is patient, and it will find any gap you leave it.
Installing the Shingles
For the shingles, I used a stair-step method that practically eliminates waste. You start with a single shingle, build three progressively shorter rows up toward the ridge, then continue laying full courses across the rest of the roof. It’s efficient, it creates a clean look, and once you get the rhythm down it moves pretty fast.
True story: right in the middle of shingling, the weather forecast called for a severe thunderstorm and it had already started to rain. We hustled to get it done, but the storm cleared before it caused any real issues. Lesson learned — always check the forecast before you start your roof. The last thing you want is a half-finished roof with a storm rolling in.
Adding Black Joist Hangers for the Exposed Beam Look
Once the roof was finished, I installed black joist hangers on each rafter. These cost a little more than standard hangers, but since the interior of this patio has an exposed beam look, the black finish makes a noticeable visual difference. It’s one of those small details that takes a project from looking like a DIY build to looking like something a professional designed. Worth the extra few bucks every time.
Framing the Walls (and Planning for Power)
With the roof done, I moved on to framing the walls. I built them 36 inches tall — tall enough to keep the screen protected from accidental impacts but short enough that the space still feels open and airy. I used pressure-treated 2×4s and 3-inch exterior screws throughout, checked everything for level, and primed all the framing with exterior primer to protect the wood and match the house exterior.
I also framed out the doorway opening during this phase, and it fit perfectly on the first try — one of those satisfying moments in a long build. For powering the patio, I’m planning to use a solar generator setup rather than running a bunch of extension cords or adding a full electrical circuit. The idea is to power a TV, a fridge, and whatever else the outdoor kitchen needs without adding to the electric bill. By the end of this framing phase, I had to make a second materials order.
Second Materials Order: Siding, Screen, and Trim ($1,792 + $120)
The second Lowe’s order came in at $1,792 and covered the siding panels, screen material, screen tracks, paint, caulk, and a few other finishing materials. I also made a couple of quick runs to pick up exterior screws, saw blades, a shovel, and a rake — those smaller purchases added another $120. Running total at this point: $4,500.
If you’re planning a similar build, I’d suggest trying to consolidate your orders upfront as much as possible. Those small mid-build runs add up fast, and the time cost of stopping work to drive to the store is real. That said, it’s almost impossible to anticipate everything on a project this size, so just budget for a few extra trips.
Installing the Exterior Siding Panels
For the siding, I went with exterior paneling sheets that run about $60 per sheet. They’re easy to work with, look great, and I had already used the same material on another outbuilding, so I knew exactly what to expect. I cut each panel to fit, installed them on the framed walls, then ran a bead of caulk over all the exposed edges — even the ones that would eventually be covered by screen tracking.
After the panels were up, I miter-cut PVC trim pieces to give the exterior a clean board-and-batten look. Once installed, I caulked all the trim edges and screw holes, then painted everything a nice gray color. When the siding and trim were finished, the patio went from looking like a construction project to looking like an actual outdoor room. That’s always a great moment in a build.
Installing the Screen Tracks and Screen
The screen tracks are one of my favorite parts of this whole project. They hold the screen material in place and have a channel that accepts a trim piece, which clips in after the screen is installed and gives everything a clean, professional finish. I cut the screen to size, brought it over to each section, and used a spline roller tool to press the spline into the channel — locking the screen in place. If you’re doing this yourself, do not skip the spline roller. Trying to push spline in by hand is miserable and the results won’t be as tight or clean.
Once all the screen was in and the white trim pieces were clipped on, the whole thing looked incredibly polished. Way better than I was expecting at this stage of the build, honestly. I’ve seen professionally installed screen rooms that didn’t look this clean.
Adding Rocks Around the Perimeter ($41)
One problem I wanted to solve while I had everything torn up: every time it rained, water splashing off the ground was throwing dirt onto the house siding and making it look dirty within hours of washing it. The fix is simple — rocks around the perimeter catch that splash and keep the siding clean.
I leveled the ground with a rake, marked 22 inches out from the house, installed plastic edging to contain the rock bed, then placed a Lowe’s order for weed barrier and a load of rocks. That order came to just $41, bringing the running total to $4,991. I used a metal rake to spread the rocks evenly, and the difference was immediate. It went from looking like raw dirt to a clean, finished landscaping bed in about an hour.
Laying Pavers at the Doorway Entrance
At the doorway, I wanted a proper paved surface rather than grass or dirt. I flattened the ground, tamped it down thoroughly, then laid a 20-year landscaping fabric, followed by leveling sand, and a foam paver base before setting the pavers. I took my time on the leveling — this is my home and I want it to last decades, not just a few years.
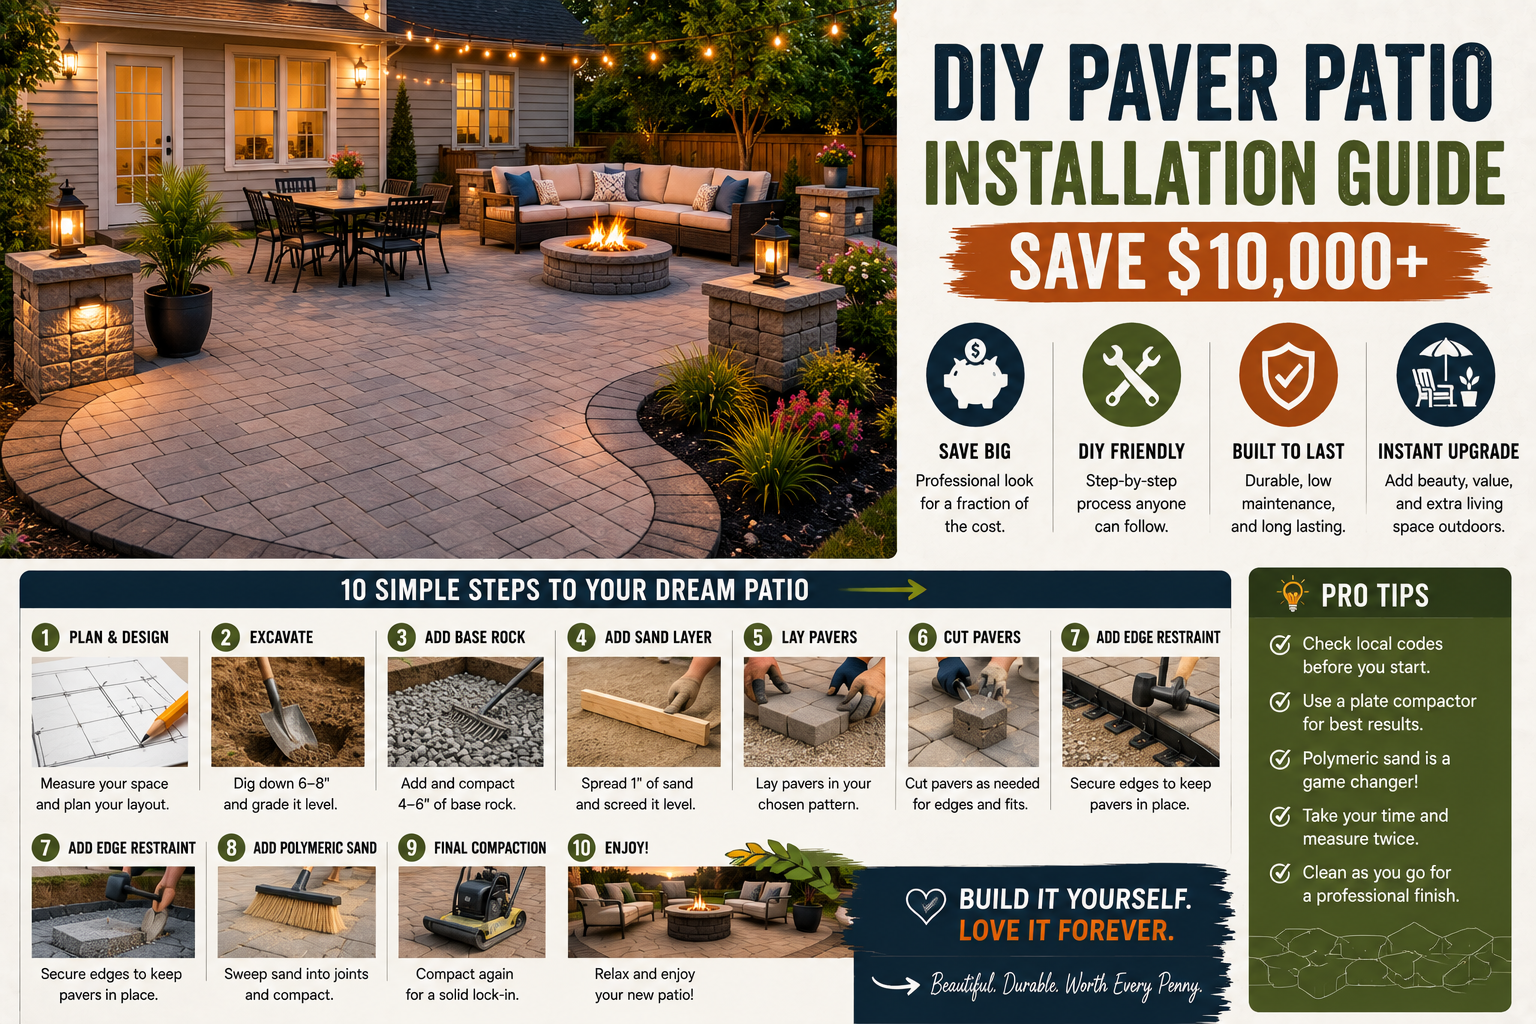
If you’re interested in a deeper dive on paver installation, I’ve put together a complete guide on DIY paver patio installation that can save you $10,000+ compared to hiring it out. The patience you put in at the prep stage directly determines how long your pavers stay level and crack-free.
Installing the Screen Door ($110)
For the door, I picked up a PVC screen door from Lowe’s for $110. I installed a PVC strip on the inside to act as a door stop, added a handle, and just like that the entry was complete. It’s a clean, functional door that matches the white trim of the enclosure perfectly.
One addition I’m really glad I made: a dog door. My dogs are big enough to easily hit and damage the screen if they tried to go through it, so installing a dedicated dog door protects that screen I just spent two weeks putting up. I ran a bead of caulk around the perimeter of the dog door after installation, and within minutes the dogs figured it out and started using it on their own.
Building a Small Overhang Above the Door
To keep rain from blowing directly into the doorway, I built a small overhang above the door using scrap lumber left over from the main build. I framed it out, added a piece of sheathing, installed drip edge, and used window flashing tape to seal it. Because I used only scrap materials for this piece, it added zero dollars to the project cost. The only purchase was a fascia board to cap it off cleanly, which ran $22. I also added support beams and used leftover soffit pieces from a previous project to finish the underside.
As a finishing touch, I added a small plant hanger at the entrance — a little detail that makes the doorway feel intentional and welcoming rather than just functional.
Adding Plants and Trellises for Visual Appeal ($297)
Once the structure was done, I wanted to soften the look with some greenery. I picked up trellises, potting soil, planters, and a variety of plants from Lowe’s for $297. I know that’s not a small number for plants, but the visual payoff is real — they transform a structure that looks like a construction project into an outdoor living space.
Honestly, I have a soft spot for garden centers. There’s something about wandering through rows of flowers and plants that’s genuinely calming. If you’re on the fence about adding plants to your outdoor project, I’d encourage you to do it. Even a modest planting budget makes a significant visual difference.
Laying Pavers Between the House and the Outbuilding
The last major phase was running a paved walkway between the house and an outbuilding. This one humbled me a little — it took three full days just to get the ground properly leveled and tamped. If I were doing it again, I’d rent a machine to dig and prep the ground rather than doing it all by hand. That manual prep work is exactly why contractor quotes are as high as they are. The labor is brutal.
Once the ground was ready, I laid a 20-year landscaping fabric, spread at least an inch of leveling sand and confirmed it was level, then laid paver base panels before setting the pavers. After all the pavers were down and the edging trim was installed, I swept polymeric sand into every joint, broomed it into every crack, misted the whole surface with a garden hose, and let it cure overnight. This locks the joints and prevents weeds and ant activity from displacing the pavers over time. For more on tackling big outdoor projects that transform your yard, check out my guide on DIY backyard patio and fireplace builds that save thousands.
Final Cost Breakdown: What This Patio Screen Enclosure Actually Cost
Here’s how the spending broke down across the entire build:
First Lowe’s order (concrete, pavers, lumber): $2,588
Second Lowe’s order (siding, screen, tracks, paint, caulk): $1,792
Mid-build supply runs (screws, blades, shovel, rake): $120
Rocks and weed barrier: $41
Screen door: $110
Fascia board for door overhang: $22
Plants, trellises, pots, soil: $297
Running total: approximately $4,970–$5,100
Compare that to the $22,000 contractor quote and you’re looking at a savings of roughly $17,000. That’s real money. And the project turned out beautifully — clean siding, professional-looking screen installation, paved walkways, and a space that’s actually usable all summer without getting eaten alive by mosquitoes. If you’re looking for more ways to stretch your home improvement budget, my post on budget home improvement DIY ideas that save thousands is worth a read.
Tips and Best Practices for Your Own Screened Patio Build
Get your ground prep right before anything else. Every phase of this build rests on how level and stable your base is. Don’t rush the leveling and tamping, and if the area is large, seriously consider renting a plate compactor or ground preparation equipment — it will save you days of back-breaking manual work.
Apply flashing tape everywhere water could sneak in. The back of the ledger board, around the drip edge, between the roof and the wall — anywhere there’s a joint, window flashing tape is your friend. Water is the number one enemy of any outdoor structure, and it always finds the path you forgot to seal.
Prime and paint components before installation whenever possible. It’s so much easier to roll paint on a rafter while it’s at ground level than to try to cut in against finished surfaces after it’s installed. I painted rafters, sheathing, and trim pieces before they went up, which saved significant time and gave a cleaner result.
Use the spline roller tool for screen installation. This is non-negotiable. The roller seats the spline properly into the channel and gives the screen consistent tension. Trying to do it by hand produces uneven results and can tear the screen material.
Add blocking between rafters if you’re screening in the space. Bugs are determined. Any gap between a rafter and the roof sheathing is an open invitation. Blocking and caulk between each rafter bay solves this completely.
Budget for a few extra supply runs. On a project this size, you will make multiple trips to the store. Plan for it financially and mentally. I’d rather budget $200 for “miscellaneous” and not need it than be surprised when I’m $150 over.
Use polymeric sand in your paver joints. Regular sand washes out over time. Polymeric sand hardens when wet and locks everything in place, reducing weed growth and preventing the joints from opening up as the ground shifts with the seasons.
Frequently Asked Questions
What is the realistic DIY cost for a patio screen enclosure?
Based on my build, you can realistically expect to spend between $4,500 and $6,000 for a mid-size screened patio enclosure that includes a concrete slab, framed structure, full roof with shingles, screen installation, siding, and paving. Variables like the size of your space, local material costs, and whether you already own tools will all affect that number. The key savings come from doing all the labor yourself — a contractor quote for similar work can easily run $18,000 to $25,000.
Is the dry pour concrete method a good choice for a patio slab?
It works, but I’ll be honest — it’s not as easy as it sounds. Dry pour means you pour bagged dry concrete directly into the form and mist it with water rather than mixing it first. The advantage is skipping the mixing of dozens of heavy bags. The disadvantage is that getting the dry material perfectly flat and level takes a very long time. If I were doing a larger slab again, I’d strongly consider renting a mixer or ordering ready-mix concrete instead.
What type of screen material works best for an outdoor patio enclosure?
For most US climates, fiberglass screen mesh is the standard choice — it’s affordable, easy to work with, and resists corrosion well. If you have large dogs or active kids, consider a pet-resistant or heavy-duty screen material rated for higher impact. The screen track system I used, where trim clips over the installed screen, gives a very clean professional finish and makes it easier to replace individual panels if one gets damaged later.
Do I need permits to build a screened patio enclosure?
This varies significantly by municipality. In many US counties, any structure attached to the house — even a screened patio — requires a building permit, especially if it has a roof. Before you start, call your local building and zoning department or visit their website to check the requirements for your specific jurisdiction. Skipping permits can create headaches when you sell the home, so it’s worth making one phone call to find out what’s required where you live.
Final Thoughts
Building my own screened patio enclosure from scratch was one of the most satisfying projects I’ve tackled. It took a few weeks, required multiple material orders, and had plenty of moments where I questioned my decisions — especially during that dry pour concrete experience. But the result speaks for itself: a fully screened, properly roofed, beautifully sided outdoor room that came in at just over $5,000 instead of $22,000.
If you’re thinking about building your own, start with a clear plan, price out your materials before you commit, and don’t underestimate the ground prep. The structure itself is very doable for a motivated DIYer with basic carpentry skills. And if you want to keep exploring what’s possible in your backyard, check out my full guide on DIY paver patio installation — it’s a perfect complement to a screened enclosure build. You’ve got this.